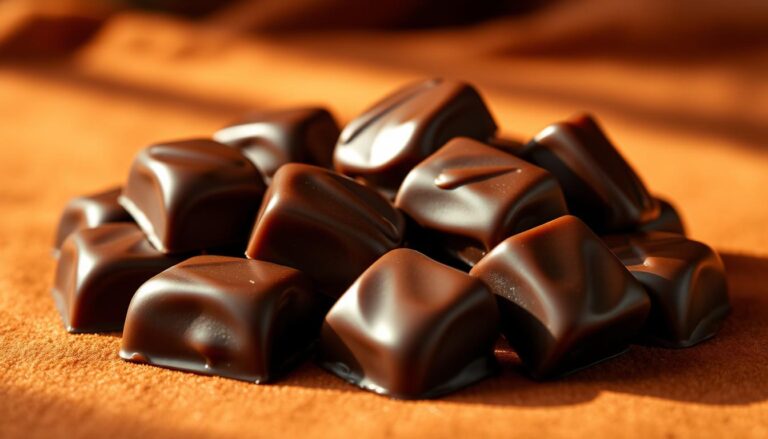
Mini S’mores Bites – An Easy Crowd Pleaser
Want to capture the magic of a campfire treat for the winter holiday season? Then check out this mini S’mores bites recipe. You’ll love it.
Welcome to your new favorite dessert recipe. This guide shows you how to make irresistible, bite-sized treats that pack all the classic flavors.
You get crispy graham crackers, gooey melted chocolate, and perfectly toasted marshmallows.
All without needing an open flame.
These little delights are the perfect solution for your cravings, no matter the season.
They are ideal for parties, family gatherings, or a simple sweet treat.
The best part? This recipe is incredibly simple.
Even if you’re new to baking, you can achieve fantastic results quickly. To top it all off, you only need a few common ingredients.
This dessert is not only delicious but also fun to make and serve.
Let’s walk together through every step to ensure your treats turn out perfectly every single time.
Shall we do this?
Key Takeaways
- Enjoy the classic taste of s’mores year-round without a campfire.
- This simple dessert requires only five common ingredients.
- The recipe is quick, taking about 20 minutes from start to finish.
- Perfect for parties, gatherings, or a fun family activity.
- Easy enough for beginner bakers to achieve great results.
- Offers a elegant twist on the traditional treat.
Recipe for Mini S’mores Bites
Here is a master-chocolatier-style recipe for Mini S’mores Bites that delivers a bite-size, oven-friendly version of the classic campfire treat.
Yield: 24 bites
Prep Time: 10 minutes
Bake Time: 5–6 minutes
Total Time: ~20 minutes
Ingredients
Graham Cracker Crust
- 1 ½ cups (150 g) graham cracker crumbs
(About 10–12 full sheets, finely crushed) - 6 tbsp (84 g) unsalted butter, melted
- ¼ cup (30 g) powdered sugar
Topping
- 2–3 milk chocolate candy bars (about 120 g total)
(Hershey-style works perfectly—break into squares) - 12 large marshmallows, cut in half horizontally
Instructions
Prepare the Graham Crust Base
- Preheat your oven to 350°F (175°C).
- Spray a 24-cup mini muffin pan lightly with nonstick spray.
- In a medium bowl, mix together:
- 1 ½ cups graham cracker crumbs
- 6 tbsp melted butter
- ¼ cup powdered sugar
- Stir until the mixture resembles wet sand and clumps when pressed.
Form the Crusts
- Add 1 tablespoon of crust mixture into each mini muffin cup.
- Use a spoon, the bottom of a small measuring cup, or your thumb to press the mixture firmly into the bottom and up the sides, forming shallow cups.
Pre-Bake the Crusts
- Bake the crusts for 4 minutes.
- Remove the pan and immediately place one chocolate square into each warm crust cup.
Add the Marshmallows
- Top each chocolate square with one marshmallow half, cut-side down.
- Return the pan to the oven and bake for 2–3 minutes, just until the marshmallows puff and begin to soften.
(They should look melty but not browned yet.)
Optional: Toast the Marshmallows
- For a classic s’mores finish:
Turn your oven to broil, place the pan on the middle rack, and broil for 20–40 seconds, watching constantly, until the tops are golden and toasted.
Cool and Release
- Allow the bites to cool in the pan for 10–12 minutes so the crust sets.
- Use a thin knife to gently lift each s’mores bite out of the pan.
Serving & Storage
- Serve warm for the gooey, campfire experience.
- Once cooled, store in an airtight container at room temperature for up to 3 days.
- To re-soften the chocolate/marshmallow, warm in the microwave for 5–7 seconds.

Introduction to Mini S’mores Bites
There’s a reason the combination of graham crackers, chocolate, and marshmallows feels like a warm hug.
It’s a timeless trio that brings back memories of starry nights and crackling fires.
This recipe takes that beloved experience and makes it perfectly portable.
Discover the Charm of Bite-Sized Treats
Small desserts that are perfect for parties let guests sample different sweets without commitment.
These little creations offer the ideal portion of gooey, crispy goodness minus the sticky-finger sensation often associated with the traditional version.
Everyone gets a neat, individually sized treat. This makes serving a large group simple and stress-free.
Why This Recipe is a Crowd-Pleaser
You can enjoy this dessert any time of year. Rain or shine, your oven does all the work. It brings summer fun indoors during colder months.
Both kids and adults love these irresistible morsels. The familiar flavors appeal to all taste preferences.
In addition, you can offer a slightly fancier look for different kind of occasions, from game night to a holiday party.
In any case, you get all the classic taste without needing a fire pit so it’s a guaranteed hit that will have people asking for the recipe.
Ingredients, Tools, and Essential Tips
The beauty of this recipe lies in its simplicity, starting with a short list of pantry staples that are probably already in your kitchen right now.
This makes the recipe incredibly convenient for last-minute cravings or unexpected guests.
Let’s look at what you’ll need to get started.
Key Ingredients: Graham Crackers, Chocolate, and Marshmallows
You only need five simple ingredients. First, you’ll need about ten to twelve whole graham crackers.
Next, gather six tablespoons of unsalted butter. Make sure to melt it before you begin. You will also need powdered sugar.
This sugar helps sweeten and bind the crust together. For the classic flavor, use from two to three milk chocolate candy bars. Hershey’s bars are the traditional choice.
Finally, you need twelve large marshmallows. You will cut each one in half before using them.
Must-Have Kitchen Tools and Equipment
The only special tool required is a 24-cup mini muffin pan. This pan creates the perfect base for your treats.
You will also need basic items like mixing bowls and measuring cups. Kitchen scissors are helpful for cleanly cutting the marshmallows.
Remember, you can use any chocolate bars you prefer.
Having all your ingredients measured before you start makes the process smooth. This prevents the crust from cooling too much before assembly.
Perfecting Your Graham Cracker Crust
Achieving the ideal texture starts with mastering your graham cracker base, the crucial first layer of flavor. Your crust preparation directly impacts the final eating experience.
Effective Crushing and Mixing Techniques
Begin by creating fine, even graham cracker crumbs. This ensures your crust holds together beautifully.
You have several options for crushing your crackers:
A food processor delivers the quickest, most consistent results, just place whole crackers in the bowl and pulse until fine.
For a hands-on approach, use a sealed plastic bag and rolling pin.
Binding with Butter and Powdered Sugar
Combine your graham cracker crumbs with melted butter and powdered sugar in a small bowl.
Stir until the mixture resembles wet sand. It should hold together when pressed.
Powdered sugar is essential here. It provides sugar crystallization that binds the crumbs.
Don’t substitute it with regular sugar. The butter should coat all crumbs evenly.
| Crushing Method | Best For | Consistency | Cleanup |
|---|---|---|---|
| Food Processor | Quick, even results | Very fine | Medium |
| Plastic Bag & Rolling Pin | Hands-on approach | Variable | Easy |
| Slap Chop | Small batches | Coarse to fine | Easy |
Test your mixture by squeezing a handful. It should clump together easily without being soggy. This perfect texture ensures your crust cups won’t fall apart.

Baking and Toasting Techniques
The right oven technique ensures your treats achieve that perfect balance of crispy crust and gooey toppings.
Mastering these methods gives you consistent results every time.
Optimal Oven Settings and Pre-Baking the Crust
Start by preheating your oven to 350°F. This temperature works perfectly for setting the graham cracker base without burning delicate ingredients.
Bake the empty crust cups for 4-5 minutes until the edges turn golden brown. This creates a sturdy foundation that holds the toppings well.
Remove the pan from the oven and work quickly. Place one chocolate rectangle into each warm cup.
Then add one marshmallow half with the cut side facing down.
Broiling Tips for a Perfect Marshmallow Toast
Return the assembled treats to the oven for 2 – 4 minutes. Watch as the marshmallows soften slightly and the chocolate begins to melt.
For that classic toasted look, switch your oven to broil. Broil for just 20 – 40 seconds to create beautiful golden-brown spots on top.
Stay near the oven during broiling. The high heat can transform perfectly toasted tops into burnt tops very quickly.
This careful timing gives you that campfire flavor without the actual flames.

Creative Variations and Flavor Boosts
Once you’ve mastered the basic recipe, a world of delicious variations awaits your exploration.
Customizing these treats lets you create unique flavors for different occasions and preferences.
You can easily adapt the classic formula to suit any taste. This flexibility makes the dessert perfect for parties with diverse preferences.
Experimenting with Additional Mix-Ins and Toppings
Try replacing the standard chocolate rectangles with miniature Reese’s Peanut Butter Cups.
This adds a creamy peanut butter twist that complements the traditional flavors beautifully.
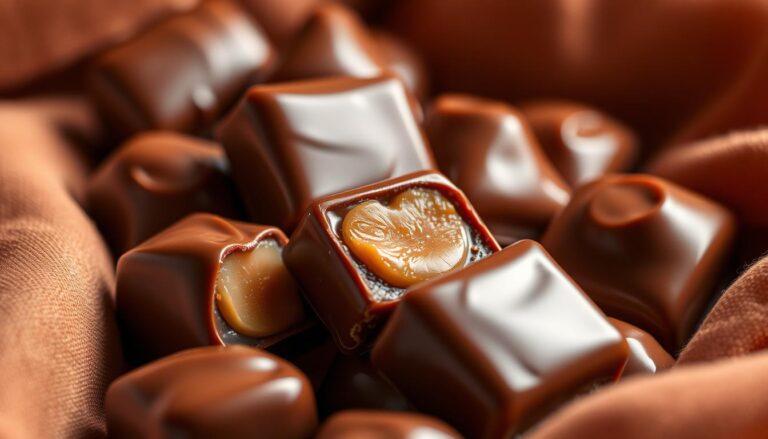
For an extra rich experience, place a caramel candy on top of the chocolate in each cup. The caramel melts into the other ingredients, creating a gooey, indulgent treat.
Using Peanut Butter, Caramel, or Dark Chocolate
If you prefer less sweetness, swap milk chocolate for dark chocolate bars. The deeper cocoa notes balance perfectly with the sweet marshmallow and graham base.
During holiday seasons, try using Andes mint candies instead of regular chocolate. The cool peppermint flavor offers a refreshing variation that guests love.
Feel free to experiment with other creative additions.
White chocolate chips or chocolate-hazelnut spread can create your own signature version of this beloved dessert.
Tips for Achieving Ideal Texture and Presentation
Achieving professional-looking results comes down to implementing smart kitchen hacks.
These simple techniques ensure your treats have the perfect balance of textures and visual appeal.
Cutting Marshmallows without the Mess
Cutting marshmallows in half can be sticky business. Use this clever trick:
Keep a glass of water nearby and dip your kitchen scissors before each cut. The water creates a barrier that prevents sticking.
Using the right size matters for these creations. Cutting large marshmallows in half creates perfect proportions for your muffin cups.
Each piece gets the ideal ratio of ingredients.
Ensuring Crispness and Gooey Chocolate Balance
The perfect treat has a crisp graham cracker base with gooey chocolate and soft marshmallow.
Avoid over-baking your initial crust to prevent sogginess. Use just enough butter to bind the crumbs without making them greasy.
For beautiful presentation, arrange your treats on a platter. The golden graham cracker base contrasts nicely with dark chocolate and white marshmallow top.
This creates visual appeal that matches the delicious taste.
| Texture Issue | Possible Cause | Solution |
|---|---|---|
| Soggy crust | Too much butter | Reduce butter by 1 tablespoon |
| Marshmallow sticking | Dry scissors | Dip in water before cutting |
| Burnt top | Broiling too long | Watch carefully for 20 – 40 seconds |
| Chocolate not melting | Crust cooled too much | Add chocolate immediately after baking crust |
Let your treats cool for about 15 minutes before removing them from the pan. This allows the sugar and butter in the crust to set properly.
The chocolate and marshmallow will remain pleasantly gooey.
Serving, Storage, and Party Presentation
Your freshly baked treats deserve a presentation that matches their delicious taste.
The way you serve and store them can enhance the overall experience for you and your guests.
These creations are absolutely best enjoyed shortly after they cool from the oven.
At that time:
- chocolate remains wonderfully melty,
- marshmallows stay soft and gooey
- graham cracker base maintains its perfect crisp texture.
Creative Serving Suggestions for Any Occasion
This recipe makes 24 individual portions, so it works beautifully for parties, potlucks, classroom events, and family gatherings where multiple people needs to be served.
Consider arranging your dessert on a tiered stand for elegant presentation. For a casual, campfire-inspired look, use a rustic wooden board.
You could also serve them on small plates with tiny forks for easy handling.
Proper Storage to Maintain Freshness
Store any leftovers in a single layer inside an airtight container. This prevents them from sticking together while maintaining quality.
You can keep them at room temperature or in your refrigerator.
While your treats can stay fresh for about one week when stored properly, they’re absolutely best within three days.
The texture and flavor remain optimal during this time frame.
Avoid freezing these desserts as freezing changes the marshmallows and graham cracker base significantly.
The thawed result won’t deliver the same appealing experience as fresh-baked treats.
Campfire Taste in your Kitchen
You now have everything needed to create a fantastic dessert that brings everyone together.
This simple recipe just requires 5 ingredients to recreate the classic campfire taste right in your kitchen.
You can make these delightful treats for any event, from parties to quiet family nights.
Feel free to get creative with different chocolates or add-ins. Following the easy steps ensures perfect results every time.
I hope you love making and sharing this easy recipe. It’s a wonderful way to create sweet memories any time of year.
Want another easy-to-make sweet treat to celebrate the arrival of a new year?
Then check out our recipe to make Rocky Road Fudge. It too only requires 5 ingredients.
FAQ
Can I make these treats ahead of time?
You can prepare the graham cracker crust in the mini muffin pan a day in advance. Just cover it tightly and store it at room temperature. For the best texture and gooey marshmallow experience, we recommend adding the chocolate and marshmallows and baking them the day you plan to serve.
What’s the best way to store leftovers?
Keep any leftover bites in an airtight container at room temperature for up to 2 days. The marshmallows may soften the crust slightly over time. For longer storage, you can freeze them for up to a month.
My marshmallows aren’t toasting under the broiler. What am I doing wrong?
This usually happens if the oven rack is too low. For a perfect golden-brown toast, move your rack to the highest position, just a few inches from the broiler element. Watch them closely, as they can go from golden to burnt in seconds!
Can I use something other than Hershey’s chocolate bars?
Absolutely! Feel free to get creative. Dark chocolate squares, peanut butter cups, or even a small dollop of caramel work wonderfully. Just ensure any alternative is small enough to fit comfortably in the base of your pan.
Do I need a food processor to make the graham cracker crumbs?
Not at all. While a food processor is quick, you can easily place whole crackers in a sealed plastic bag and crush them with a rolling pin. This method gives you great control over the crumb texture.
How do I prevent the bites from sticking to the pan?
Thoroughly greasing your mini muffin tin with butter or non-stick spray is key. You can also use paper liners for easy removal and a clean presentation, especially for parties.