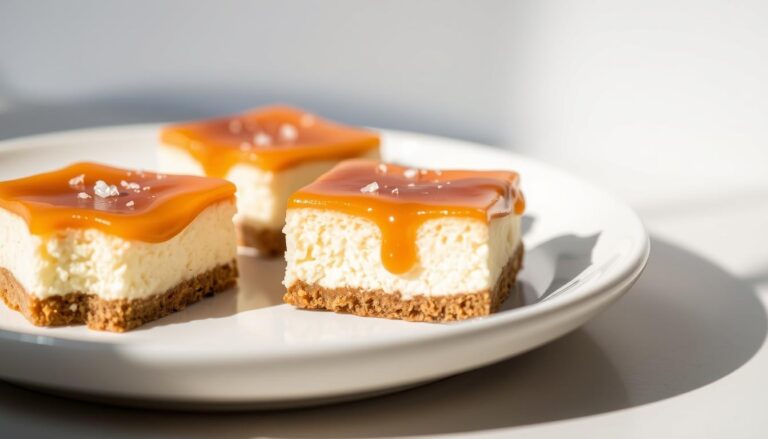
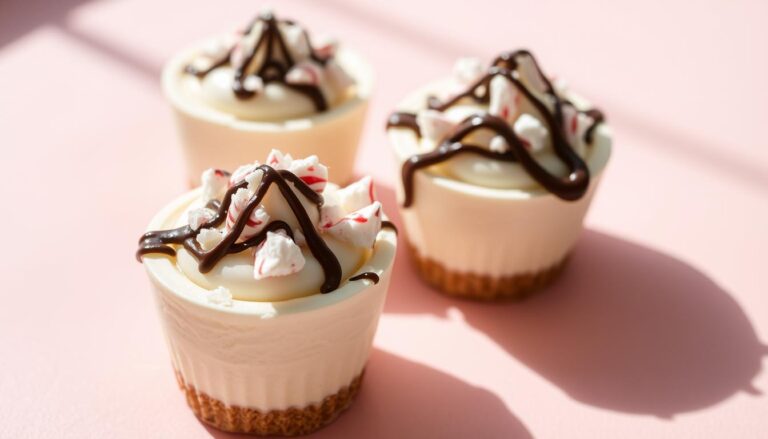
No-Bake Mini Chocolate Cheesecake Bites (The Easiest NYE Dessert)
Want to serve a dessert that feels incredibly fancy but is one of the easiest things you’ll ever make? Then you need to check out these mini chocolate cheesecake bites.
These no-bake mini desserts are the ultimate party trick. They are perfect for your New Year’s Eve celebration or any special gathering.
You get all the rich, creamy decadence of a classic dessert in a perfectly portioned, bite-sized treat.
This recipe is a dream for busy hosts. You don’t need to turn on your oven or spend hours in the kitchen.
With minimal effort, you can create a dessert that will truly impress your guests.
We’re talking about multiple layers of delicious flavor in every single piece. The crust, filling, and topping all work together for an unforgettable experience.
Best of all, you can make these delights well ahead of time. They are freezer-friendly, which means less stress on the day of your event.
You can actually enjoy your own party!
Ready to learn how simple it is? Let’s dive into the details and get you set up for sweet success.
Key Takeaways
- Perfect for parties, these treats offer a fancy look with minimal effort.
- Enjoy rich, creamy flavor in a convenient, no-mess, single-serving size.
- The no-bake method saves time and energy, ideal for busy hosts.
- Features a delicious multi-layered taste that chocolate lovers will adore.
- The recipe is easily scalable to feed small or large gatherings.
- Make-ahead and freezer-friendly nature reduces last-minute party stress.
Mini Chocolate Cheesecake Bites Recipe
Here is a party-perfect recipe for Mini Chocolate Cheesecake Bites that don’t involve baking at all.
Yield: About 24 mini cheesecake bites and it’s perfect for New Year’s Eve!
Ingredients
Chocolate Wafer Crust
- 1 ½ cups (about 180 g) chocolate wafer crumbs
- 5 tablespoons (70 g) unsalted butter, melted
For the Chocolate Cheesecake Filling
- 16 oz (454 g) full-fat cream cheese (Philadelphia), softened
- ½ cup (100 g) granulated sugar
- ¼ cup (60 g) sour cream, room temperature
- 2 teaspoons vanilla extract
- 2 large eggs, room temperature
- 6 oz (170 g) semi-sweet chocolate, melted and slightly cooled
Chocolate Ganache Topping
- ¾ cup (128 g) chocolate chips (semi-sweet or dark)
- ½ cup (120 ml) heavy cream
- 2 oz (56 g) high-quality baking chocolate, chopped
Instructions
Prepare the Crust
- Line a mini muffin pan with 24 paper liners.
- In a medium bowl, combine:
- 1 ½ cups chocolate wafer crumbs
- 5 tbsp melted butter
- Mix until the crumbs are evenly coated and look like damp sand.
- Spoon 1 tablespoon of crust mixture into each liner.
- Press down firmly using the back of a spoon or a small tamper.
- Freeze for 10 minutes while preparing the filling.
Make the Chocolate Cheesecake Filling
- In a large bowl, beat the 16 oz softened cream cheese until smooth and lump-free (about 1 minute).
- Add ½ cup sugar and beat again until fully incorporated.
- Mix in ¼ cup sour cream and 2 tsp vanilla extract.
- Add the 2 eggs, beating on low speed just until combined — do not overmix.
- Fold in the 6 oz melted semi-sweet chocolate using a spatula until smooth.
Assemble the Cheesecake Bites
- Remove muffin pan from the freezer.
- Spoon the chocolate cheesecake filling over each crust, filling each cup nearly to the top.
- Smooth the tops with the back of a spoon.
- Refrigerate for at least 4 hours, or freeze for 1 hour to set.
Make the Ganache Topping
- Add chocolate chips and chopped baking chocolate to a heat-safe bowl.
- Heat ½ cup heavy cream until just simmering.
- Pour hot cream over the chocolate.
- Let sit for 2 minutes, then stir until silky and smooth.
- Let the ganache cool slightly until it thickens but is still pourable.
Finish & Serve
- Spoon or pipe a small swirl of ganache over each cheesecake bite.
- Chill an additional 10 minutes to set the topping.
- Serve chilled — they hold their shape beautifully on a party tray.

Introduction to No-Bake Mini Chocolate Cheesecake Bites
These elegant little treats are designed to make any celebration feel more special without demanding hours in the kitchen.
They bring a touch of luxury to your table while keeping preparation simple.
About This Festive Dessert
Perfect for New Year’s Eve or holiday gatherings, these mini delights create a festive atmosphere.
Their party-ready size makes them ideal for potlucks and special occasions where you want to serve something memorable.
You’ll experience multiple layers of flavor in every piece. The crust contains cocoa, while the filling features melted chocolate.
A final drizzle on top completes the rich experience.
The cream cheese provides a crucial balance to all the sweetness. Its slight tang cuts through the richness, preventing the dessert from being overwhelming.
This creates a perfect harmony of flavors.
| Occasion | Perfect For | Key Feature |
|---|---|---|
| New Year’s Eve | Countdown Parties | Easy finger food |
| Holiday Gatherings | Family Dinners | Impressive presentation |
| Gift Giving | Valentine’s Day | Personalized treats |
Why You’ll Love This Recipe
Even people who aren’t chocolate fanatics will enjoy these creations as they strike the right balance between indulgent and refreshing.
The universal appeal makes them crowd-pleasers.
The bite-sized format offers incredible convenience. Guests can easily grab them while mingling. No plates or forks are needed, making cleanup simple.
Despite their professional appearance, these treats are quite simple to prepare. They require just a bit of patience and the right technique.
The impressive results belie the easy process.
These versatile sweets work for many occasions beyond New Year’s Eve. They also make for fantastic gifts and perfect Valentine’s Day desserts.
This level of adaptability certainly adds to their appeal.
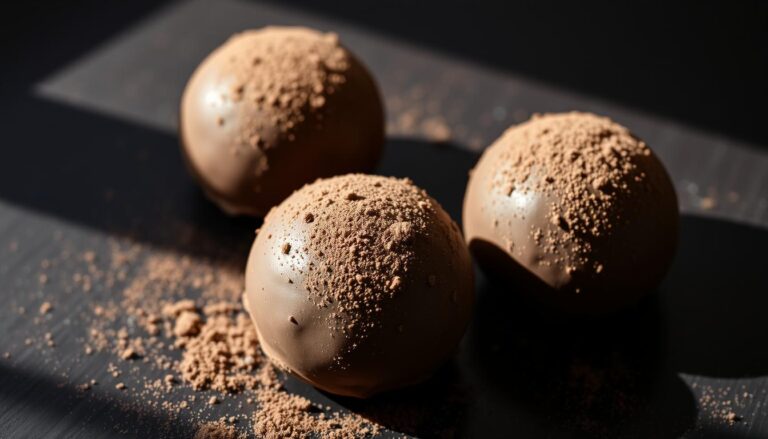
Related: Learn to make our Oreo Cookie Truffles, another bite-sized treat your guests won’t get enough of.
Raw Materials and Tools for Delicious Cheesecake Bites
A smooth preparation process hinges on quality ingredients and a few key kitchen tools.
Having everything ready before you start makes the assembly quick and enjoyable.
Raw Materials
For the best results, use full-fat blocks of cream cheese. A brand like Philadelphia is ideal. Let it soften completely at room temperature for a lump-free filling.
Understanding the Role of Key Ingredients
Full-fat cream cheese forms the foundation of your dessert. It provides structure and that characteristic tangy flavor that balances the sweetness.
Sour cream adds extra tanginess while contributing moisture. This prevents your treats from becoming dry or dense.
The result is a luxuriously creamy texture that melts in your mouth.
Eggs function as both a binder and moisturizer in the filling. They help the mixture set properly while adding richness.
Quality semi-sweet baking chocolate enhances the primary flavor profile. It creates a sophisticated result that lets the cream cheese tang shine through.
Your crust combines graham cracker or cookie crumbs with melted butter. The butter acts as a binder that holds everything together.
This creates the essential crunchy contrast to your creamy filling.
Sugar does more than just sweeten your creation. It helps create a smooth, creamy consistency when beaten with the cream cheese.
Must-Have Kitchen Tools and Equipment
You will need a food processor to create fine crumbs from your chocolate wafers, graham crackers or cookies.
A stand mixer or hand-held mixer is essential for beating the cream cheese mixture until it’s perfectly smooth.
Use a regular or mini muffin tin lined with paper liners. Parchment paper is helpful for easy removal.
A vegetable peeler is great for creating elegant chocolate shavings to decorate your finished treats.

Expert Tips and Techniques
The difference between a good result and a perfect one often lies in the small details.
These professional secrets will help you achieve a smooth, crack-free finish and a flawless texture every single time.
Achieving the Perfect Texture
Your most critical step is ensuring all ingredients are at room temperature before you begin. This allows the cream cheese to blend smoothly without any lumps.
If you forgot to soften your cream cheese, don’t worry. You can microwave it on high in 10-second intervals until it’s soft and pliable.
When mixing, beat the cream cheese and sugar very well until fluffy. But once you add the eggs, mix only until just combined.
Scrape the bowl and mixer attachment often to prevent pockets of unmixed ingredients.
For an extra-smooth texture, try a simple water bath technique. Place a dish of boiling water on the oven’s bottom rack. This creates steam that keeps the dessert moist.

Variations and Creative Twists
Once you master the basic technique, you can explore creative variations that make these treats uniquely yours.
The foundation is wonderfully adaptable to different flavors and presentations.
Alternative Crust Options and Flavor Enhancements
Try Oreo cookies for extra richness or Biscoff cookies for a caramelized taste.
Vanilla wafers create a milder foundation, while digestive biscuits offer a less sweet alternative. Remember that richer cookies need less butter than drier crackers.
Enhance the filling with citrus zest for brightness or different extracts for unique profiles.
Fold in mini chocolate chips for melty pockets or swirl in caramel for decadence.
Presentation Ideas for Parties and Special Occasions
Create elegant chocolate shavings using a vegetable peeler on a chocolate bar. Drizzle contrasting chocolate in decorative patterns for visual appeal.
Top with fresh berries for color or chopped nuts for texture. Seasonal touches like crushed candy canes or festive sprinkles make them party-ready.
These make fantastic gifts when packaged beautifully. The recipe scales easily for larger crowds and stores well in the freezer for stress-free preparation.
Related: A larger-than-expected crowd is coming your way. Not to worry, make this delicious, sweet treat in no time.
Effortless Elegant Desserts that Impress
You’ve now mastered the art of creating elegant desserts that impress without the stress.
These little creations will undoubtedly become the highlight of your next celebration.
Remember the key advantages of this approach. It delivers professional results using simple techniques and common ingredients.
The make-ahead nature means you can enjoy your own party.
For storage, keep leftovers in an airtight container. They last 4-5 days in the fridge or up to a month in the freezer.
Thaw frozen portions in the refrigerator before serving.
This versatile recipe adapts beautifully throughout the year. Try different crusts and flavor enhancements to make it your own signature treat.
We’d love to see your results! Share which variations you tried in the comments below.
By the way, would you like to make a delicious, sweet treat that evoques the flavors or marshmallows over a camp fire?
Then check out our recipe to make Mini S’mores Bites for your NYE party.
FAQ
Can I make these mini desserts ahead of time?
Absolutely! These treats are perfect for preparing in advance. You can store them in an airtight container in your fridge for up to three days. For longer storage, freeze them on a baking sheet before transferring to a freezer-safe bag for up to a month.
Why is it important for the cream cheese to be at room temperature?
Using softened cream cheese is a key step. When it’s at room temperature, it blends smoothly with the sugar and other ingredients. This prevents lumps and gives you a silky, creamy filling every time. Just take it out of the fridge about an hour before you start.
My graham cracker crust isn’t holding together. What can I do?
If your crust is a bit crumbly, you might need a touch more melted butter. The mixture should feel like wet sand and hold its shape when you press it into the pan. Make sure you press it down firmly and evenly with the back of a spoon.
Can I use a different type of chocolate?
Of course! Feel free to get creative. You can use semi-sweet, dark, or milk chocolate chips based on your preference. For a richer flavor, try a high-quality baking bar. Just make sure it’s fully melted and slightly cooled before mixing it into the filling.
Do I need to use an electric mixer for the filling?
Using a hand mixer or a stand mixer is highly recommended. It makes the process much easier and ensures the cream cheese and sour cream are whipped to a light, airy consistency. You want everything perfectly combined for the best texture.
How can I prevent the top from sticking when I remove the bites from the pan?
Lining your pan with parchment paper is the best trick! Leave a little overhang on the sides. Once the dessert is fully set, you can use the paper to lift the entire block out of the pan before cutting it into individual pieces.