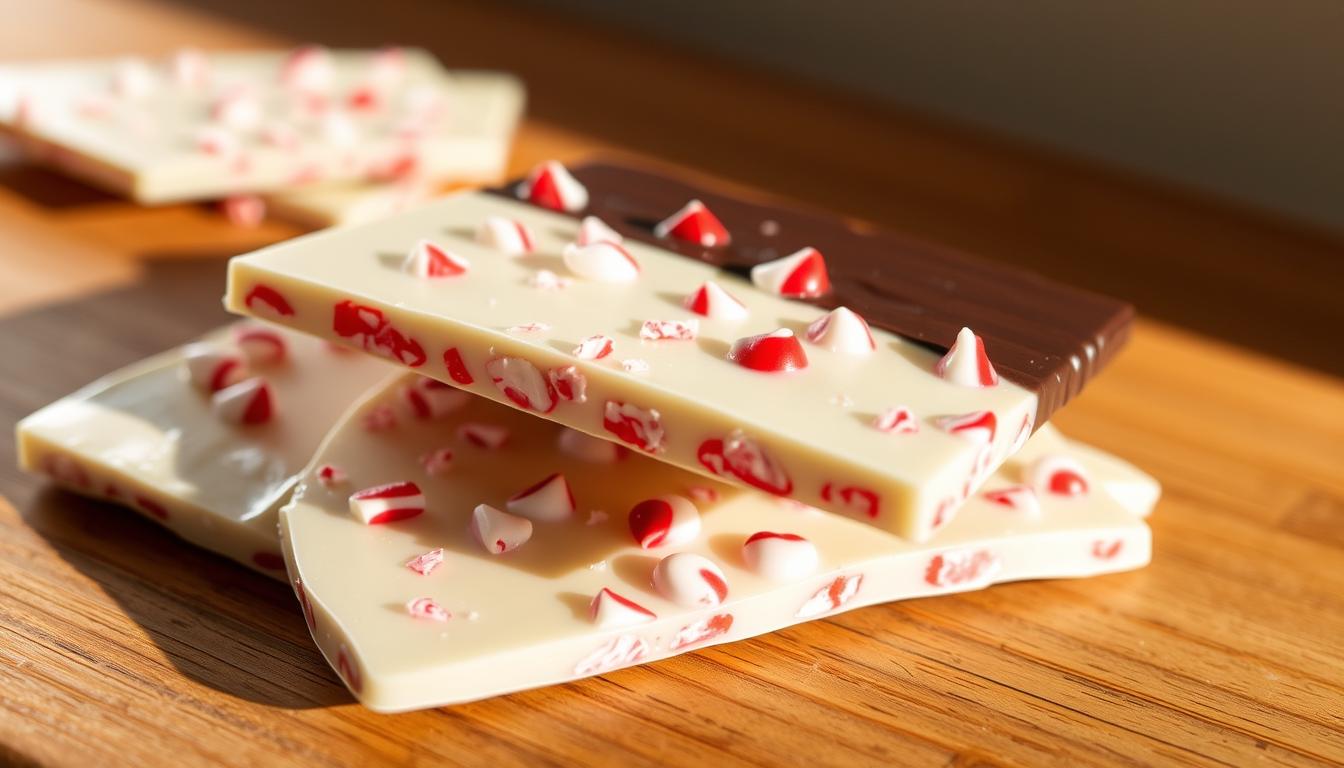
Homemade Peppermint Bark (Ghirardelli-style)
Homemade peppermint bark is a great way to let friends an family know you are already in the holiday spirit. Especially when it tastes like the Ghirardelli classic.
This recipe will help you craft a luxurious layered confection that looks like it came from a specialty shop.
The treat itself combines rich dark chocolate with creamy white layers and a refreshing minty finish.
Mouth watering already?
Let’s get cracking.
Key Takeaways
- Rivals premium store-bought brands using quality chocolate and smart layering techniques
- Features three distinct textures: dark chocolate, white chocolate, and candy cane crunch
- Uses real chocolate instead of candy melts for superior flavor and texture
- Easily adjustable batch sizes for holiday gatherings or gift-giving needs
- Requires only 30 minutes of hands-on preparation time
Ghirardelli-Inspired Homemade Peppermint Bark
This homemade Peppermint Bark recipe closely rivals the Ghirardelli classic which is rich, crisp, and irresistibly minty.
Ingredients:
- 8 oz (225g) high-quality dark chocolate (60–70% cocoa)
- 8 oz (225g) high-quality white chocolate
- ¾ tsp peppermint extract (divided: ¼ tsp for dark, ½ tsp for white)
- ½ cup (75g) crushed peppermint candies or candy canes (about 4 large)
Instructions:
- Prepare the pan:
- Line an 8×8 inch (20×20 cm) square baking pan with parchment paper, allowing some overhang for easy removal.
- Melt the dark chocolate:
- Chop the dark chocolate into small pieces.
- Melt using a double boiler or in the microwave (30-second bursts, stirring in between) until smooth.
- Stir in ¼ tsp peppermint extract.
- Pour into the prepared pan and spread evenly with a spatula.
- Chill in the fridge for 20–25 minutes, until set but not rock-hard.
- Crush the peppermint:
- While chilling, place the peppermint candies in a zip-top bag and crush them using a rolling pin or mallet into small bits (not powder).
- Melt the white chocolate:
- Chop and melt white chocolate using the same method.
- Stir in ½ tsp peppermint extract.
- Assemble the bark:
- Pour the white chocolate gently over the chilled dark chocolate layer.
- Immediately sprinkle the crushed peppermint evenly on top, gently pressing into the white chocolate so it adheres.
- Set and break:
- Refrigerate the assembled bark for 30–45 minutes or until completely firm.
- Lift out of the pan and break into rustic pieces using your hands or a sharp knife.
Storage:
- Store in an airtight container in the fridge for up to 2 weeks, or freeze for longer.
By the way, if you love chocolate with a capital “L”, then make sure to check out our blog that explains how to make your favorite white, milk or dark bars at home.
Shop this Recipe
|
8×8-inch pan |
|
|
Double Boiler |
|
|
Microwave |
|
|
Heatproof Bowl |
|
|
Silicone Spatula Set |
|
|
Airtight Container |
Note: Chocolate Candy Kitchen (CCK) actively partners up with reputable brands to promote useful, high-quality products.
Some or all of the links above may be affiliate links that generate a small revenue for CCK when you buy through them. Thank you for supporting our blog.

Essential Tools for Crafting Your Peppermint Bark
Let’s break down what you’ll need to build those beautiful layers and achieve that signature snap.
Must-Have Kitchen Equipment
You’ll need basic tools to streamline the process. A microwave-safe bowl handles melting duties, while an 8-inch square pan lined with parchment creates clean layers.
An offset spatula spreads chocolate evenly, and a rolling pin crushes candy canes into perfect-sized shards.
Keep things simple, no specialty gadgets required.
The right prep tools ensure your creation sets properly and releases easily for picture-perfect slicing.
With these essentials, you’re minutes away from glossy, professional-looking results.

Creative Variations & Custom Touches
Transform your holiday treats with personal flair using these adaptable ideas.
The basic formula works like a sketchpad: add colors, textures, and flavors that reflect your style while keeping the signature crunch everyone loves.
Flavor Tweaks and Alternative Layers
Swap the classic layer order for fresh appeal. Try reversing the sequence with white chocolate nestled between dark tiers.
For a minimalist approach, use equal parts of both chocolates in two clean strata. Feeling adventurous?
Substitute peppermint with orange zest or almond extract for warm, aromatic notes.
Nuts add grown-up sophistication. Press toasted pistachios or pecans into the top layer before setting.
These additions create satisfying crunch contrasts while complementing the candy pieces.
Tips and Tricks for a Flawless Peppermint Bark Experience
Even seasoned bakers encounter challenges when working with layered treats.
A few simple adjustments can elevate your results from good to gallery-worthy.
Let’s explore solutions for common frustrations and ways to keep your creation fresh.
Avoiding Common Pitfalls
Timing matters most when building layers. Chill each chocolate tier just until it loses its shine, about 12 minutes.
If it hardens completely, the next layer won’t stick. Stick with chocolates sharing similar fat bases, like cocoa butter-based brands.
Mixing palm oil white chocolate with dark varieties often causes separation.
Test your peppermint extract strength before mixing. Add half the recommended amount first, then adjust.
For clean cuts, let chilled slabs rest at room temperature 20 minutes. Press a warm knife straight down. Avoid sawing motions.
Smart Storage and Serving Strategies
Store your finished pieces between parchment sheets in airtight containers. Cool climates allow room-temperature storage for 5 days.
Humid areas? Refrigerate up to three weeks. Always trim uneven edges first for uniform shapes.
Crush candy canes to match your texture preference. Fine crumbs blend seamlessly, while chunky shards create bold visuals.
Pair slices with coffee at gatherings or wrap them in wax paper bags for portable gifts. A little planning ensures every bite stays crisp and flavorful.
You make the classics now.
Your kitchen adventures just got sweeter with this layered delight.
Combining smooth chocolate with refreshing mint and festive crunch, this recipe turns simple ingredients into edible art.
Whether you’re prepping for cookie exchanges or crafting heartfelt gifts, it delivers holiday magic in every bite.
The process stays surprisingly simple:
- melt,
- layer,
- chill.
Within hours, you’ll have glossy slabs ready for gifting or grazing. Store pieces in airtight containers to maintain their signature snap.
This treat shines brightest when shared. Package shards in cellophane bags with ribbon for coworkers, or arrange elegant triangles on dessert boards.
Pair with coffee during gatherings or tuck into lunch boxes for sweet surprises.
However you serve it, the perfect balance of rich and refreshing keeps people coming back.
Ready to spread seasonal cheer? Whip up a batch today and watch smiles multiply.
And if you want another seasonal treat, check out our recipe to make Perfect Pumpkin Chocolate Chip cookies this fall.
FAQ
Can I use milk chocolate instead of dark for the base layer?
Absolutely! While dark chocolate balances the sweetness, milk chocolate works well if you prefer a creamier flavor. Just ensure it’s high-quality for smooth melting and layering.
How long does peppermint bark stay fresh?
When stored in an airtight container at cool room temperature, it stays crisp for up to 2–3 weeks. Avoid humidity to keep the layers from softening.
Why did my chocolate layers mix together?
Let the first layer fully set (about 20–30 minutes in the fridge) before adding the next. A chilled baking sheet or parchment paper helps speed up the process.
Can I skip peppermint extract if I don’t have it?
Yes, but the mint flavor will be milder. Crushed candy canes on top add freshness, though the extract enhances the aroma. Adjust to your taste!
What’s a festive alternative to candy cane toppings?
Try sprinkles, edible glitter, or crushed freeze-dried berries for color. For a nutty twist, add toasted almond slivers or sea salt flakes.
How do I package this for gifts without breaking it?
Wrap pieces in wax paper and place them in a sturdy tin or cellophane bag tied with ribbon. Include a handwritten note for a personal touch!