Homemade Milky Way Bar
What’s the ultimate treat that combines creamy nougat, smooth caramel, and rich chocolate in one irresistible package? Our homemade milky way bar for sure.
Yar are maybe wondering…can you actually recreate the magic of a beloved classic candy bar in your own kitchen, without any fancy equipment or ingredients?
The answer is yes, and it’s easier than you might think.
With this recipe, you’ll learn how to craft our kind of Homemade Milky Way Bar: packed with fluffy nougat, gooey caramel, and creamy chocolate.
It’s perfect as a pick-me-up snack, gift-giving, or indulging in a sweet treat.
Is your mouth watering yet?
Good, let’s get on with the show.
Key Takeaways
- Requires zero oven time with only 5 essential ingredients
- Browned butter adds complex, caramelized notes to the blondie base
- Customize thickness and sweetness to personal preference
- More affordable than buying multiple candy packs
- Ideal for gifting or satisfying late-night cravings
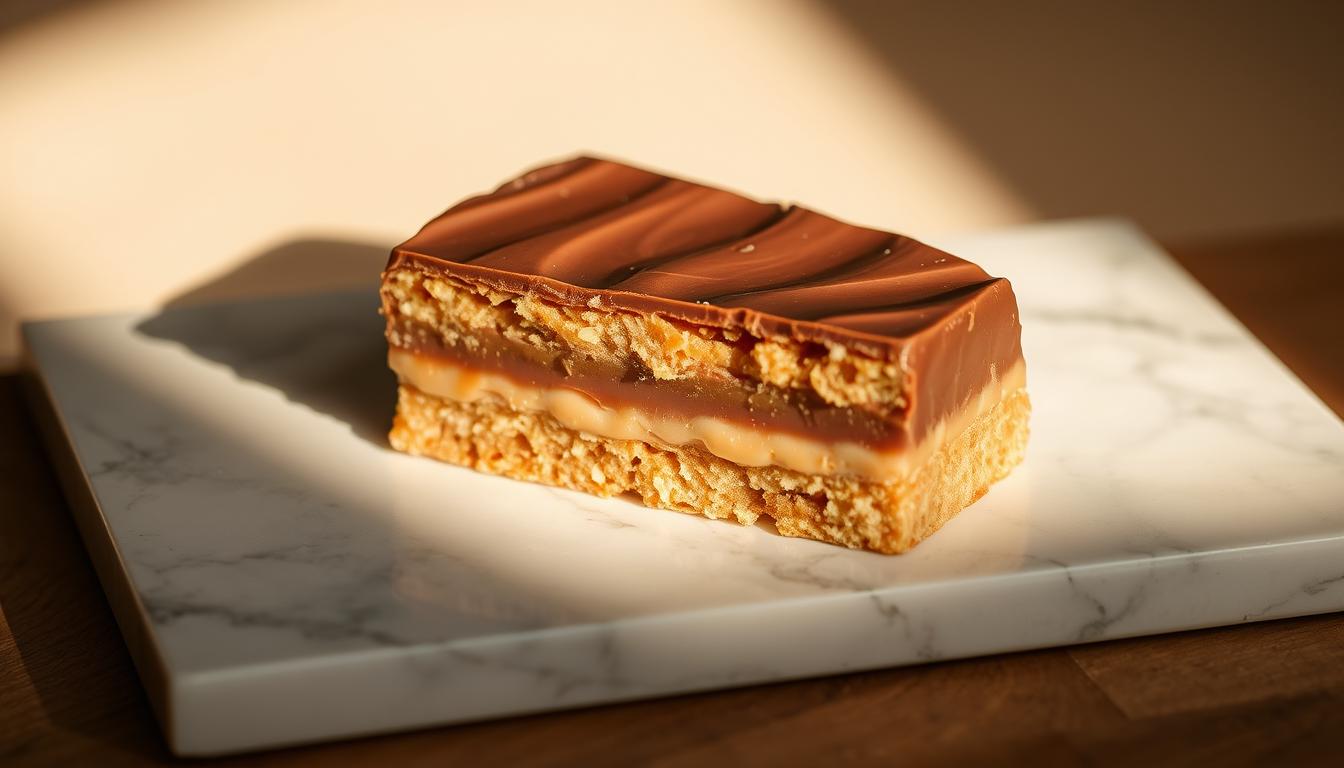
Homemade Milky Way Bars
Here’s the recipe to make beautiful milky way-style bars, featuring a soft nougat layer, rich caramel, and smooth milk chocolate coating.
Yields: around 24 mini bars.
Ingredients
Nougat Layer:
- 2 cups granulated sugar (400g)
- 1/2 cup light corn syrup (120ml)
- 1/2 cup water (120ml)
- 2 large egg whites
- 1/4 tsp salt
- 1 tsp vanilla extract
- 1/2 cup creamy milk chocolate chips (90g)
- 1/4 cup marshmallow fluff or creme (60g)
Caramel Layer:
- 1 (14 oz) bag soft caramels (397g)
- 2 tbsp heavy cream (30ml)
Coating:
- 12 oz milk chocolate (340g), chopped or in chips
- 1 tbsp neutral oil (like vegetable or coconut) for smooth melting (optional)
🔪 Step-by-Step Instructions
Prepare the Nougat:
- In a saucepan, combine sugar, corn syrup, and water. Heat over medium heat, stirring until sugar dissolves. Bring to a boil (no stirring), and heat until it reaches 260°F (hard-ball stage) on a candy thermometer.
- While the sugar syrup cooks, beat the egg whites with salt until soft peaks form.
- Carefully and slowly pour the hot syrup into the egg whites while beating constantly. Continue beating until thick and glossy (~5–6 minutes).
- Mix in vanilla, marshmallow fluff, and melted milk chocolate chips until fully combined.
- Pour the nougat into a parchment-lined 9×9 inch (23×23 cm) pan and spread evenly. Let set at room temperature until firm (about 1 hour).
Add the Caramel Layer:
- In a microwave-safe bowl, combine caramels and heavy cream. Microwave in 30-second intervals, stirring until smooth.
- Pour over the nougat layer and spread evenly. Chill in the fridge until firm (~30 minutes).
Cut and Coat:
- Lift the layered block out of the pan using parchment. Cut into desired bar sizes (bite-sized or full bars).
- Melt milk chocolate with oil in a double boiler or microwave (stir every 20 seconds until smooth).
- Dip each bar into the chocolate, letting excess drip off. Place on parchment paper and let them set completely at room temp or in the fridge.
Storage Tips:
- Store in an airtight container at room temp for up to 1 week.
- For longer storage, refrigerate up to 3 weeks or freeze for up to 3 months.

Introduction to Your Delicious Homemade Milky Way Bars
There’s magic in recreating childhood favorites with a gourmet touch.
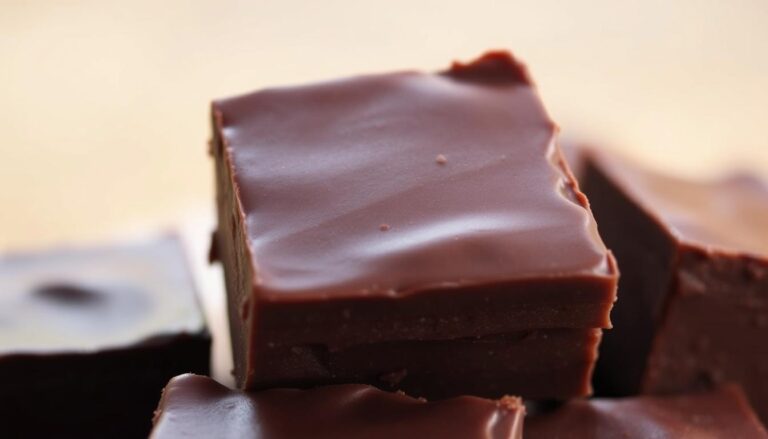
That first bite of smooth chocolate giving way to fluffy nougat and silky caramel? You can now capture that iconic milky way experience right in your kitchen.
Better yet, these creations let you control every element, from the salt level in the caramel to the intensity of the chocolate coating.
What makes these candy bars unforgettable? Quality ingredients shine through.
Store versions often use stabilizers and preservatives, but your own milky way-style bars? No way.
Your homemade milky way bar relies on real butter, pure vanilla, and premium chocolate.
This results in richer textures and cleaner flavors that linger pleasantly without artificial aftertastes.
Oh! and if you love making your own versions of popular treats, then make sure to see our recipe for homemade 3-Musketeer bars.
Equipment Overview
Creating restaurant-quality treats starts with reliable tools. Let’s break down what you’ll need to build those irresistible layers of flavor and texture.
Key Tools and Equipment You’ll Need
An 8×8-inch pan gives ideal thickness to each layer.
Line it with parchment paper to lift bars out cleanly. Microwave-safe bowls melt chocolate chips evenly, preventing scorching.
Use forks for dipping as their tines let excess chocolate drip off neatly.
Having everything pre-measured keeps the process smooth, so you can focus on crafting those perfect layers.
Tips and Tricks for Perfecting Your Candy Bars
Mastering candy-making requires precision and a few clever tricks up your sleeve.
Let’s explore how to avoid sticky situations and create flawless layers every time.
Timing, Temperature, and Technique
Low and slow wins the race with caramel.
Melt it over medium-low heat to prevent hardening. Chocolate almond bark melts smoother than chips since its higher cocoa butter content creates glossy coatings.
Keep a thermometer handy. Chocolate behaves best between 88-90°F.
If it thickens, stir in ½ tsp coconut oil per cup for fluidity. Work in small batches to maintain ideal dipping consistency.
Preventing Common Pitfalls
Chill layers fully before cutting.
Warm knives create clean edges so dip the blade in hot water and dry it between slices.
If caramel sticks to your bowl, lightly grease it with butter first.
Humidity causes chocolate to bloom (forming white streaks).
Store finished bars in airtight containers with silica packs. For quick fixes, re-dip bloomed pieces in fresh melted chocolate.
- Dark chocolate lovers: Use 60% cacao for balanced sweetness
- Double-layer parchment prevents leaks during setting
- Freeze bars 10 minutes before dipping for neater edges

Try out the Perfect Browned Butter Blondie Twist
What transforms ordinary ingredients into extraordinary treats?
To achieve upgraded candy bars, the answer lies in mastering browned butter.
This simple technique adds complexity to every bite, turning basic components into something unforgettable.
Unlocking Richness Through Heat
Start by melting butter in a light-colored pan. Watch closely as it foams and turns golden.
Those amber specks? That’s caramelized milk solids creating nutty depth. Remove it from heat the moment you smell toasted hazelnuts. About 5-7 minutes.
Cool the butter slightly before mixing.
Too hot, and it’ll melt your chocolate. Too cool, and it won’t blend smoothly.
Aim for 85°F, which is warm enough to enhance flavors without overpowering other layers.
Why does this work so well? Browning butter intensifies its natural sweetness. It pairs perfectly with caramel’s richness and balances the nougat’s lightness.
Friends will notice the difference but might struggle to name the secret ingredient.
For best results, use unsalted butter. You control the salt level, ensuring each layer harmonizes.
Store versions can’t replicate this depth because mass production skips time-intensive steps like careful caramelization.
Using Parchment Paper and Other Essential Tools
Great candy-making starts with the right prep.
While ingredients get all the glory, your tools determine whether those layers stay intact or crumble.
Let’s explore how to set up your workspace for flawless results every time.
Pan Lining Mastery
Cut parchment paper into an 8×14-inch rectangle. Make eight 2-inch slits along the edges. Four on each long side.
These strategic cuts let the paper hug the pan’s corners without wrinkles. Press the flaps firmly against the sides, creating a crisp edge.
| Parchment Type | Best For | Heat Resistance | Cost |
|---|---|---|---|
| Bleached | Delicate candies | Up to 420°F | $ |
| Unbleached | Eco-friendly prep | Up to 450°F | $$ |
| Silicone-coated | Sticky caramel | Up to 500°F | $$$ |
Leave 2-inch overhangs on opposite sides.
These “handles” let you lift the entire block out cleanly. For extra security, clip the overhang to the pan’s rim with binder clips during chilling.
Cheap parchment tears easily when layered. Splurge on heavy-duty brands because they withstand repeated chilling and cutting.
Store sheets flat in a cool container to prevent curling before use.
Sharp chef’s knives slice through chilled layers best. Warm the blade under hot water and dry it between cuts. This prevents caramel drag and keeps edges photogenic.
Storing and Serving Your Homemade Milky Way Bars
Your kitchen masterpiece deserves proper care to maintain its quality.
With smart storage and creative presentation, these treats stay fresh while making every serving feel special.
Storage Guidelines for Freshness
Keep confections in an airtight container between parchment layers. Refrigerate up to two weeks or freeze for three months.
Thaw frozen pieces in the fridge for four hours before serving.
Serving Suggestions and Presentation
Serve chilled for clean slices that showcase the layers. Pair with espresso for a grown-up dessert experience.
For summer gatherings, freeze portions and present them as frosty bites.
Drizzle melted chocolate over plates before arranging your dessert. Add flaky sea salt or crushed nuts for texture contrast.
These small touches transform everyday indulgence into a memorable moment.
And if we are talking about memorable moments, head on to our recipe so you can make your own chocolate rice krispies bars, and revisit happy childhood memories.
FAQ
Can I use milk chocolate instead of dark for the coating?
Absolutely! Swap dark chocolate for milk chocolate if you prefer a sweeter flavor. Just ensure it’s high-quality for smooth melting and dipping.
How do I prevent the caramel from sticking to the pan?
Lining your pan with parchment paper is key. Lightly grease it with butter or cooking spray for extra insurance against sticking.
Why brown the butter for the blondie layer?
Browning butter adds a nutty, rich depth to the blondie base, elevating the classic candy bar flavor. It’s a simple step that makes a big difference!
Can I freeze these for later?
Yes! Wrap individual pieces tightly in plastic and store them in an airtight container. Thaw at room temperature for 30 minutes before serving.
What if my chocolate coating seizes or cracks?
Tempering chocolate slowly (using a double boiler or microwave in short bursts) prevents seizing. If it thickens, stir in a bit of coconut oil to smooth it out.
How long do these stay fresh?
Stored properly in a cool, dry place, they’ll keep for up to 2 weeks. For longer freshness, refrigerate for up to a month.
Can I skip the nougat layer to save time?
The nougat adds that iconic texture, but a marshmallow fluff shortcut works in a pinch. Just spread it thinly between the caramel and blondie layers.
What’s the best way to cut them cleanly?
Chill the bars first, then use a sharp knife dipped in hot water. Wipe the blade between cuts for neat, even slices.