The Easiest 3-Ingredient Chocolate Fudge Recipe (Never Fails!)
What’s the quickest way to satisfy your sweet tooth and show your skills at making delicious, sweet treats? How about executing a chocolate fudge recipe to perfection?
Our recipe requires just three ingredients and minimal effort, making it perfect for busy days, last-minute gifts, or whenever you need a chocolate fix.
In this article, we’ll walk you through the simple steps to make this mouthwatering Chocolate Fudge recipe that’s sure to become a favorite.
Ready?
Let’s do this!
Key Takeaways
- Requires only 3 common ingredients and basic kitchen tools
- Eliminates precise temperature monitoring
- Sets reliably in various humidity conditions
- Delivers smooth texture with clean cuts
- Customizable with optional add-ins
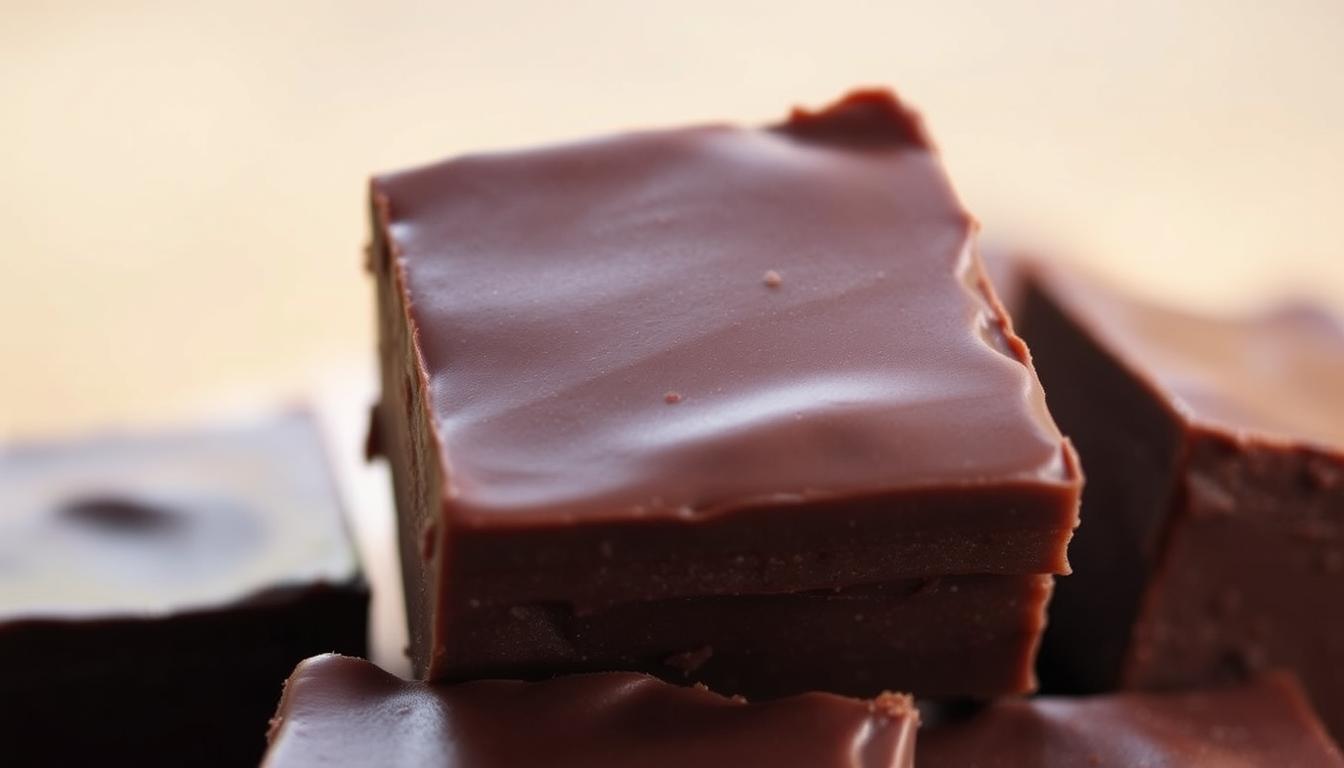
Easy 3-Ingredient Chocolate Fudge
Here’s an easy and delicious 3-Ingredient Chocolate Fudge recipe.
It’s perfect for beginners and will be ready in no time.
Ingredients:
- 4 tablespoons unsalted butter.
- 3 cups (510g) semi-sweet chocolate chips
- 1 (14 oz / 396g) can sweetened condensed milk
- 1 tsp pure vanilla extract (optional but recommended for flavor)
Instructions:
- Prepare the pan:
- Line an 8×8 inch (20×20 cm) square baking pan with parchment paper or aluminum foil. Lightly grease the lining to prevent sticking.
- Melt the ingredients:
- In a medium saucepan over low heat, combine the butter, chocolate chips and sweetened condensed milk.
- Stir constantly with a rubber spatula or wooden spoon until the chocolate is completely melted and the mixture is smooth. About 5–7 minutes.
- Add vanilla (optional):
- Remove from heat and stir in the vanilla extract, if using.
- Pour and chill:
- Pour the fudge mixture into the prepared pan and smooth the top with a spatula.
- Refrigerate for at least 2 hours or until fully set.
- Cut and serve:
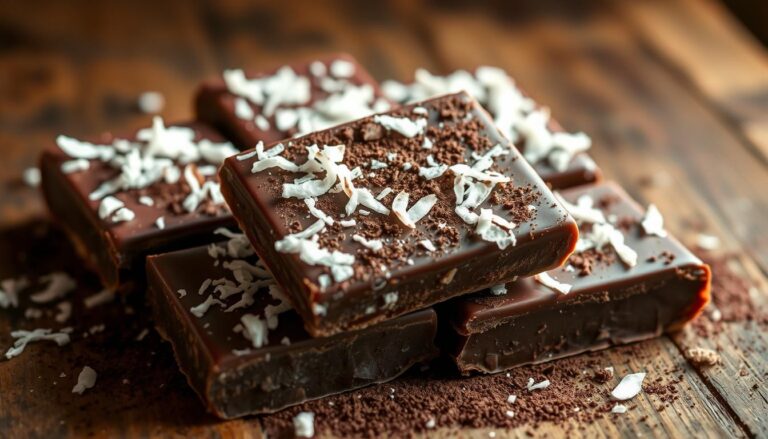
- Once firm, lift the fudge out of the pan using the parchment or foil edges.
- Cut into 1-inch squares and enjoy!
Storage:
- Store in an airtight container at room temperature for up to 1 week or in the fridge for 2–3 weeks.
Shop this Recipe
|
8 x 8-inch pan |
|
|
Medium saucepan |
|
|
Rubber spatula |
|
|
Airtight Container |
Note: Chocolate Candy Kitchen (CCK) actively partners up with reputable brands to promote useful, quality products.
Some or all of the above links may be affiliate links that generate a small revenue for CCK when you buy through them. Thanks you for supporting our blog.

Essential Ingredients & Utensils
Great treats start with smart choices. Your ingredient quality and tools directly impact how your creation turns out.
Let’s break down what works best and why.
Building Blocks of Success
Three components form the foundation of this dessert.
Sweetened condensed milk acts as the glue, providing creaminess and balanced sweetness.
Chocolate chips (milk, dark, or semi-sweet blends) deliver rich flavor depth.
Unsalted butter for moisture control and flavor enhancement.
| Ingredient | Role | Pro Tip |
|---|---|---|
| Chocolate chips | Flavor base | Mix types for complexity |
| Sweetened condensed milk | Texture binder | Use full-fat versions |
| Unsalted butter | Moisture control | Softened, not melted |
Your Kitchen Allies
Proper equipment prevents common frustrations.
A heavy saucepan distributes heat evenly, stopping scorching. Silicone spatulas scrape bowls clean, saving every bit of your mixture.
An 8-inch pan lined with parchment creates perfect slices.
| Tool | Purpose | Why It Matters |
|---|---|---|
| Heavy saucepan | Melting | Prevents hot spots |
| Silicone spatula | Mixing | Heat-resistant scraping |
| Square baking pan | Setting | Creates even layers |
Quality matters most with chocolate chips and butter. Premium brands melt smoother and offer better flavor payoff.
Cheap substitutes might save money but often lead to grainy textures or separation issues.
Preparing Your Workstation
A well-organized workspace is your secret weapon for flawless results.
Proper setup eliminates last-minute scrambling and ensures your creation releases cleanly from its mold.
Let’s transform your countertop into a stress-free zone.
Pan Preparation Essentials
Begin by selecting an 8-inch square baking dish.
Lightly grease the entire surface with softened butter using your fingertips or a pastry brush.
This creates a grip for the parchment paper while preventing stubborn sticking.
| Step | Traditional Prep | Modern Solution |
|---|---|---|
| Lining Material | Greased pan only | Buttered parchment + pan |
| Edge Handling | Trimmed edges | 2-inch overhangs |
| Release Success | 60% clean removal | 100% perfect lift-out |
Cut parchment paper slightly larger than your pan. Press it into the buttered surface, smoothing wrinkles with the side of your hand.
The overhanging edges act as handles later, like built-in lifting straps for your sweet creation.
Double-layer protection works best. Butter both the pan and parchment paper’s underside.
This dual coating stops even ultra-sticky mixtures from adhering. Your dessert will slide out smoothly after setting.
Assemble everything before heating ingredients. Once melted, the mixture thickens rapidly.
Having your lined pan ready means you can pour immediately for even spreading and professional edges.

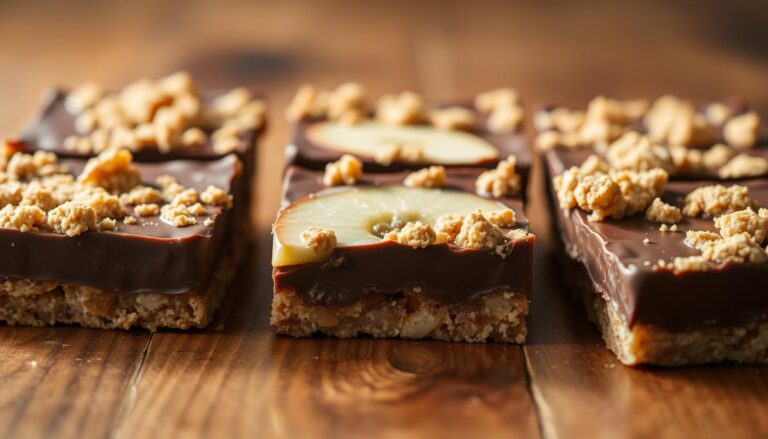
Variations and Flavor Tweaks
Your creativity takes center stage with this adaptable base.
Mix textures and tastes to match any occasion or craving. No advanced skills required.
Let’s unlock endless possibilities for personalizing your sweet creations.
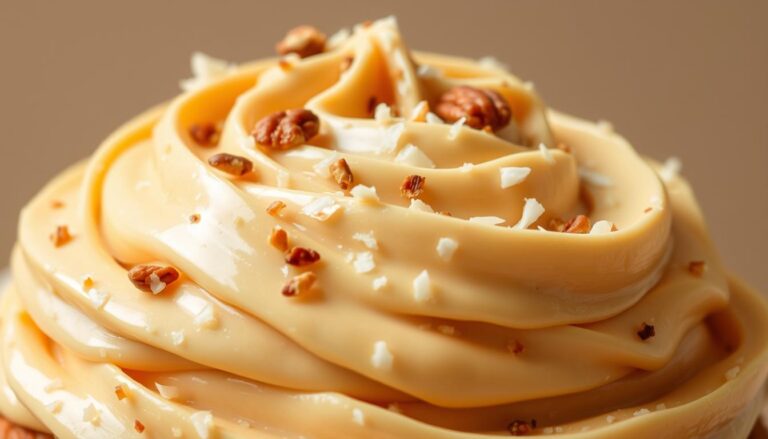
Add-ins, Toppings, and Nut Options
Crunchy walnuts or salty pistachios add delightful contrast to creamy textures. Stir in peanut butter chips for nutty richness or crushed peppermints for festive flair.
Mini marshmallows create playful pockets of chewiness, while cookie pieces offer buttery undertones.
Timing matters when adding extras.
Fold in nuts or candies right before pouring the mixture into your pan.
This prevents sinking and ensures even distribution. For toppings, press them gently into the surface after spreading, they’ll stay visible and crisp.
Experimenting With Vanilla, Peppermint, and Other Extracts
Swap vanilla extract for almond or orange to create new flavor dimensions.
A teaspoon of peppermint oil transforms your treat into a winter favorite.
Always use pure extracts rather than imitation versions as they pack more intense flavor without artificial aftertastes.
For layered tastes, combine extracts.
Try half vanilla and half coconut for tropical vibes.
If using citrus oils, add a pinch of zest to amplify freshness.
These tweaks turn simple squares into gourmet offerings that impress guests or elevate gift boxes.
Related article: Learn to make a peppermint bark for the holidays that will make Ghirardelli jealous.
Storage and Serving Suggestions
Keep your homemade sweets fresh and picture-perfect with smart storage solutions.
Proper techniques preserve texture while letting flavors shine through.
Follow these guidelines to enjoy your creation at its best, whether you’re savoring it yourself or sharing with others.
Room Temperature vs. Refrigeration Guidelines
For short-term enjoyment, store squares in an airtight container at room temperature.
Layer parchment paper between pieces to prevent sticking.
This method works best in cool, dry climates and keeps treats ready to serve for 7-14 days.
| Storage Method | Duration | Best For |
|---|---|---|
| Countertop | 1-2 weeks | Quick consumption |
| Refrigerated | 2-3 weeks | Humid areas |
| Frozen | 3 months | Long-term saving |
Refrigeration extends freshness up to three weeks. Use a sealed container to avoid absorbing other food odors.
Let chilled pieces sit at room temperature for 30 minutes before serving. This restores their creamy mouthfeel.
Troubleshooting & Expert Tips
Even simple desserts can have hiccups. Here’s how to fix them fast.
Whether your mixture won’t set or develops gritty spots, these solutions turn kitchen mishaps into learning moments.
Let’s tackle common snags and share insider tricks for flawless batches.
Common Issues and How to Fix Them
Sticky mixtures that refuse to firm up often need more cooking time.
If yours stays soft after cooling, gently reheat it with 1 teaspoon of cornstarch.
Grainy textures usually mean sugar crystals formed. Next time, avoid stirring once the mixture starts boiling.
| Issue | Cause | Fix |
|---|---|---|
| Too soft | Undercooked | Simmer 3 extra minutes |
| Rock-hard | Overheated | Add 1 tbsp cream |
| Grittiness | Over-stirring | Strain before setting |
Pro Tricks from Seasoned Candy Makers
Butter your saucepan’s sides before heating to prevent sugar buildup.
Never scrape the pan’s edges while pouring—those dried bits ruin smoothness.
At high altitudes, reduce cooking temperature by 2°F per 1,000 feet elevation.
| Technique | Benefit | When to Use |
|---|---|---|
| Butter rub | Prevents crystals | Before heating |
| Thermometer check | Ensures accuracy | Last 5 minutes |
| Altitude adjustment | Maintains texture | Over 3,000 feet |
Keep a candy thermometer handy for precision. If your batch still fails, melt it into ice cream topping or cake filling.
Every “mistake” becomes a new treat with these clever fixes!
The right way to impress friends and family.
You’ve just discovered the ultimate shortcut to impressive homemade candy.
This method proves that quality treats don’t require complicated steps or specialized tools.
With three basic items and minimal prep time, you’ll create silky squares that rival professional confections.
Whether you’re gifting them or enjoying them yourself, these sweets adapt to any occasion.
Swap in different extracts or mix-ins like toasted walnuts for personalized flair.
The base formula remains reliable. No candy thermometer or perfect kitchen conditions needed.
Store your creations in an airtight container at room temperature for up to two weeks.
For longer freshness, layer pieces with parchment paper and freeze them. Warm your knife slightly before slicing to achieve clean edges every time.
Slice it into squares, share with friends, or stash some for spontaneous sweet cravings.
Once you master this technique, you’ll never look at store-bought versions the same way again.
Want another treat with a fudgy spirit?
Then take a look at our recipe for Soft, Fudgy and Delicious Chocolate Crinkle Cookies.
FAQ
Can I use evaporated milk instead of sweetened condensed milk?
No—evaporated milk lacks the sugar content needed for the right texture. Stick to sweetened condensed milk for that creamy, firm consistency.
How long does homemade fudge stay fresh?
Store it in an airtight container at room temperature for up to two weeks. For longer freshness, refrigerate it for 3–4 weeks.
Why did my batch turn out grainy?
Graininess often happens if sugar crystals form. Stir gently while heating and avoid scraping the saucepan sides to prevent this issue.
Can I add nuts or other mix-ins?
Absolutely! Fold in chopped walnuts, pecans, or even crushed peppermint candies after heating for extra crunch or flavor.
Is a candy thermometer necessary?
While helpful, it’s optional here. The mixture just needs to reach a smooth, thick texture—about 3–4 minutes of steady stirring on medium heat.
Can I make this dairy-free?
Yes! Swap regular butter for plant-based versions and use dairy-free chocolate. Check that your sweetened condensed milk alternative has similar thickness.
What’s the best way to cut fudge neatly?
Let it cool completely, then use a sharp knife dipped in hot water. Wipe the blade clean between cuts for smooth edges.
How do I fix fudge that’s too soft?
Pop it in the fridge for 1–2 hours to firm up. If it’s still soft, gently reheat and add a bit more chocolate to thicken the mixture.
Can I freeze leftovers?
Yes! Wrap pieces tightly in parchment paper and store in a freezer-safe bag for up to 3 months. Thaw at room temperature before serving.
What’s the calorie count per serving?
One piece (about 1 inch square) averages 90–110 calories, depending on add-ins. For precise counts, measure ingredients and divide by your total servings.