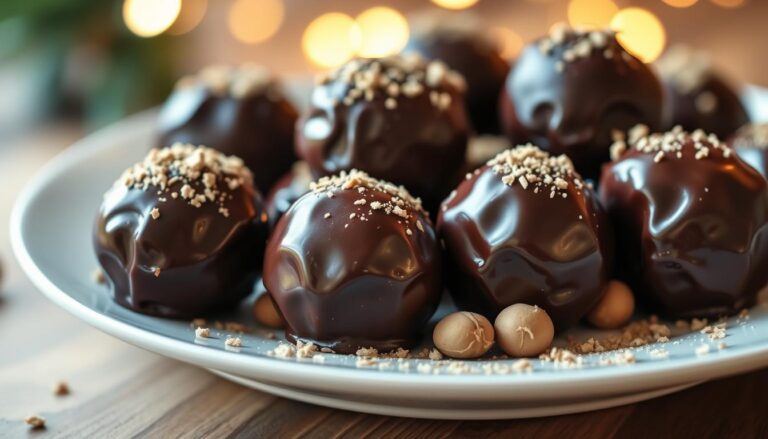
Chocolate Cake Ball “Drops” (The Perfect NYE Party Treat)
Want to serve a dessert that looks like it came from a professional bakery, but you made it yourself with almost no effort? Then check out these Cake Ball Drops.
This combines rich, moist texture with fun, festive appeal. It is the ultimate solution for your New Year’s Eve celebration.
You can prepare these stunning delights days in advance. In fact, this is the magic of these treats. They are perfect for busy hosts.
The process behind these decadent treats is simple, requiring just a few basic steps. Even beginner bakers can master it with confidence.
This means you get to wow your guests while also enjoying your own party.
Get ready to impress everyone and see your creation disappear from the dessert table first.
Key Takeaways
- Create stunning, professional-looking desserts with minimal effort.
- Perfect make-ahead option for stress-free party hosting.
- Simple steps are easy for bakers of all skill levels.
- Highly versatile for customizing flavors and decorations.
- Ideal bite-sized treat for large gatherings or intimate parties.
- Combines rich, decadent taste with a fun, festive presentation.
Recipe for Cake Ball Drops (Perfect for New Year’s Eve!)
Here is the recipe to make Cake Ball Drops. Simple, crowd-pleasing treats that are also perfect for your New Year’s Eve celebration.
Yield: 30–36 cake balls.
Ingredients
Cake Base
- 1 box (15.25 oz) cake mix — any flavor
- 3 large eggs (150 g total)
- 1/2 cup (120 ml) vegetable oil
- 1 cup (240 ml) water
Frosting
- 1/2 cup (113 g) unsalted butter, softened
- 1 1/2 cups (180 g) powdered sugar, sifted
- 2 tablespoons (12 g) unsweetened cocoa powder
- 1 teaspoon (5 ml) vanilla extract
- Pinch of salt
(Use the full batch. You will need 1/2–3/4 cup of frosting to bind the cake crumbs.)
Coating
- 2 cups (360 g) milk chocolate candy melts
- 2 cups (360 g) white chocolate candy melts
- 2 tablespoons (28 g) refined coconut oil (1 tbsp for each chocolate type)
Optional Decorations
- Sprinkles
- Edible glitter
- Crushed cookies
- Drizzled contrasting chocolate
Instructions
Bake the Cake
- Preheat oven to 350°F (175°C). Grease a 9×13-inch baking pan.
- In a large bowl, whisk together cake mix, eggs, oil, and water until smooth (about 1 minute).
- Pour into the prepared pan and bake for 25–30 minutes, or until a toothpick inserted comes out clean.
- Cool completely on a wire rack.
- Once cool, crumble the entire cake into fine crumbs using your hands.
Make the Frosting
- Beat the softened butter on medium-high speed for 2 minutes until creamy.
- Add powdered sugar, cocoa powder, and salt. Mix on low until combined.
- Add vanilla extract. Beat for 2 additional minutes until fluffy.
- Set aside.
Form the Cake Ball Dough
- Add 1/2 cup of the frosting to the cake crumbs.
- Mix with a spatula or your hands until the mixture resembles dough, soft and moist but not sticky.
- If too dry, add 1–2 tablespoons more frosting.
- Scoop and roll into 1-inch balls (about 30–36 pieces).
- Freeze the cake balls on a parchment-lined sheet for 15–20 minutes to firm up.
Prepare the Chocolate Coating
- Melt the milk chocolate candy melts in a heatproof bowl with 1 tablespoon coconut oil.
- Microwave in 20–30 second bursts, stirring between each interval, until smooth.
- Repeat with the white chocolate melts and remaining coconut oil.
- The oil thins the chocolate for smoother dipping.
Dip & Decorate
- Using a fork or dipping tool, submerge each chilled cake ball into melted chocolate.
- Tap off excess chocolate and place on parchment paper.
- Drizzle the opposite chocolate on top for a tuxedo look, or sprinkle decorations while wet.
- Let the coating set at room temperature or refrigerate for 10 minutes.
Serve & Store
- Store cake ball drops in an airtight container:
- Up to 5 days refrigerated
- Up to 2 months frozen (thaw in fridge before serving)

Introduction to Your Festive Cake Treat
Unlock the secret to creating bakery-worthy treats without turning on your oven this holiday season.
These delightful creations combine simplicity with elegant presentation.
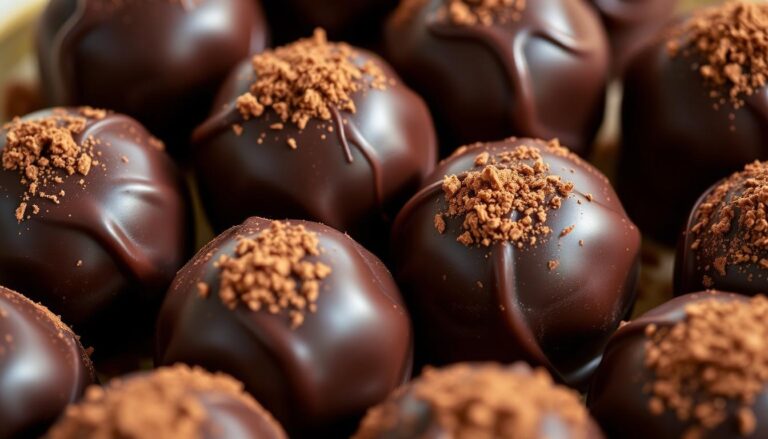
What Are Cake Ball Drops?
Imagine transforming baked goods into bite-sized spheres of deliciousness.
These treats begin with crumbled baked goods mixed with creamy frosting. The mixture becomes moldable and moist.
After rolling into uniform shapes, they get a smooth coating. This creates an irresistible combination of textures.
Some people call them cake pops when adding sticks.
Why They’re Perfect for NYE Celebrations
These creations become the perfect New Year’s Eve dessert.
Their name playfully nods to the iconic Times Square event. They’re easy to eat while mingling with guests.
You can prepare them days in advance. Simply display them when your party begins. Decorate with metallic sprinkles and edible glitter for festive flair.
Their crowd-pleasing nature ensures they’ll be the first to disappear from your dessert table.
Everyone enjoys the rich, sweet profile in perfect bite-sized portions.
Essential Components and Tools
The foundation of these decadent treats starts with quality ingredients and proper tools.
Having everything organized before you begin makes the process smooth and enjoyable.
Cake Mix, Frosting, and Key Add-ins
Your base begins with a reliable cake mix. Choose a premium brand like Devil’s Food or Betty Crocker for superior flavor.
The box requires standard additions like eggs, oil, and water.
For binding, you’ll need about one cup of frosting. Buttercream or cream cheese varieties work beautifully.
Add cocoa powder for extra richness if desired.
The coating calls for candy melts in your preferred colors. Milk and white varieties create classic contrast.
Keep coconut oil handy to thin the coating if needed.
Necessary Kitchen Equipment
Gather a 9×13-inch baking pan for your base.
You’ll need a mixer for combining ingredients efficiently. A large bowl accommodates the mixture comfortably.
Use a cookie scoop for uniform sizing. Baking sheets lined with parchment paper prevent sticking.
Microwave-safe bowls melt your coating perfectly.
For dipping, have forks or toothpicks ready. A dedicated melting pot maintains ideal consistency.
Don’t forget festive sprinkles for that New Year’s sparkle.

Preparation Steps and Handy Tips
The success of your festive treats hinges on two key preparation stages: creating the perfect crumble and mixing the binding ingredients.
Following these steps carefully ensures your mixture is ideal for shaping.
Mastering the Cake Crumble
Begin by preparing your base according to package directions. Pay close attention to the specific measurements for your brand.
After baking, let your creation cool completely on a wire rack.
This patience is crucial. A warm base will create a sticky, unworkable mixture. Once cool, break it down into fine crumbs.
Using a stand mixer with a paddle attachment makes this task quick and easy. You can also use an electric hand mixer or even your hands in a large bowl.
For the smoothest texture, a food processor works wonders.
Mixing Your Frosting and Extras
Now, add your binding agents to the crumbs.
For a rich flavor, incorporate room-temperature cream cheese, your chosen frosting, and cocoa powder.
Use a mixer on low speed to combine everything thoroughly. The goal is a moist mixture that holds together when pressed.
Start with about half the container of frosting. If the dough seems dry, add more one tablespoon at a time.
You will know the texture is perfect when you can form a ball that doesn’t crack. It should also not leave a sticky residue on your hands.
This balanced consistency is key for the next steps.

Flavor Variations and Decoration Ideas
The real joy of this recipe lies in making it uniquely yours with endless flavor and decoration possibilities.
You can easily tailor these delightful pops to match any party theme or personal taste.
This flexibility is what makes them a perfect treat for any occasion. Let your imagination run wild.
Flavor Experiments and Cake Mix Alternatives
Swapping the base mix opens up a world of delicious options. For any variation beyond the original, simply omit the cream cheese and cocoa powder.
You might need to adjust the amount of frosting to get the perfect, moldable consistency. A classic vanilla or birthday cake version is always a crowd-pleaser.
Fold colorful sprinkles right into the mixture for a fun confetti effect. Fruit flavors like strawberry or lemon offer a refreshing twist.
For indulgent treats, consider combinations like double chocolate or a cookies-and-cream style. The table below highlights some popular flavor ideas to get you started.
| Flavor Theme | Base Mix | Frosting & Mix-ins |
|---|---|---|
| Classic Birthday | Vanilla | Vanilla frosting, rainbow sprinkles |
| Zesty Citrus | Lemon | Lemon frosting, white chocolate chips |
| Seasonal Spice | Spice Cake | Cream cheese frosting, chopped pecans |
| Decadent Delight | Red Velvet | Cream cheese frosting, white chocolate coating |
Creative Toppings and Festive Finishing Touches
The final decorations are where your pops truly shine. A simple drizzle of contrasting melted candy coating creates an elegant look.
White chocolate drizzled over a dark coating is particularly stunning. Sprinkles are a quick and easy way to add color and sparkle.
For New Year’s Eve, focus on metallic gold and silver sprinkles or edible glitter. You can also add texture with chopped nuts, toffee bits, or shredded coconut.
A tiny pinch of sea salt on top can elevate the flavor profile beautifully. These finishing touches make your creations unforgettable.
Storage, Freezing, and Make-Ahead Tips
Planning your party desserts in advance is a game-changer for a stress-free celebration.
This recipe offers incredible flexibility, allowing you to prepare key components days or even weeks before your event.
Understanding the best storage methods ensures your creations stay fresh and delicious.
How to Keep Your Cake Balls Fresh
Your mixture of baked good and frosting can be refrigerated for up to three days. Simply cover the bowl tightly with plastic wrap. This gives you a great head start.
For long-term planning, shape the mixture into spheres and freeze them without any coating.
They will keep perfectly in a freezer-safe container for two to three months.
When you are ready to finish them, let the frozen spheres sit at room temperature for about fifteen minutes.
This brief thawing time prevents the coating from cracking later.
Once fully coated, do not refreeze the finished treats. Instead, store them in an airtight container.
At room temperature, they remain fresh for five to seven days.
For even longer freshness, up to ten days, keep the sealed container in the refrigerator. Let them sit out for fifteen to twenty minutes before serving for the best texture.
This make-ahead approach makes this recipe a true lifesaver during the busy holiday season.
New Year’s Eve Magic: Turning Treats into Party Hits
Elevate your dessert table into a dazzling focal point that captures the excitement of the New Year’s countdown.
The final presentation is where your creations truly become the star of the celebration.
A thoughtful display makes your effort shine. It turns simple sweets into memorable party hits.
Using Silver, Gold, and Sparkle for Festivity
Metallic decorations are key for a glamorous look. Apply gold and silver sprinkles while the coating is still wet for the best adhesion.
About one-quarter cup of mixed glitter creates an instant festive effect. It sparkles beautifully under party lights.
This easy step transforms your pops into elegant centerpieces. They perfectly match the midnight celebration theme.
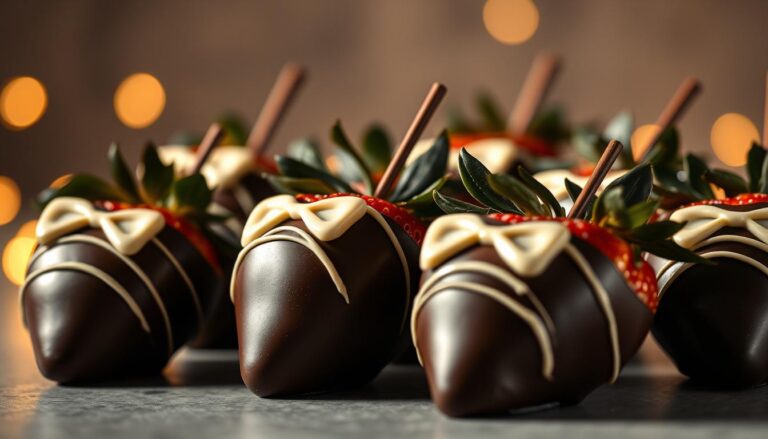
Related: Learn to make our white chocolate-dipped cherries with edible gold!
Serving Ideas to Impress Your Guests
Creative presentation makes your dessert station unforgettable. Consider these stylish ways to display your treats.
Each option offers a unique way to wow your crowd. They combine beauty with practical serving.
| Presentation Style | Key Elements | Best For |
|---|---|---|
| Tiered Display | Stand surrounded by champagne flutes and party horns | Creating an Instagram-worthy focal point |
| Pop Bouquet | Sticks arranged in a foam block covered with metallic fabric | Serving as both dessert and elegant table decoration |
| Grab-and-Go Station | Elegant platters with flavor labels | Mingling guests who want a quick, neat treat |
Plan your timing so these delights are ready an hour before guests arrive. This gives you time for a beautiful setup.
The portion-controlled format helps everyone manage their sugar intake. It’s a fun way for all ages to enjoy the celebration.
Your impressive display will be a conversation starter. It ties directly into the iconic ball drop tradition.
Party Treats for Welcoming the New Year.
As you prepare to welcome the new year, you now possess all the knowledge to create unforgettable party treats.
This guide has walked you through every step of crafting impressive desserts that will dazzle your guests.
The make-ahead nature of this recipe means you can enjoy your celebration stress-free.
You’ll have more time to mingle while your beautiful creations speak for themselves. The customization options let you tailor these sweets to any taste or theme.
Whether you’re new to baking or have years of experience, this approach ensures success.
Gather your ingredients and embrace the joy of creating something special.
Your New Year’s Eve celebration deserves a sweet finale that everyone will remember fondly.
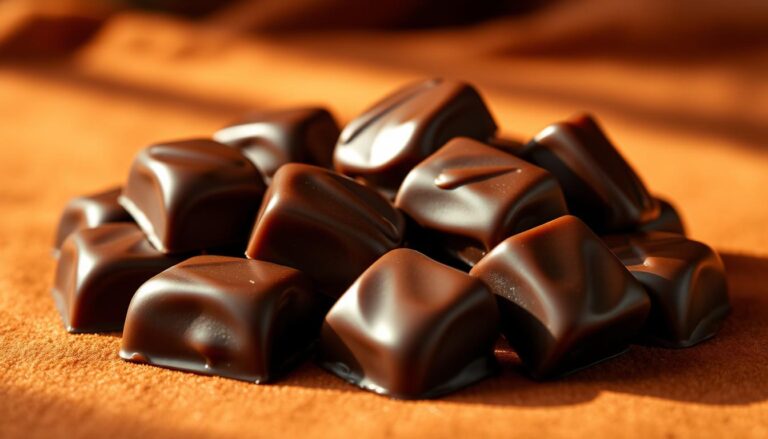
Need a last-minute sweet treat to save your New Year’s Eve party?
Not to worry. Take a look at our recipe to make Chocolate Bark with Pretzels and Caramel. It’s a real lifesaver.
FAQ
Can I make these cake ball drops ahead of time?
Absolutely! These are a fantastic make-ahead treat. You can store them in an airtight container in the refrigerator for up to a week. For longer storage, freeze them on a baking sheet, then transfer to a freezer bag for up to three months.
What kind of frosting works best for this recipe?
A thicker, cream cheese or buttercream frosting is ideal. It helps bind the cake crumbs without making the mixture too wet. Avoid using whipped or light frostings, as they can make the mixture sticky and difficult to roll.
My candy coating is too thick. How can I thin it out?
A great trick is to add a tiny amount of paramount crystals or a teaspoon of vegetable oil to the melted candy melts. Stir it in gently. This will help create a smoother, more dippable consistency for a perfect finish.
Do I have to use a boxed mix for the cake?
Not at all! While a boxed mix is super convenient, you can absolutely use your favorite homemade cake recipe. Just bake it, let it cool completely, and then crumble it up to use in the recipe. It’s a wonderful way to use up leftover baked goods.
How can I prevent the cake balls from cracking when I dip them?
The key is temperature. Make sure your chilled treats aren’t too cold when they go into the warm coating. Let them sit at room temperature for about 5-10 minutes before dipping. Also, ensure your candy melts are fully melted and smooth.
What are some fun flavor variations I can try?
The possibilities are endless! Try a lemon cake with vanilla frosting, or a red velvet mix with cream cheese frosting. You can even add a tablespoon of peanut butter or a splash of mint extract to the mixture for a unique twist.