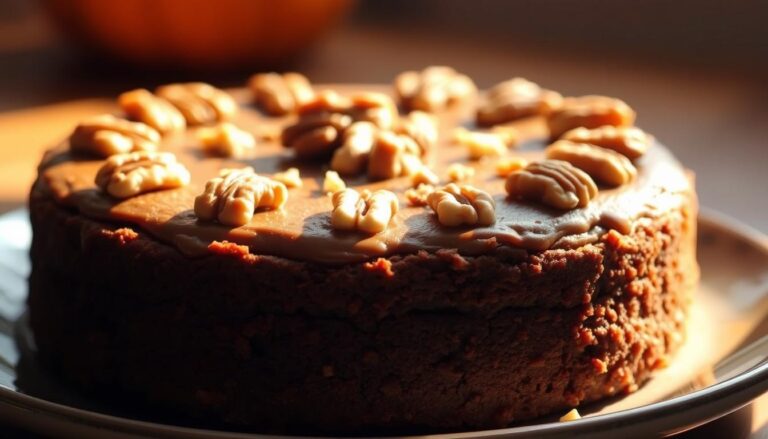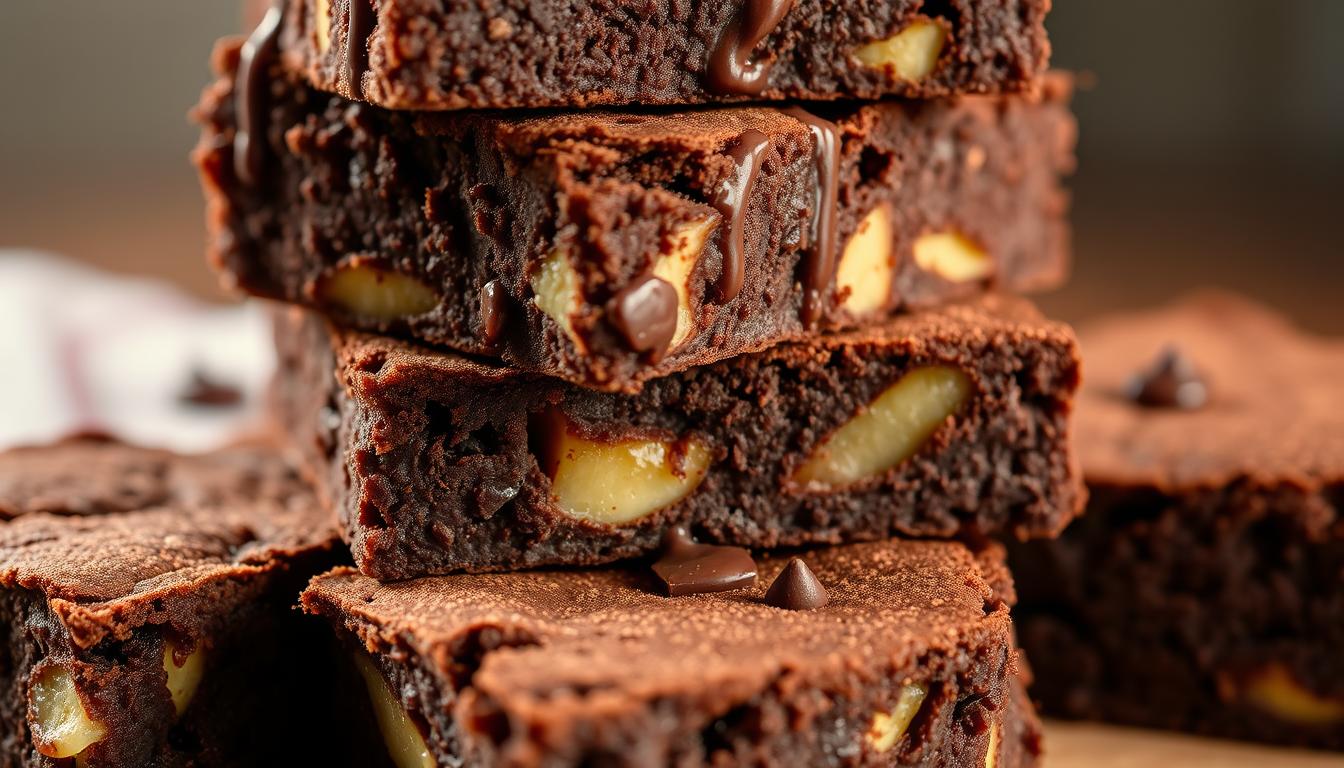
The Ultimate Chocolate Apple Brownies (Chewy & Fudgy)
Are you in the mood for a fall season twist on a classic dessert? Then you need to check out our Chocolate Apple Brownies recipe.
This recipe transforms classic desserts into something extraordinary, combining earthy sweetness with a subtle tang.
Every bite offers soft, chewy perfection, thanks to fresh ingredients that lock in moisture naturally.
These baked delights balance deep, velvety flavors with bright, crisp notes for a taste that’s both cozy and refreshing.
They’re ideal for pairing with your morning coffee or as an afternoon pick-me-up.
So, ready to explore how seasonal produce can elevate timeless recipes into crowd-pleasing masterpieces?
Let’s go!
Key Takeaways
- Combines rich cocoa flavors with fresh fruit for a balanced sweet-tart taste.
- Achieves a moist, fudgy texture through natural ingredients.
- Pairs perfectly with coffee or milk for versatile snacking.
- Features warm spices to enhance seasonal appeal.
- Offers an easy-to-make upgrade to classic dessert recipes.
🍫🍎 Chocolate Apple Brownies
Here’s the recipe to make delightful Chocolate Apple Brownies that are chewy, fudgy, and perfect for the fall season.
Yields: 9 large brownies or 16 small ones.
Ingredients
- 1 cup (125 g) all-purpose flour
- ½ cup (45 g) unsweetened cocoa powder
- ½ tsp baking powder
- ¼ tsp baking soda
- ½ tsp salt
- ½ tsp ground cinnamon
- ¼ tsp ground nutmeg
- ½ cup (115 g) unsalted butter, melted
- 1 cup (200 g) granulated sugar
- ½ cup (100 g) packed light brown sugar
- 2 large eggs (room temperature)
- 1 tsp pure vanilla extract
- 1 cup (120 g) finely grated apple (peeled, excess juice blotted with a paper towel; about 1 medium apple)
- ½ cup (90 g) semi-sweet chocolate chips (optional, for extra fudginess)
Instructions
- Prep the pan: Preheat oven to 350°F (175°C). Line an 8×8-inch (20×20 cm) baking pan with parchment paper, leaving an overhang for easy lifting. Lightly grease.
- Mix dry ingredients: In a medium bowl, whisk together the flour, cocoa powder, baking powder, baking soda, salt, cinnamon, and nutmeg. Set aside.
- Combine wet ingredients: In a large bowl, whisk the melted butter, granulated sugar, and brown sugar until smooth. Add the eggs and vanilla extract; whisk until glossy and well combined.
- Fold in apple: Gently fold in the grated apple (make sure it’s blotted to remove excess moisture).
- Make the batter: Add the dry ingredients into the wet mixture and fold until just combined (do not overmix). Stir in the chocolate chips if using.
- Bake: Spread batter evenly into prepared pan. Bake for 28–32 minutes, or until a toothpick inserted in the center comes out with moist fudgy crumbs (not clean).
- Cool and serve: Allow brownies to cool completely in the pan on a wire rack. Lift out using parchment overhang, cut into squares, and enjoy chewy, fudgy, fall-spiced goodness!

Introduction to Fall Season Brownies
Your kitchen will soon smell like a bakery with this easy-to-follow guide.
Perfect for first-timers and seasoned bakers alike, the method skips complex steps while delivering professional results.
Just grab your mixing bowl and let’s create magic.
What makes this treat stand out? Fresh ingredients work together to create layers of flavor.
Think cinnamon-kissed fruit pieces nestled in a fudgy base. The batter comes together in one bowl, saving time and cleanup.
| Occasion | Serving Idea | Prep Time |
|---|---|---|
| Potluck Dinner | Cut into squares & serve on a platter | 15 mins |
| Holiday Gathering | Pair with vanilla ice cream | 20 mins |
| Weeknight Treat | Warm slices with caramel drizzle | 10 mins |
Love personal touches? Fold in walnuts for crunch or swap spices to match your mood.
The recipe scales effortlessly for large groups, leaving leftovers that stay moist for days.
Pro tip: Double the batch and freeze half for surprise guests.
Whether you’re hosting friends or craving something sweet, this dessert adapts to any situation.
That’s the beauty of using seasonal produce. It brings warmth to every bite without fancy techniques.
Understanding the Key Ingredients
Great recipes start with smart ingredient choices.
The right components elevate flavors and textures while simplifying the baking process.
Let’s break down what makes these treats unforgettable.
Role of Apples: Granny Smith and Beyond
Firm, tart apples like Granny Smith shine here.
Their zesty flavor cuts through sweetness, creating balance in every bite.
Natural juices keep the texture moist without making it soggy.
| Apple Variety | Flavor Profile | Texture After Baking |
|---|---|---|
| Granny Smith | Tangy & Bright | Holds Shape |
| Honeycrisp | Sweet-Tart | Slightly Soft |
| Pink Lady | Mildly Sweet | Firm Bite |
Can’t find green apples? Try Braeburn or Jonagold.
These varieties maintain structure during baking while adding subtle sweetness.
Always pick fruits that feel heavy for their size since that means there is more juice in them.
The Importance of Quality Chocolate and Cocoa
Rich cocoa powder forms the flavor foundation. Opt for Dutch-processed varieties as their deep color and smooth taste blend beautifully with fruit notes.
For extra indulgence, fold in chopped dark chocolate chunks.
Cheap cocoa can taste bitter or chalky. Look for products with 70%+ cacao content.
This ensures your dessert stays luxuriously fudgy without overpowering the apple’s freshness.

Preparing Your Ingredients and Equipment
Setting up your workspace correctly makes baking smoother and more enjoyable. Gather everything you need before starting to avoid mid-process surprises.
This approach ensures better focus and consistent results every time.
Essential Tools for a Successful Bake
A large mixing bowl and electric mixer create the ideal base for your batter. Choose between a 9×13-inch pan for thinner slices or an 8×8 dish for thicker, fudgier results.
Don’t forget parchment paper. It prevents sticking without extra grease.
| Pan Size | Serving Style | Bake Time | Texture |
|---|---|---|---|
| 9×13-inch | Party Portions | 25-28 mins | Chewy Edges |
| 8×8-inch | Dessert Squares | 30-33 mins | Fudgy Center |
Measuring Ingredients for Perfect Consistency
Use dry measuring cups for flour and cocoa to prevent dense results. Level them with a knife for accuracy.
Liquid ingredients like melted butter need clear liquid cups. Pour to the marked line.
Room-temperature eggs blend easier into the batter. If you forgot to take them out early, place cold eggs in warm water for 5 minutes.
Keep your rubber spatula handy for scraping the bowl thoroughly.
Preheat your oven to 350°F while prepping ingredients.
This ensures even baking from the first minute. Lightly grease your chosen pan or line it with parchment for stress-free removal later.

Mixing Wet and Dry Components Effectively
Mastering the blend of wet and dry ingredients transforms good desserts into great ones.
Proper technique ensures balanced flavors and ideal texture.
Let’s break down the steps that make your batter smooth and your results consistent.
Creaming Butter and Sugar for a Fluffy Base
Start by beating softened butter and sugar until pale and airy. This traps tiny bubbles that expand during baking, creating a tender crumb.
Use an electric mixer on medium speed for 3-4 minutes. You’ll notice the mixture lighten in color.
Add eggs one at a time, blending fully after each addition. This prevents the batter from splitting and builds structure.
Scrape the sides of the bowl to incorporate every bit for uniform texture.
Combining Dry Ingredients: Flour, Baking Powder, and Cocoa
Whisk flour, cocoa powder, baking powder, and salt in a separate bowl.
This distributes leavening agents evenly, avoiding bitter pockets. Sifting helps eliminate lumps for silky-smooth batter.
| Mixing Method | Purpose | Common Mistakes |
|---|---|---|
| Creaming | Incorporates air | Undermixing (dense texture) |
| Folding | Preserves air bubbles | Overmixing (tough results) |
| Whisking Dry | Even distribution | Skipping sifting (clumpy batter) |
Gradually mix dry ingredients into wet components.
Stir just until no flour streaks remain as overworking develops gluten, leading to chewiness instead of fudginess.
A few small lumps are okay. They’ll vanish during baking.
The Baking Process
Perfecting your bake starts with precise timing and preparation.
This stage determines whether you’ll achieve that dreamy fudginess or a satisfying chew.
Follow these steps to lock in moisture while creating a tender crumb structure.
Preheating the Oven and Setting Up Your Pan
Begin by heating your oven to 350°F.
A fully preheated oven ensures even heat distribution from edge to center. Lightly grease your baking dish or line it with parchment paper for effortless removal later.
| Bake Time (Minutes) | Texture | Toothpick Test |
|---|---|---|
| 30 | Ultra-Fudgy | Moist crumbs cling |
| 35-40 | Chewy | Few sticky bits |
| 45 | Cake-Like | Comes out clean |
Timing Your Bake for Chewy and Fudgy Texture
Pour the batter into your prepared pan, smoothing it into corners for uniform thickness.
Start checking doneness at 30 minutes. Ovens vary, so peek through the window first. Adjust timing by 2-3 minutes based on the performance of your appliance (its quirks sort of speak).
For gooey centers, pull the dish out when the edges look set but the middle jiggles slightly.
Let it cool completely before slicing. This rest period lets residual heat finish the job without overcooking.
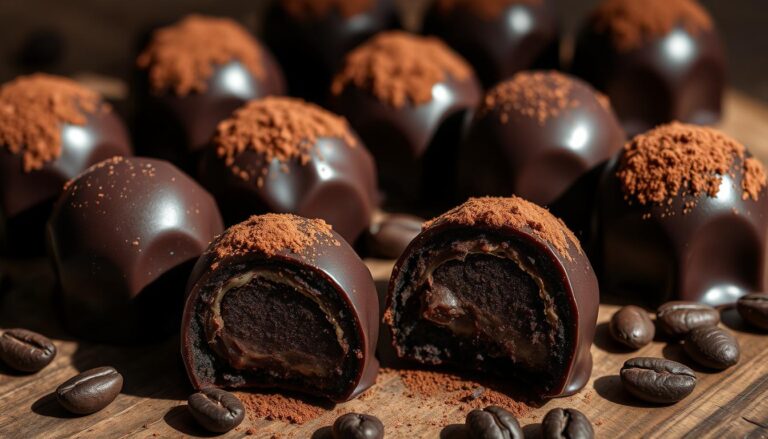
No oven or baking skills? Check out our no-bake Chocolate Pumpkin Oreo Balls recipe. They are easy to make and children love them.
Mastering the Chocolate Apple Brownies
Creating the ultimate treat requires balancing science and intuition.
The magic happens when minimal leavening agents meet rich fats, creating dense squares that melt in your mouth.
Unlike cakey desserts, these rely on cocoa’s natural structure and butter’s creaminess for that signature fudge-like bite.
Fresh fruit chunks add brightness but demand careful measurement.
Use 1½ cups diced pieces, enough for flavor bursts without drowning the batter. Overloading releases excess juice, turning your creation from chewy to mushy.
| Apple Quantity | Texture Result | Moisture Level |
|---|---|---|
| 1 cup | Dense & Firm | Balanced |
| 2 cups | Cake-Like | High |
| ½ cup | Dry Crumb | Low |
Visible fruit pieces create exciting texture contrasts.
Fold them in gently during the final mix to maintain their shape.
Watch for golden edges pulling slightly from the pan. That’s your cue to remove them while centers still jiggle.
Letting treats cool completely allows internal carryover cooking. This stops the bake at peak fudginess.
Slice too soon, and you’ll lose those clean, sharp edges everyone loves.
Flavor Enhancements and Customizations
Transform your baked creations from simple to spectacular with smart mix-ins and toppings.
Personal touches let you tailor each batch to match your taste preferences or event theme.
Whether you crave extra crunch or creamy sweetness, these ideas add dimension without complicating the process.
Incorporating Spices and Nuts for Extra Crunch
Toast chopped walnuts or pecans before folding them into the batter for deeper flavor.
The heat activates natural oils, making nuts crispier during baking.
Spice swaps like apple pie blend or pumpkin spice introduce warm aromas that pair beautifully with fruit pieces.
| Add-In | Flavor Profile | Recommended Quantity |
|---|---|---|
| Toasted Walnuts | Earthy, Rich | ½ cup |
| Pumpkin Spice | Warm, Aromatic | 1½ teaspoons |
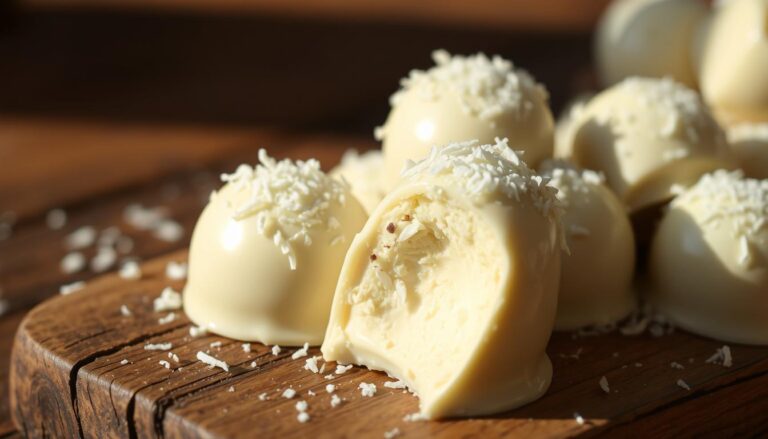
| White Chocolate | Creamy Sweet | ¾ cup chunks |
Optional Additions: Ice Cream and Powdered Sugar Toppings
Dust cooled squares with powdered sugar for a snowy finish that contrasts with dark cocoa tones.
Serve warm portions à la mode. The cold cream melts into gooey crevices for ultimate indulgence.
Drizzles like caramel or chocolate sauce turn everyday treats into celebration-worthy desserts.
Experiment with combinations to discover your signature twist.
These upgrades keep the base recipe intact while offering endless ways to delight different palates.
The Role of Baking Powder and Flour in Texture
The secret to perfect texture lies in your dry ingredients.
Each component plays a specific role in creating that ideal balance between fudgy and structured.
Let’s break down how these pantry staples work together.
How Each Dry Ingredient Influences the Final Bite
Baking powder acts like a tiny elevator in your batter. It creates gentle lift without making your treats cakey.
Use just half a tsp of baking powder since too much causes uneven rising or bitter aftertastes.
Flour choice changes everything. All-purpose flour gives tender results, while whole wheat adds hearty density.
For chewier outcomes, reduce flour slightly. More flour means cake-like firmness.
| Flour Type | Texture Result | Best For |
|---|---|---|
| All-Purpose | Soft & Tender | Classic Fudginess |
| Whole Wheat | Dense & Nutty | Hearty Bites |
| Bread Flour | Chewy Structure | Artisan-Style |
Always sift cocoa with flour. This prevents clumps and distributes leavening agents evenly.
Your batter stays smooth, and every slice bakes uniformly.
Remember: Small adjustments create big changes.
Swap flours or tweak measurements to match your texture goals. With practice, you’ll nail your preferred consistency every time.
Storage and Freezing Guidelines
Keep your baked goods tasting fresh long after they cool with smart storage strategies.
Proper preservation locks in moisture while preventing flavor loss, ensuring every bite stays as delightful as day one.
Whether you’re saving leftovers or prepping ahead, these methods protect texture and taste.
Refrigeration Tips for Maintaining Freshness
Store cooled portions in airtight containers lined with parchment paper. This prevents condensation from making edges soggy.
For best results, separate layers with wax paper to maintain individual square integrity.
Fruit-infused desserts stay fresh in the fridge for up to five days.
For reheating, microwave chilled squares for 10 seconds to revive fudgy texture. Avoid stacking warm slices because they’ll stick together and lose shape.
Freeze extras for future cravings by wrapping them tightly in plastic wrap.
Slide wrapped pieces into freezer bags, pressing out excess air. Thaw frozen servings overnight in the fridge or at room temperature for two hours.
Label packages with dates to track freshness. Frozen treats retain optimal quality for three months.
Enjoy them chilled or briefly warmed. The chocolatey flavor deepens beautifully either way.
Ok, now you know how to make these delicious brownies.
Are you ready to take on a new challenge?
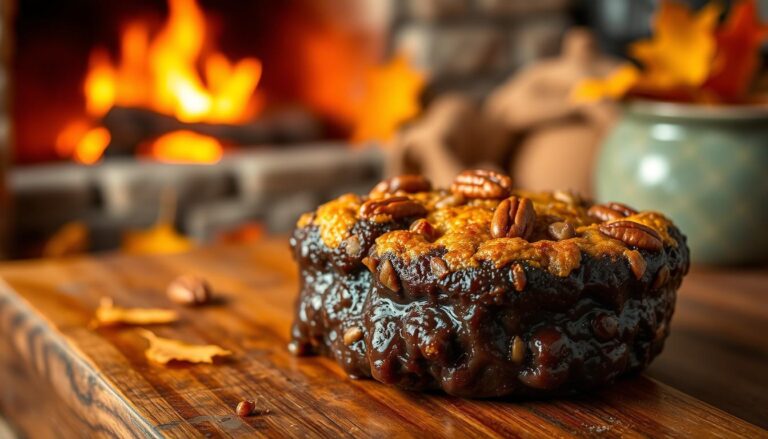
Then take a look at our Chocolate Pumpkin Dump Cake with Roasted Walnuts recipe.
FAQ
Can I use another apple variety if I don’t have Granny Smith?
Yes! Tart apples work best, but Honeycrisp or Braeburn also add sweetness. Avoid overly soft types like Red Delicious for better texture.
Why is baking powder important in this recipe?
It helps the batter rise slightly, balancing chewiness with a tender crumb. Too much can make them cakey, so measure carefully.
How do I store leftovers to keep them fresh?
Place cooled pieces in an airtight container at room temperature for up to 3 days. For longer storage, refrigerate or freeze slices wrapped in foil.
Can I swap cocoa powder for melted chocolate?
Cocoa provides intense flavor without added fat. If using melted chocolate, reduce butter by 2 tbsp to avoid a greasy texture.
How do I prevent the edges from overcooking?
Check doneness 5 minutes early. If edges darken too fast, cover the pan with foil and finish baking until the center sets.
Are walnuts necessary for crunch?
Nuts are optional! For a nut-free version, try toasted oats or omit them. The diced fruit already adds moisture and subtle texture.
Can I freeze these for later?
Absolutely! Slice them, wrap tightly in plastic, and freeze for up to 2 months. Thaw at room temperature before serving.
What’s the purpose of sifting dry ingredients?
Sifting prevents clumps in the batter, ensuring even mixing. It also aerates the flour and cocoa for a lighter final result.