Brownie Brittle for a Thanksgiving Snack Tray
Want to add original treats and desserts to your Thanksgiving snack tray this year? Then check out our brownie brittle recipe.
Imagine a dessert that combines crispy edges with deep chocolate flavor, turning every bite into a textural adventure.
This fall, elevate your holiday spread with a treat born from clever baking innovation.
Perfect for snack trays or dessert tables, it offers a modern twist on classic flavors without complicated steps.
This treat delivers the rich taste of traditional desserts but with an addictive crunch.
The technique maximizes surface area, ensuring every piece has that golden-edge texture guests adore.
Pair it with seasonal fruits or serve solo. Either way, it’ll disappear fast.
Ready to add this snack to your table?
Let’s do it then.
Key Takeaways
- Invented in 1992, this crispy dessert started as a solution to craving more brownie edges.
- Uses simple ingredients like chocolate and sugar for easy holiday prep.
- Adds satisfying crunch to traditional Thanksgiving dessert spreads.
- Thin baking method creates maximum crispy surface area.
- Popularized through major retailers like Costco.
- Perfect for guests who prefer texture over dense fudgy treats.
🍂 Recipe for Brownie Brittle with Fall Nuts, Toffee & Spices
Here’s the recipe for Brownie Brittle with Fall Nuts, Toffee & Spice. This is a crispy, chocolatey treat perfect for a Thanksgiving snack tray.
Ingredients
Dry Ingredients:
- 1 cup (125 g) all-purpose flour
- ½ cup (45 g) unsweetened cocoa powder
- ¼ teaspoon fine sea salt
- ½ teaspoon ground cinnamon
- ¼ teaspoon pumpkin pie spice
- ½ teaspoon baking soda
Wet Ingredients:
- ¾ cup (150 g) granulated sugar
- ¼ cup (55 g) packed light brown sugar
- ⅓ cup (80 mL) vegetable oil (or melted unsalted butter)
- 1 large egg white, room temperature
- 1 teaspoon pure vanilla extract
- 2 tablespoons (30 mL) water
Mix-ins and Toppings:
- ¼ cup (40 g) semi-sweet chocolate chips
- ¼ cup (40 g) dark chocolate chips
- ¼ cup (40 g) milk chocolate chips
- ¼ cup (30 g) chopped pecans or walnuts
- ¼ cup (30 g) toffee bits
Instructions
- Preheat Oven & Prep Pan
Preheat oven to 325°F (160°C).
Line a large baking sheet (13×18 inch) with parchment paper or a silicone mat. Lightly spray with nonstick baking spray. - Mix Dry Ingredients
In a medium bowl, whisk together flour, cocoa powder, salt, cinnamon, pumpkin pie spice, and baking soda until evenly combined. - Combine Wet Ingredients
In a large bowl, whisk together granulated sugar, brown sugar, oil, egg white, vanilla, and water until smooth and glossy. - Blend Batter
Add the dry ingredients into the wet mixture and stir until a thick, glossy batter forms.
Fold in half of the chocolate chips (a mix of milk, dark, and semi-sweet). - Spread Thinly
Pour batter onto prepared pan and spread very thinly (⅛ inch thick) with an offset spatula.
The thinner the layer, the crispier the brittle will bake. - Add Toppings
Sprinkle evenly with the remaining chocolate chips, chopped pecans or walnuts, and toffee bits. Press lightly into the surface. - Bake to Crisp
Bake for 20–25 minutes, or until edges are set and the surface looks dry and shiny.
Turn off the oven and let the pan sit inside for 5 more minutes for extra crispness. - Cool & Break Apart
Let the brittle cool completely on the pan (it will crisp up as it cools).
Once firm, break into irregular pieces.
Tips for Perfect Crispness
- Spreading too thick = chewy, not brittle. Aim for paper-thin layers.
- For extra snap, bake 2–3 minutes longer and let cool in the turned-off oven with the door slightly ajar.
- Store in an airtight container at room temperature for up to 7 days.
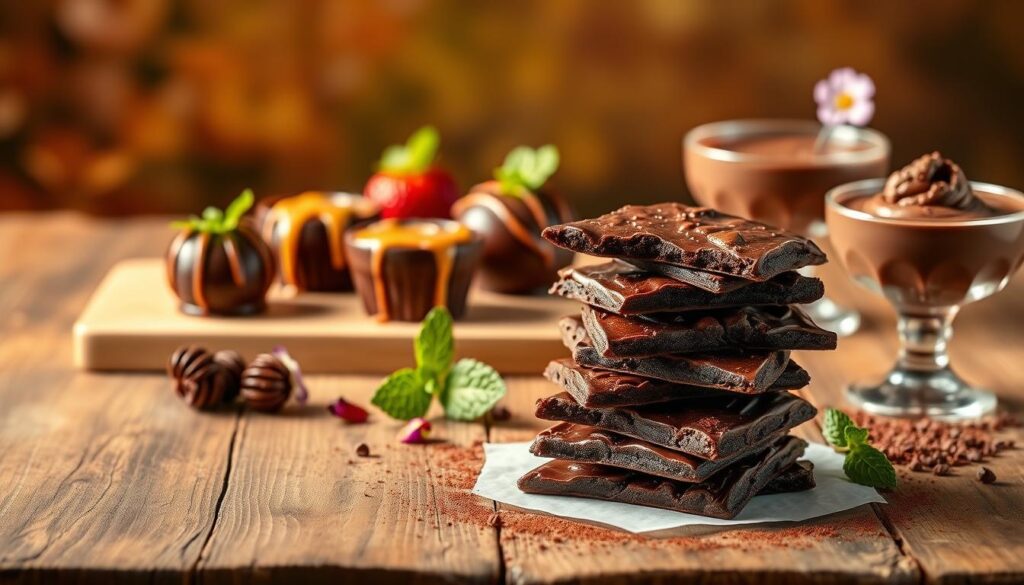
Recipe Inspiration & Fall Flavors
Fall festivities call for desserts that blend crunch and warmth, so enter a customizable treat ready to impress.
This crispy chocolate creation adapts effortlessly to autumn’s harvest, letting you weave seasonal flair into every shard.
The secret lies in balancing rich cocoa with mix-ins that evoke cozy gatherings.
Why This Treat Complements Your Thanksgiving Tray
It’s the textural hero your dessert spread needs. While pies and cakes dominate with softness, this snack offers satisfying contrast.
Guests can nibble freely without plates, making it ideal for mingling. Plus, it stays fresh for days, freeing up oven space for turkey day.
Pair shards with hot cider or coffee to highlight cocoa’s richness.
Whether displayed on a rustic board or stacked in jars, it becomes a conversation starter that balances tradition and novelty.

Essential Kitchen Tools & Ingredient Insights
The right tools transform baking experiments into consistent successes.
For this crispy chocolate creation, your equipment choices directly impact texture and ease.
Let’s explore the gear that guarantees golden results every time.
Must-Have Tools: Oven, Parchment Paper, & Pizza Cutter
Your sheet pan becomes the canvas for crunch. A 13×18-inch pan provides enough space to spread batter paper-thin.
Always line it with parchment paper as this non-stick surface prevents sticking and simplifies cleanup.
An offset spatula works magic for achieving uniform thickness. Its angled blade lets you smooth batter without lifting or tearing.
For cutting, a pizza cutter creates clean lines while the dessert is still warm and pliable.
When selecting ingredients, Dutch-process cocoa powder delivers intense chocolate flavor without bitterness.
Use fresh eggs at room temperature for optimal volume. Measure flour and cocoa by weight when possible since packed cups can throw off ratios.
Keep these tips in mind:
- Silpat mats offer reusable alternatives to parchment paper.
- Neutral oils let chocolate flavors shine.
- Bench knives rescue pieces stuck to the pan.
Creative Ways to Enjoy Your Brownie Brittle
Transform your holiday desserts into textural masterpieces with these inventive serving ideas.
This crispy chocolate creation shines brightest when paired with complementary flavors and creative presentations.
Let’s explore how to maximize its versatility.
Serving Suggestions: From Snack Tray to Ice Cream Topper
Crush your chocolate crisps into bite-sized pieces for instant dessert upgrades.
Sprinkle them over pumpkin spice ice cream for crunch contrast or layer with yogurt in parfait glasses.
At room temperature, they stay crisp for dipping in vanilla frosting. A nostalgic nod to 90s snack packs.
| Serving Style | Preparation | Perfect Pairing |
|---|---|---|
| Ice Cream Companion | Break into ½-inch pieces | Cinnamon or peppermint ice cream |
| Snack Board Star | Arrange whole shards | Cheese cubes & dried fruits |
| Gourmet Gift | Dip in melted chips | Festive ribbon packaging |
| Breakfast Boost | Crush over oatmeal | Greek yogurt & honey |
Customizing with Nuts, Toppings & More
Mix different chocolate chips into the batter before baking. Try white chips for visual pop or dark varieties for depth.
After cooling, drizzle with caramel and press chopped pecans into the surface.
For holiday parties, add crushed candy canes or golden sprinkles while the chocolate coating sets.
Keep these crispy treats at room temperature in airtight containers.
Pair them with seasonal beverages like spiced cider or peppermint mochas.
The options evolve with your creativity and each batch becomes a new opportunity for flavor exploration.
An easy snack for Thanksgiving.
Perfecting a holiday treat shouldn’t require hours in the kitchen.
With just 40 minutes from start to finish, 15 for prep and 25 in the oven, this recipe delivers crispy satisfaction through smart technique.
You’ll love how the chocolate flavor deepens over time while maintaining that signature snap.
Store your creation at room temperature in airtight containers for up to a week.
Need longer storage? Refrigerate for two weeks or freeze portions for three months.
The skills you’ve gained here: precision spreading, strategic cutting, and two-stage baking will apply to countless recipes.
Use Dutch-process cocoa powder next time for richer color, or experiment with sea salt sprinkles for sweet-salty contrast.
Whether serving eight guests or savoring solo, this crispy dessert solves holiday stress.
It travels well, pairs beautifully with coffee or wine, and lets you focus on festivities rather than last-minute baking.
Your new go-to treat proves great flavor doesn’t mean complicated steps.
So, are you ready to go after a bigger challenge?
Then give the old college try to this recipe.
FAQ
How do I store leftovers to keep them crisp?
Seal cooled pieces in an airtight container at room temperature. Layering parchment paper between sheets helps prevent sticking while maintaining crunch.
Can I substitute ingredients for dietary needs?
Yes! Swap egg whites with aquafaba for vegan options, or use dairy-free chocolate chips. Adjust sugar levels slightly if needed without compromising texture.
Can I make this ahead for Thanksgiving?
Absolutely. Prepare the batter 1–2 days early and refrigerate it. Bake fresh on the day for optimal crispness—just spread thinly on a parchment-lined sheet.
Why did mine turn out chewy instead of crispy?
Overmixing the batter or underbaking can cause chewiness. Spread the mixture very thin on your baking sheet and watch the oven temperature closely.
What toppings pair well with fall flavors?
Try crushed pecans, pumpkin spice, or a sprinkle of sea salt. Drizzling melted chocolate or caramel adds festive flair to your snack tray.
Do I need a pizza cutter for slicing?
A sharp knife works, but a pizza cutter creates cleaner edges. Slice while still warm for easy, even pieces that snap perfectly once cooled.

