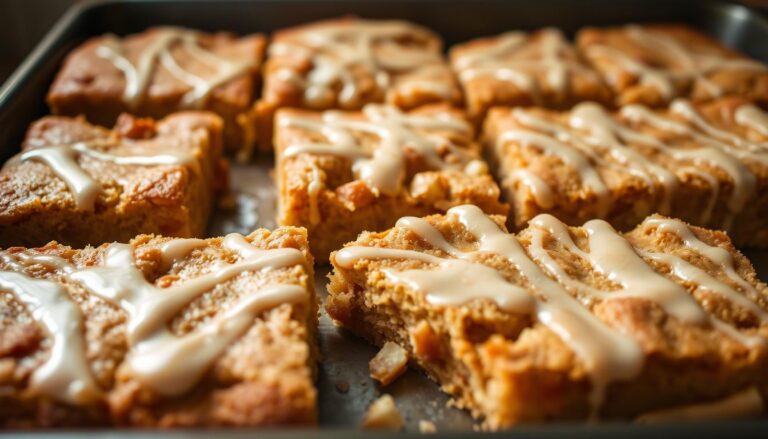
Brownies with an Oreo & Cookie Dough Core
Would you like to craft a dessert that layers three iconic treats into one unforgettable experience? That’s what brownies with an oreo and cookie dough core are all about.
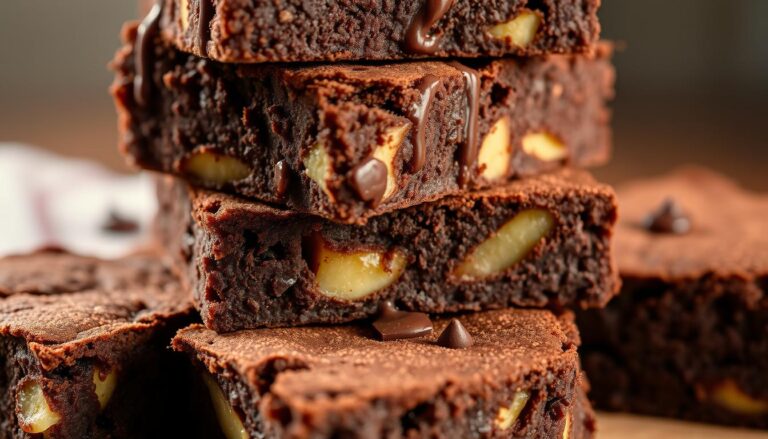
This viral creation combines a chewy chocolate chip base, crunchy cookies, and a fudgy top layer that melts in your mouth.
What makes these bars so addictive? The magic lies in their contrasting textures and bold flavors.
Each bite delivers soft, gooey dough paired with crisp cookies and rich chocolate.
Yummy, right?
Let’s get to work then.
Key Takeaways
- Three distinct layers create a symphony of textures and flavors.
- Homemade preparation beats commercial alternatives in taste and quality.
- Social media fame since 2011 makes this a proven crowd-pleaser.
- Contrast between chewy, crunchy, and fudgy elements keeps people hooked.
- Ideal for special events or indulgent personal treats.
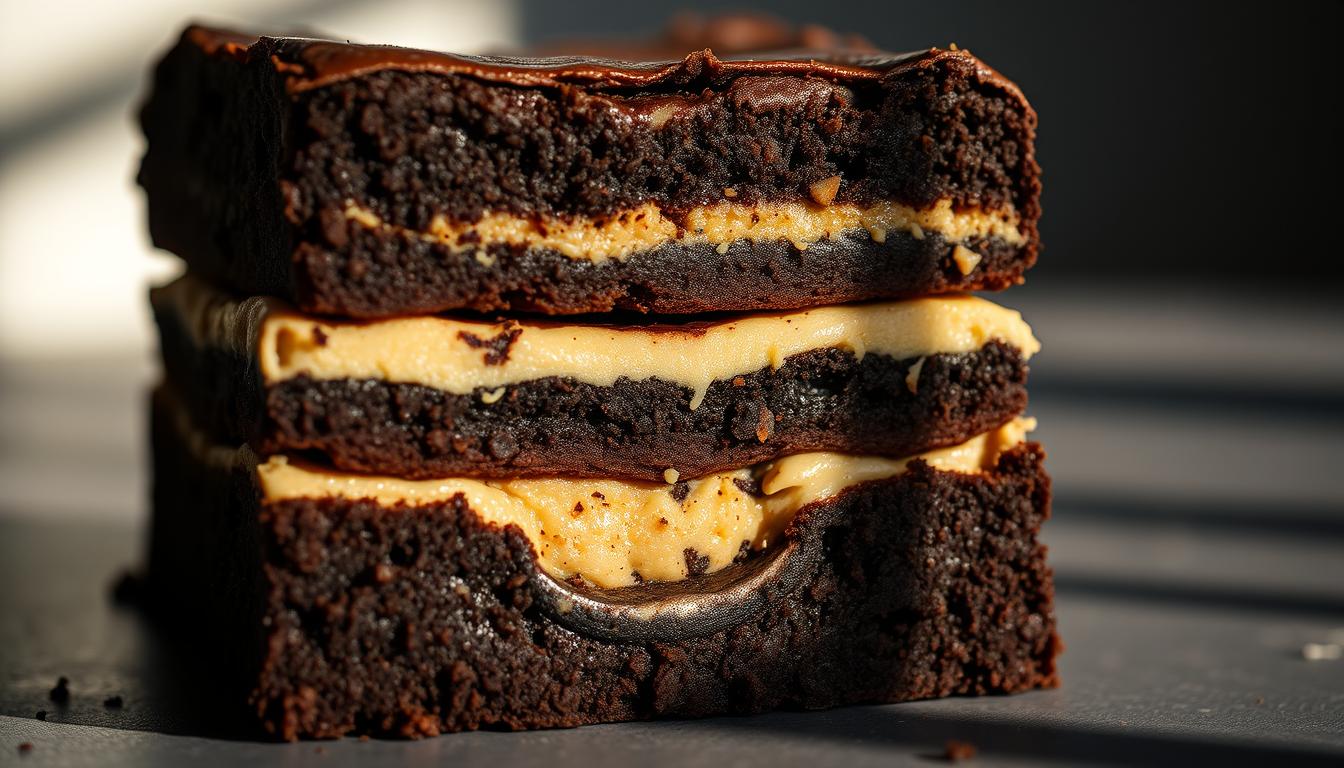
Slutty Brownies with Oreo and Cookie Dough Core
This is a recipe to make a triple-layered dessert that’s fudgy, chewy, and irresistibly rich.
- 🔸 Yields: 16 squares
- 🔸 Prep Time: 25 minutes
- 🔸 Bake Time: 35–40 minutes
- 🔸 Total Time: 1 hour 10 minutes (plus cooling)
🧾 Ingredients
Brownie Layer:
- 1/2 cup (113 g) unsalted butter, melted
- 1 cup (200 g) granulated sugar
- 2 large eggs
- 1 tsp pure vanilla extract
- 1/3 cup (35 g) unsweetened cocoa powder
- 1/2 cup (64 g) all-purpose flour
- 1/4 tsp salt
Cookie Dough Layer:
- 1/2 cup (113 g) unsalted butter, softened
- 1/3 cup (67 g) brown sugar
- 1/4 cup (50 g) granulated sugar
- 2 tbsp milk
- 1 tsp vanilla extract
- 1 cup (125 g) all-purpose flour (heat-treated*)
- 1/2 cup (85 g) mini chocolate chips
Middle Layer:
- 16 Oreo cookies
👩🍳 Step-by-Step Instructions
1. Prepare the Pan:
Preheat your oven to 350°F (175°C). Line an 8×8 inch (20×20 cm) pan with parchment paper and lightly grease it.
2. Make the Cookie Dough (no eggs):
In a bowl, beat together softened butter, brown sugar, and granulated sugar until creamy.
Add milk and vanilla, then stir in flour (heat-treated*) until fully combined. Fold in mini chocolate chips.
Press this dough evenly into the bottom of your prepared pan.
3. Add Oreo Layer:
Place 16 Oreo cookies in a single layer over the cookie dough, slightly pressing them in.
4. Make the Brownie Batter:
In another bowl, whisk together melted butter, sugar, eggs, and vanilla until smooth.
Add cocoa powder, flour, and salt. Stir just until combined.
Pour this batter over the Oreos and spread evenly with a spatula.
5. Bake:
Bake for 35–40 minutes, or until the brownie top is set and a toothpick inserted into the center comes out with moist crumbs.
Cool completely before slicing.
Pro Tips:
- To heat-treat flour: microwave it in a bowl for 1 minute, stirring every 15 seconds, to eliminate any bacteria. Let cool before using.
- For cleaner cuts, chill the bars before slicing with a sharp knife.

Introduction to the Ultimate Triple-Layer Dessert
What if you didn’t have to choose between cookies, fudgy squares, and cream-filled treats?
This iconic creation answers that delicious dilemma.
Food enthusiasts first fell for its bold layers in 2011 when Amanda Rettke shared her spin on The Londoner’s original concept.
Discovering the Origins
The dessert’s playful nickname comes from Jessica Simpson’s 2012 TV appearance. She joked about its “many ingredients” while praising the flavor combo.
Home bakers quickly adopted the recipe, turning it into a viral sensation through blogs and social shares.
Why You’ll Love These Bars
Three distinct textures create a party in your mouth. A soft base meets crispy middles and velvety tops.
You control ingredient quality, avoiding artificial additives found in store versions.
| Feature | Homemade Version | Store-Bought |
|---|---|---|
| Flavor Complexity | Layered sweetness with contrasting notes | One-dimensional taste |
| Texture Contrast | Chewy, crunchy, and fudgy layers | Often soggy or dry |
| Ingredient Control | Choose premium chocolate and fresh dough | Preservatives common |
Customization options make each batch unique. Swap fillings or adjust sweetness levels.
Friends will beg for your secret after one bite of this nostalgic-yet-innovative treat.

Gathering Your Kitchen Equipment
Perfect layers start with the right tools.
Having quality gear ensures each tier bakes evenly and releases cleanly.
Let’s explore what transforms messy attempts into bakery-worthy results.
Essential Tools for Success
A 8×8-inch non-stick pan works best for heat distribution. Glass pans often cause uneven edges.
Line it with parchment paper for stress-free removal. No stuck corners or crumbled layers.
| Tool | Purpose | Pro Tip |
|---|---|---|
| Stand Mixer | Creams butter/sugar faster | Use paddle attachment |
| Kitchen Scale | Precise flour measurements | Weigh cocoa powder too |
| Medium Saucepan | Melts butter smoothly | Low heat prevents burning |
Make sure your measuring cups match standard sizes. Even slight variations affect texture.
A hand mixer works if you lack counter space, just beat for extra 2 minutes.
Room temperature ingredients blend better. Pull butter and eggs out 30 minutes early. This simple step saves time and prevents lumpy batter.
Want clean slices? Chill the baked dessert 15 minutes before cutting. Use a plastic knife for neat squares every time.
Layering Tips for Slutty Brownies
Achieving bakery-quality layers requires more than just stacking ingredients.
Precision matters when building this iconic dessert’s signature structure. Let’s break down the techniques that ensure picture-perfect results every time.
Cookie Foundation Essentials
Start by pressing your dough layer firmly into a 8×8 pan. Use your palms to create an even surface that supports other tiers.
This prevents cracks when adding heavier components.
Arrange whole cookies in neat rows across the base. Sixteen fit perfectly without overlapping in standard pans.
For edge gaps, halve extras to fill spaces. Gentle pressure anchors them into the dough layer below.
As batter bakes, moisture softens the oreo layer into a cake-like texture.
This binds tiers while maintaining visible divisions. Clean slices reveal distinct sections, which are proof of proper technique.
Patience pays off during assembly.
Well-structured layers ensure balanced flavors in every square.
Your masterpiece will taste as impressive as it looks.
By the way, if it’s cookies you love, take a look at our Chocolate Crinkle Cookie recipe. It’s a true holiday classic!
FAQ
Can I use store-bought cookie dough instead of homemade?
Absolutely! Store-bought dough works well if you’re short on time. Just make sure it’s safe to eat raw if you plan to skip baking that layer.
What type of baking pan works best for this recipe?
A 8×8-inch square metal pan is ideal. It ensures even baking and fits all three layers snugly. Line it with parchment paper for easy removal later.
How do I prevent the Oreos from sinking into the batter?
Press them gently into the dough layer before adding the chocolate chip mixture. This creates a stable base so they stay put during baking.
Can I substitute the Oreos with another cookie?
Sure! Try mint-filled chocolate cookies or peanut butter cream varieties for a twist. Just avoid overly crumbly options that might break apart.
How long should I let the dessert cool before slicing?
Let it sit for at least 30 minutes. This helps the layers set, so you get clean cuts without squishing the gooey center.
Can I freeze leftovers for later?
Yes! Wrap individual squares tightly in plastic wrap and store them in an airtight container. Thaw at room temperature before enjoying.
Do I need to adjust baking time for a glass pan?
Glass pans retain heat longer, so reduce the oven temperature by 25°F and check for doneness 5-10 minutes earlier than the recipe suggests.
Can I make this recipe egg-free?
Swap eggs with flax eggs or commercial egg replacers. For the cookie dough layer, use heat-treated flour and skip raw eggs entirely.