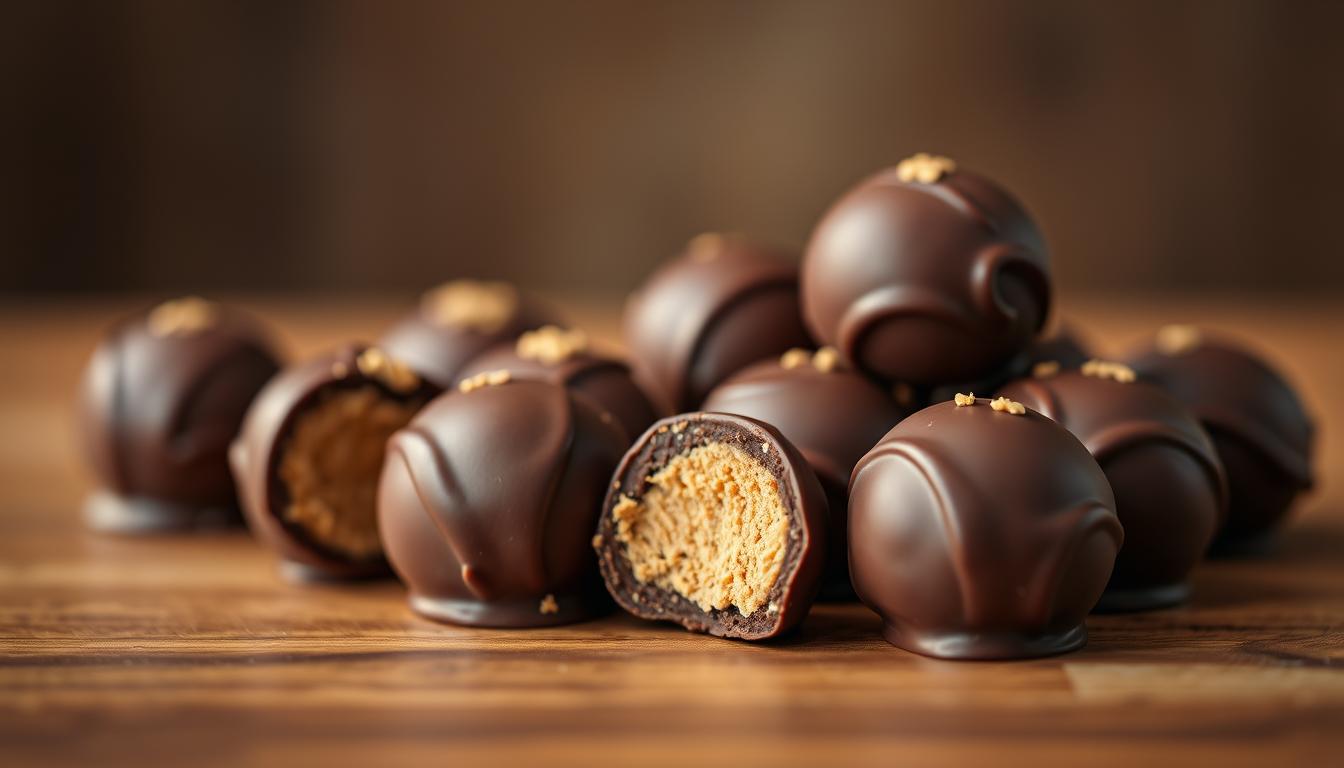
3-Ingredient Peanut Butter Chocolate Balls
Want to whip up a crowd-pleasing dessert faster than it takes to preheat your oven? Welcome to our 3-ingredient peanut butter chocolate balls recipe.
This no-fuss recipe turns everyday pantry items into decadent bites that blend sweet, salty, and creamy flavors in every bite.
Best of all? You won’t need fancy equipment or baking skills to pull it off.
These homemade delights have earned their spot as a timeless favorite for good reason.
The magic lies in combining just three simple components: a smooth nut-based spread, rich melted coating, and powdered sweetener.
Stirred together by hand, the mixture transforms into bite-sized indulgences that stay firm yet melt in your mouth.
Perfect for last-minute gatherings or satisfying late-night cravings, these treats deliver gourmet quality without the effort.
Ready to roll?
Let’s go then.
Key Takeaways
- A classic recipe that beats store-bought candies in flavor and freshness.
- No-bake method saves time and requires zero baking expertise.
- Balanced combination of creamy filling and glossy coating creates addictive texture.
- Ideal solution for busy hosts needing impressive last-minute desserts.
- Customizable treats that work for gifting or personal indulgence.
- Uses affordable ingredients found in most kitchens.
Miracle Peanut Butter Chocolate Balls Recipe
Here’s a simple, delicious recipe for Peanut Butter Chocolate Balls using only 3 ingredients.
It’s perfect for beginners or anyone looking for a quick no-bake treat!
This recipe makes about 18 to 20 balls.
✅ Ingredients:
- 1 cup (240g) creamy peanut butter (unsweetened or lightly sweetened)
- ½ cup (60g) powdered sugar (sifted for smooth consistency)
- 1½ cups (270g) semi-sweet or dark chocolate chips (60–70% cocoa recommended)
📝 Instructions:
- Mix the filling
In a medium bowl, combine 1 cup peanut butter and ½ cup powdered sugar.
Stir with a spatula or hand mixer until fully blended and smooth. - Form the balls
Scoop about 1 tablespoon of mixture and roll into a smooth ball using your hands.
Place on a parchment-lined baking sheet.
Repeat until all dough is used. - Chill
Place the tray in the freezer for 20–25 minutes, or until firm. - Melt the chocolate
In a microwave-safe bowl, heat 1½ cups chocolate chips in 30-second intervals, stirring each time, until fully melted and smooth (about 1½ minutes total). - Coat the peanut butter balls
Dip each chilled ball into the melted chocolate using a fork or dipping tool.
Let excess chocolate drip off, then place back on the parchment. - Set the coating
Refrigerate for 15–20 minutes or until the chocolate is set.
Storage Tips:
- Store in an airtight container in the fridge for up to 2 weeks.
- Or freeze for longer storage (up to 3 months).
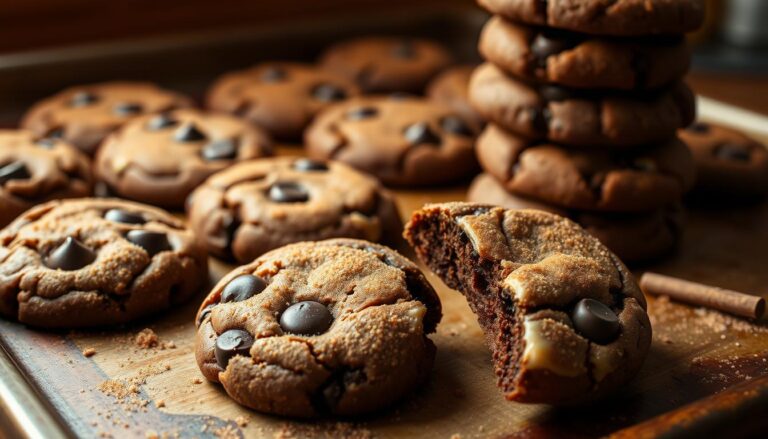
Oh, and if quick, no-bake treats is what you are about make sure to check out our Chocolate Oatmeal Cookies. It has just 3 ingredients and there’s no baking involved.

Tools You Need
Gathering your supplies first sets you up for success.
This recipe thrives on precise combinations and simple equipment, no fancy gadgets required.
Let’s break down what makes these components work together so perfectly.
Must-Have Kitchen Tools
A sturdy bowl and wooden spoon handle mixing duties effortlessly.
Line your sheet pan with parchment to prevent sticking during chilling. Keep skewers or toothpicks handy for dipping without messy fingers.
Don’t forget refrigerator space! These treats need firming up before their chocolate bath.
While specialty dipping tools help, a fork works in a pinch for creating those picture-perfect spheres.
Preparing the Perfect Peanut Butter Dough
Crafting the ideal base for your treats starts with mastering two key phases: blending ingredients flawlessly and understanding temperature control.
Get these right, and you’ll create bite-sized delights that hold their shape while melting luxuriously on the tongue.
Mixing Techniques and Tips
Begin by thoroughly combining room-temperature fat with your creamy nut spread in a large bowl. This creates a silky foundation that welcomes powdered sugar.
Add the sweetener gradually, three tablespoons at a time, stirring until the mixture resembles cookie dough.
Watch for these texture clues: perfect consistency lets you roll spheres without sticking to your palms.
Too crumbly? Add a teaspoon of melted fat. Too tacky? Dust in more sugar.
Always mix by hand to feel the transformation from separate ingredients to cohesive dough.
Chilling and Consistency Guidelines
Let the blended mixture rest covered at room temperature for 15 minutes. This brief pause lets the sugar fully absorb oils for uniform texture.
For longer storage, refrigerate in an airtight container up to three days, the cold firms the structure for easier shaping.
When rolling your dough, work quickly if your kitchen is warm. Chilled hands prevent softening, but if the mixture becomes sticky, pop it back in the fridge.
Properly rested dough should hold fingerprint impressions without collapsing when pressed gently.

Mastering Chocolate Dipping Techniques
The secret to glossy, professional-looking treats lies in your chocolate technique. Proper handling ensures smooth coatings that cling perfectly to chilled centers.
Let’s explore methods to achieve flawless results every time.
Melting Chocolate the Right Way
Quality baking bars outperform chips for dipping. Chocolate chips contain stabilizers that create clumpy textures. Chop bars into uniform pieces for even melting.
Use a microwave-safe bowl for quick melting: 20-second bursts with stirring between each. For traditionalists, a double boiler works beautifully.
Keep water simmering, not boiling, to prevent scorching.
Troubleshooting Common Dipping Issues
Too-thick melted chocolate? Add ½ teaspoon coconut oil per 4 ounces. Too runny? Let it cool slightly while stirring.
Work in a cool room (below 72°F) to prevent quick hardening.
Pro tip: After dipping, gently tap your wrist over the container. This removes excess coating for even layers.
Use toothpick holes to hide imperfections when placing treats on parchment.
Presentation, Variations, and Serving Ideas
Transform your treats into edible art with simple yet stunning finishing touches.
A sprinkle of creativity takes these bites from everyday snacks to party-ready delights.
Let’s explore ways to customize their look and flavor while keeping prep time minimal.
Creative Garnish Ideas
Roll chilled spheres in crushed nuts or festive sprinkles for instant visual appeal.
For holiday gatherings, try red-and-green jimmies or edible glitter. Drizzle melted coating in zigzag patterns using a fork for bakery-style flair.
Balance sweetness with flaky sea salt or cocoa powder dusting. Chopped pretzels add crunch, while shredded coconut creates tropical vibes.
Store decorated pieces in an airtight container between parchment layers to protect designs.
Mix up flavors by swapping the nut spread for almond or sunflower varieties. Stir protein powder into the mixture for energy-boosting snacks.
Serve chilled on a decorative sheet with coffee or as dessert shooters at your next gathering.
And if peanut butter is your delight, then check out our Copycat Snickers Bar recipe.
FAQ
Can I use almond butter instead of peanut butter?
Absolutely! Almond butter or other nut spreads work well. Just ensure they’re creamy for the right texture. Adjust sugar if your alternative is sweetened.
Why does my melted chocolate get clumpy?
Chocolate can seize if exposed to moisture. Use a dry bowl and melt it slowly (double boiler or microwave in 15-second bursts). Stir in ½ tsp coconut oil for smoother dipping.
How long do these treats stay fresh?
Store them in an airtight container at room temperature for up to a week. For longer freshness, refrigerate for 2-3 weeks or freeze for 3 months.
Can I add protein powder to the dough?
Yes! Mix in 1-2 tbsp of vanilla or unflavored protein powder. Add a splash of milk if the dough feels too dry.
What if my dough won’t hold its shape?
If it’s too sticky, chill it for 20-30 minutes. If crumbly, add 1 tsp melted butter or a drizzle of honey to bind it.
Can I make these dairy-free?
Definitely! Use dairy-free chocolate chips and vegan butter. Check labels to ensure all ingredients meet dietary needs.
How do I prevent the coating from cracking?
Let chilled dough sit at room temp for 5 minutes before dipping. This reduces temperature shock, keeping the chocolate layer smooth.