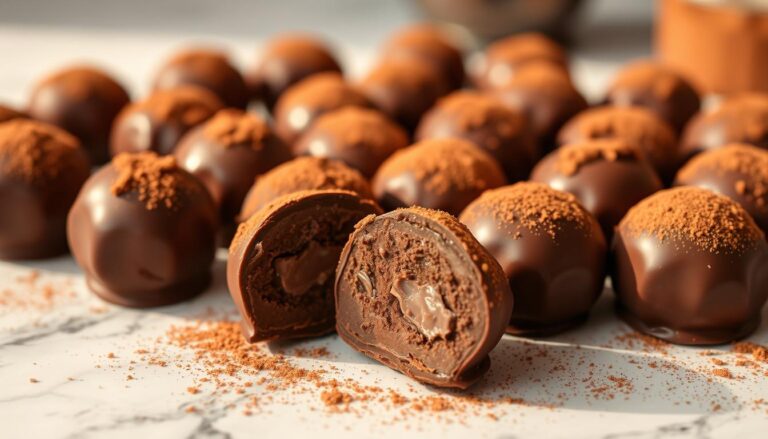
Copycat Cadbury Crunchie Bar (ultimate honeycomb toffee)
Can you come up with a copycat Cadbury Crunchie Bar containing honeycomb toffee center and rich chocolate coating in your own kitchen?
The answer is yes, and we’re excited to share the recipe with you!
With this guide, you’ll learn how to make a delicious crunchy, golden, and utterly addictive candy bar.
It is perfect for satisfying your sweet cravings as well as impressing friends and family.
Ready to get to work?
Perfect, let’s get started.
Key Takeaways
- Homemade versions offer superior freshness compared to mass-produced candies
- Precision with sugar temperatures ensures perfect honeycomb texture
- Baking soda timing creates the signature airy bubbles
- Customizable chocolate coatings allow for personal creativity
- Social media trends have revived interest in classic confections
- Ideal for special occasions or edible DIY gifts
🍯 Ultimate Honeycomb Toffee Treat
Here’s a recipe for making Copycat Cadbury Crunchie Bars, the ultimate honeycomb toffee treat.
Yields: about 12 bars.
📌 Ingredients
- Granulated sugar – 200g (1 cup)
- Golden syrup – 80ml (1/4 cup)
- Baking soda – 1 ½ teaspoons
- Water – 2 tablespoons
- Salt – a pinch (optional, enhances flavor)
- Milk or dark chocolate (for coating) – 250g (about 9 oz)
👩🍳 Instructions
Prepare your tools
- Line an 8×8 inch (20×20 cm) pan with parchment paper.
- Set aside a heatproof silicone spatula or wooden spoon.
- Measure the baking soda and keep it ready—you must act quickly later.
Make the honeycomb base
- In a medium heavy-bottomed saucepan, combine:
- 200g sugar
- 80ml golden syrup
- 2 tbsp water
- Pinch of salt (optional)
- Stir gently over medium heat until the sugar dissolves.
- Once dissolved, stop stirring and increase to medium-high heat. Let it bubble.
- Cook until it reaches a deep golden amber color or 150°C (300°F) on a candy thermometer (hard crack stage). This takes about 5–7 minutes.
Add baking soda
- Immediately remove from heat.
- Quickly add 1½ tsp baking soda and stir vigorously.
- The mixture will foam up dramatically—this is the honeycomb reaction.
- Quickly pour the bubbling mix into the prepared pan. Don’t spread it; it will settle naturally.
Cool and break
- Let the honeycomb cool completely at room temperature (about 45–60 minutes).
- Once set, break into chunks or bar-sized pieces using a sharp knife or your hands.
Dip in chocolate
- Melt 250g chocolate (milk or dark) in a double boiler or microwave in 30-sec intervals.
- Dip each honeycomb bar into the melted chocolate. Place on parchment to set.
- Refrigerate for 15 minutes or let set at room temp for 30–45 minutes.
Pro Tips
- Work quickly but carefully when adding the baking soda.
- Do not touch the hot sugar mixture—it’s extremely hot.
- Store in an airtight container to prevent it from becoming sticky.

Introduction to Homemade Honeycomb and Crunchie Bars
There’s a fascinating history to the crispy treat that many children love and that is taking kitchens by storm.
This golden confection combines science and sweetness, creating a snack that crackles with nostalgia and modern appeal.
From Cinder Toffee to Viral Sensation
For over a century, this bubbly candy has worn many names across the globe.
In Wales, it’s called cinder toffee for its rugged texture. British bakers know it as hokey pokey, while Americans often call it sea foam.
Each version shares the same magical transformation when baking soda meets hot syrup.
| Region | Name | Unique Trait |
|---|---|---|
| Wales | Cinder Toffee | Crunchy, coal-like texture |
| UK | Hokey Pokey | Playful name, ice cream pairing |
| North America | Sea Foam | Light, airy dissolve |
The candy’s latest fame came from an unexpected source.
When Netflix’s Squid Game featured honeycomb shapes, TikTok creators raced to recreate them.
Over 950,000 videos showcased the satisfying snap of homemade versions.
What makes this treat special? A chemical reaction creates hundreds of air pockets.
Hot sugar syrup foams dramatically when mixed with baking soda, hardening into delicate bubbles.
This science experiment you can eat has delighted generations, now it’s your turn to master it.
Oh! and by the way, if plain toffee is your secret pleasure make sure to check our best recipe about it.
Tools for Your Recipe
The magic of honeycomb candy starts with three basic components and reliable kitchen gear.
Let’s break down what you’ll need to create that signature crackle and crunch.
Must-Have Kitchen Equipment
| Tool | Purpose | Tip |
|---|---|---|
| Heavy saucepan | Even heat distribution | Prevents hot spots |
| Candy thermometer | Measures 300°F critical temp | Test accuracy first |
| Parchment-lined tray | Sets candy safely | No substitutes – wax paper melts |
A wire rack helps chocolate coatings set evenly.
Keep silicone spatulas handy for scraping every bit of foamy goodness from your pan. With these tools, you’re ready to transform simple ingredients into golden magic.

Expert Techniques and Tips for Achieving the Perfect Texture
Mastering honeycomb candy requires precision and a few expert tricks up your sleeve.
Let’s explore the methods that separate chewy disappointments from golden, crackling triumphs.
Temperature Control and Timing Essentials
Your candy thermometer becomes your best friend here.
Heat the sugar mixture to exactly 300°F. Go hotter, and you’ll get bitter burnt flavors. Stop too soon, and your candy stays sticky.
| Stage | Temperature | Visual Clue |
|---|---|---|
| Soft Crack | 270-290°F | Threads form when dropped in water |
| Hard Crack | 300-310°F | Syrup hardens instantly in cold water |
| Burn Zone | 320°F+ | Smoky smell, dark amber color |
Set multiple timers. The baking soda reaction happens in seconds – have your tray ready before heating begins.
Avoiding Common Candy Making Pitfalls
Humidity turns crisp honeycomb into sticky messes.
Make this candy on dry days, or freeze finished pieces. Never scrape your saucepan as those stuck bits ruin the texture.
Burnt pans clean easily. Fill the pot with hot water and boil for 5 minutes. The hardened sugar dissolves like magic.
Watch for these signs of trouble:
- Chewy texture = undercooked syrup
- Bitter taste = overheated mixture
- Flat bubbles = old baking soda
Creative Variations for Your Crunchie Bars
Take your homemade treats to new heights with creative twists that surprise the palate.
Customization turns classic recipes into signature creations worth sharing (or keeping all to yourself).
Chocolate Transformations
Swap standard coatings for exciting alternatives. High-quality chocolate choices dramatically change flavor profiles:
| Type | Cocoa Percentage | Best For |
|---|---|---|
| Dark | 72% | Bittersweet balance |
| Milk | 35% | Creamy sweetness |
| White | 0% | Vanilla-forward fans |
Candy melts offer beginner-friendly dipping with vibrant colors. Try swirling two melted varieties together for marbled effects.
Flavor Adventures
Boost your base recipe with these easy upgrades:
- Swap golden syrup for corn syrup to mellow caramel notes
- Mix orange zest into dark chocolate coatings
- Press crushed nuts into setting chocolate
Fold honeycomb chunks into vanilla ice cream during the last churn. The cold temperature preserves the crunch while adding texture contrast.
For savory-sweet lovers, sprinkle flaky sea salt over freshly dipped bars. Store variations in separate containers to maintain distinct flavors.
Storing and Serving Your Homemade Candy
Your golden honeycomb creations deserve proper care to stay crisp and delicious.
With smart storage solutions and creative presentation, you’ll keep every bite as fresh as day one.
Best Practices for Freezing and Long-Term Storage
Seal undipped honeycomb pieces in airtight containers with parchment layers between them.
Metal tins work best—they block humidity that softens candy. In damp climates, freeze portions for up to 3 months.
Chocolate-dipped bars stay fresh 4 weeks at room temperature if sealed tightly. For gifting, wrap individual pieces in wax paper before boxing.
Thaw frozen candy at room temperature for 20 minutes to preserve its signature snap.
Presentation and Serving Ideas
Arrange honeycomb shards on dessert boards alongside fresh berries and nuts.
Dip half-melted pieces in hot coffee for a sweet stirrer surprise. Package clusters in clear jars tied with ribbon for edible gifts.
Crush leftover bits into ice cream toppings or cake decorations. Pair dark chocolate-coated bars with red wine for adult gatherings.
However you serve them, these homemade treats deliver that magical crackle every time.
By the way, if you enjoy making your own versions of popular candy check out our Mounds Bar recipe with Shredded Coconut.
You’ll love it.
FAQ
What makes the honeycomb texture in these bars?
The bubbly, airy texture comes from mixing baking soda into hot sugar syrup. This creates a chemical reaction that traps air bubbles, giving the candy its signature crunch.
Can I substitute corn syrup for golden syrup?
Yes! Light corn syrup works as a replacement if you can’t find golden syrup. The flavor will vary slightly, but it’ll still create that crisp, caramelized base for the toffee.
Why does my sugar mixture sometimes crystallize?
Crystallization happens if sugar sticks to the pan’s sides or isn’t dissolved completely. Brush the saucepan walls with water while heating to prevent sugar crystals from forming.
How do I know when the sugar syrup is ready?
Use a candy thermometer—the syrup should reach 300°F (hard crack stage). If you don’t have one, test by dropping a bit into cold water. It should harden instantly and snap when bent.
Can I use milk chocolate instead of dark for coating?
Absolutely! Milk or semi-sweet chocolate pairs well with the sweet honeycomb. For an authentic twist, try tempering your chocolate to ensure a smooth, shiny finish.
How long do homemade versions stay fresh?
Store them in an airtight container at room temperature for up to two weeks. For longer storage, freeze uncoated honeycomb pieces and dip them in chocolate later.
What’s the best way to break the toffee into pieces?
Let the cooled honeycomb set on parchment paper, then gently tap it with a rolling pin or mallet. Avoid crushing it—controlled pressure creates clean, bite-sized chunks.
Can I add flavors like vanilla or sea salt to the recipe?
Definitely! Stir in a teaspoon of vanilla extract after removing the syrup from heat, or sprinkle flaky salt over the chocolate coating for a sweet-and-salty twist.