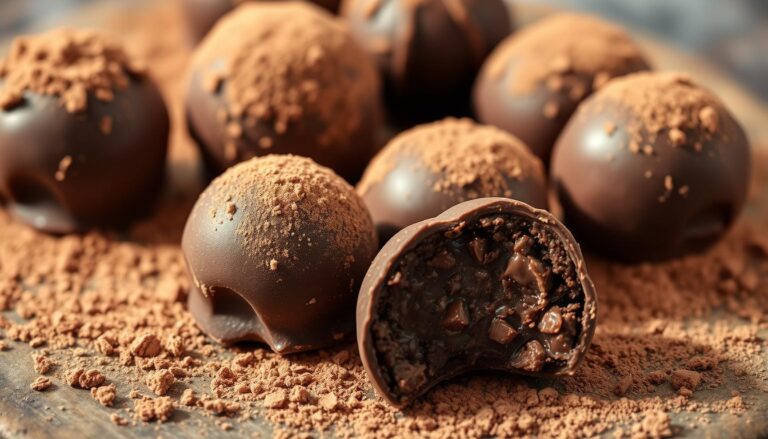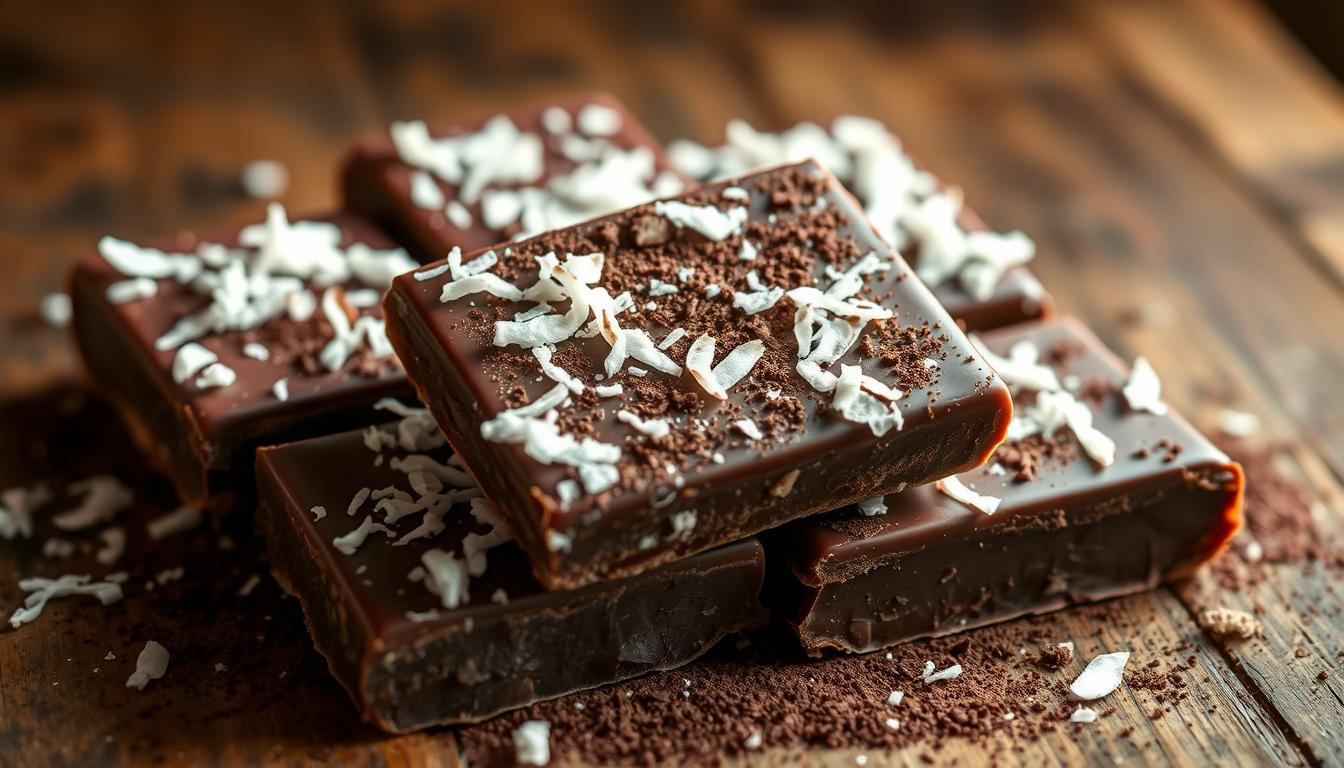
Homemade Mounds Bars with Shredded Coconut
Can you make a deliciously authentic homemade mounds bar that’s packed with shredded coconut and covered in rich chocolate?
Of course!
In the next minutes you’ll learn to make a chocolate treat that is chewy, creamy, and utterly irresistible.
It’s easier than you think and we’ll guide you through every step in this simple process of creating tasty treats from scratch.
So, let’s get this party started.
Key Takeaways
- Create premium-quality chocolate coconut treats without artificial ingredients
- Customize sweetness levels and add mix-ins like almonds for variety
- Requires only four basic ingredients and no baking equipment
- Achieve perfect texture contrast between creamy filling and crisp coating
- Store-bought alternatives can’t match the freshness of homemade versions
- Simple techniques adaptable to other candy-making projects
Making Mounds Bars with Shredded Coconut at home.
Use just a few pantry ingredients to make delicious copycat mounds bars from the comfort of your home.
This recipe yields about 16 bars.
Ingredients:
- 2 cups unsweetened shredded coconut
- ¾ cup sweetened condensed milk
- 1 tsp pure vanilla extract
- 2 cups semi-sweet or dark chocolate chips
- 1 tbsp coconut oil (optional, for smoother chocolate coating)
Step-by-Step Instructions:
- Make the Coconut Filling
In a medium bowl, mix together the shredded coconut, sweetened condensed milk, and vanilla extract until fully combined and sticky. - Shape the Bars
Scoop about 1½ tablespoons of the mixture and form into small rectangular logs or rounded mounds using your hands. Place them on a parchment-lined tray. - Chill
Freeze the coconut mounds for 25–30 minutes or until firm. - Melt the Chocolate
In a microwave-safe bowl, melt the chocolate chips and coconut oil (if using) in 30-second bursts, stirring in between, until smooth. - Coat the Bars
Using a fork, dip each chilled coconut mound into the melted chocolate, fully coating it. Let the excess drip off, then place back on the parchment-lined tray. - Set the Chocolate
Refrigerate for 20–30 minutes until the chocolate coating is completely set.
Optional:
Top with a light sprinkle of shredded coconut before the chocolate sets for a decorative touch.
Storage:
Keep in an airtight container in the fridge for up to 2 weeks, or freeze for longer storage.

Introduction to Homemade Mounds Bars
Why settle for factory-made when your kitchen can craft something better?
This DIY version puts you in charge of flavors and textures while cutting out processed additives. You’ll taste the difference real ingredients make.
Control Over What You Eat
Store-bought snacks often hide questionable additives.
Your creation uses just shredded coconut, dark chocolate, and natural sweeteners. No mystery chemicals or corn syrup here.
| Your Version | Store-Bought | |
|---|---|---|
| Ingredients | 5 recognizable items | 15+ with preservatives |
| Sweeteners | Pure vanilla extract | High fructose corn syrup |
| Customization | Endless options | Fixed recipe |
Simple Process, Big Rewards
Mix coconut with binding agents, shape into bars, and dip in melted chocolate.
It’s easier than baking cookies and faster than waiting in checkout lines. Customize thickness or sweetness as you go.
Need gluten-free or vegan options? Swap honey for agave or use dairy-free chocolate. Your dietary needs steer the recipe, no compromises required.
Oh! and if you want to try your hand at making your own brand of another popular candy bar, then check out our recipe for a Copycat Ferrero Rocher.
It’s simply delicious.
Kitchen Preparation
Creating irresistible coconut-chocolate treats starts with an organized kitchen setup.
Let’s break down what you’ll need and how to prepare your space for candy-making success.
Setting Up Your Workspace with Parchment Paper and Tools
Line an 8×8-inch pan with parchment paper. This prevents sticking and makes cleanup easier.
Keep extra sheets nearby for chocolate dipping stations.
Measure all components before mixing; the coconut blend sets quickly once combined with condensed milk.
Place your microwave-safe bowl and rubber spatula within reach. If using a double boiler instead, set it up now.
Flaked sea salt should be handy for sprinkling – it balances sweetness better than table salt.

Perfecting Your Homemade Mounds Bars
Creating picture-perfect confections requires mastering two crucial skills: shaping the coconut center and achieving flawless chocolate coverage.
These techniques separate messy kitchen experiments from polished treats worthy of gift boxes or dessert tables.
With a few smart strategies, you’ll produce goodies that rival artisanal chocolate shop creations.
Expert Tips on Pressing and Dipping
Shape matters when working with sticky coconut mixtures. Apply firm pressure using your palms to compact the mixture into rectangles that hold their form.
Rinse your hands every 3-4 pieces. Damp fingers prevent sticking without adding excess moisture.
Keep unused portions chilled while working. This maintains structure during dipping and prevents softening. For best results:
- Use parchment-lined trays for shaped pieces
- Chill 10 minutes before chocolate coating
- Handle one piece at a time
Ensuring a Smooth Chocolate Coating
Professional-quality finishes come from proper chocolate handling.
Melt ⅔ of your chocolate chips first, then stir in remaining pieces until fully incorporated. This tempering method creates that signature snap and shine.
| Coating Method | Success Rate | Common Issues | Pro Solution |
|---|---|---|---|
| Double Fork | 95% | Excess chocolate pooling | Tap fork tines gently |
| Chocolate Dip | 85% | Incomplete coverage | Rotate piece 360° |
| Pour Over | 75% | Uneven layers | Use angled spatula |
Test chocolate viscosity by lifting your spoon. It should flow smoothly but coat the back evenly.
Work quickly once melted, reheating in 5-second bursts if needed. Allow finished pieces to set completely at room temperature for that crisp outer layer.
Variations and Customizations
Your kitchen becomes a candy lab with endless flavor possibilities.
Whether you need dairy-free options or prefer low-carb treats, these coconut-chocolate confections adapt beautifully to dietary needs and taste preferences.
Almond Joy, Vegan, and Keto Version Options
Transform the base recipe into entirely new experiences.
Press whole almonds onto coconut centers before dipping for an Almond Joy twist.
For keto followers, swap sugar with stevia and boost coconut oil. Each piece contains just 2.2g net carbs.
| Version | Key Changes | Sweetener | Carbs Per Serving |
|---|---|---|---|
| Keto | Stevia + coconut oil | Erythritol | 2.2g |
| Vegan | Maple syrup | Agave | 8g |
| Paleo | Raw honey | Dates | 6g |
Experimenting with Different Chocolate Types
Your chocolate selection defines the final flavor.
Dark varieties (70% cacao) mirror classic candy bar profiles, while milk chocolate adds creamy sweetness.
White chocolate creates striking visual contrast and milder flavors.
| Chocolate Type | Flavor Profile | Best Paired With |
|---|---|---|
| Dark | Bold, slightly bitter | Sea salt sprinkle |
| Milk | Sweet, creamy | Toasted almonds |
| White | Vanilla-forward | Freeze-dried raspberries |
Add vanilla extract or coconut flakes to the chocolate coating for extra depth.
The right combination turns simple ingredients into gourmet-quality sweets that outshine anything from a factory line.
Check out this article if you are interested in making your own chocolate bars.
Serving Suggestions and Storage Ideas
Transform your kitchen creations into showstopping desserts with clever presentation and smart preservation methods.
Whether hosting a party or satisfying a sweet craving, these ideas maximize enjoyment while keeping treats fresh.
Creative Ways to Serve Your Candy Bars
Turn simple confections into festive centerpieces. Arrange pieces on tiered stands for birthdays or wrap them in parchment paper for rustic charm.
Crumbled toppings add texture contrast to ice cream sundaes or yogurt parfaits.
| Occasion | Serving Style | Pro Tip |
|---|---|---|
| Holidays | Mix with seasonal candies | Use red/gold foil for Christmas |
| Dessert Buffets | Skewer mini pieces | Pair with fresh berries |
| Gifts | Box with wax paper layers | Add custom labels |
Proper Storage for Maintaining Texture and Flavor
Keep your candy at peak freshness with these methods.
Room-temperature storage works best for soft centers. Use airtight containers away from heat sources.
For longer preservation, freeze individual portions.
| Method | Duration | Texture Impact |
|---|---|---|
| Pantry | 5 days | Optimal softness |
| Fridge | 1 week | Firmer bite |
| Freezer | 3 months | Crunchier coating |
Thaw frozen pieces 10 minutes before serving. Avoid repeated temperature changes – moisture from condensation can create sugar blooms on chocolate surfaces.
Troubleshooting and Pro Tips
Even experienced cooks hit snags when making coconut-chocolate treats. These pro tips turn kitchen mishaps into masterpieces.
How to Fix Common Ingredient Issues
Your coconut mixture should hold together when pressed. If it crumbles, pulse it in a food processor for 15 seconds.
This releases natural oils for better binding.
Always chill the base in the freezer for 15 minutes. Skipping this step leads to messy dipping. Keep unused portions cold while working to maintain shape.
Timing and Temperature Adjustments
Work with one piece at a time, leave others in the freezer.
Melt chocolate in a dry bowl to prevent seizing. If your kitchen is warm, let coatings set in the fridge for 20 minutes.
Chocolate hardening time varies. Test a small piece first.
Properly tempered coatings snap cleanly and resist fingerprints at room temperature.
Oh! and make sure to click here if you love making chocolate treats children adore.
FAQ
Can I use unsweetened coconut instead of sweetened shredded coconut?
Yes, but you’ll need to adjust the sweetness. Add 1-2 tablespoons of powdered sugar to the mixture if using unsweetened coconut to mimic the classic flavor.
How do I prevent the chocolate coating from cracking?
Let the coconut filling chill fully in the fridge before dipping. Also, ensure your melted chocolate isn’t too hot—room temperature or slightly warm works best for a smooth finish.
What’s the easiest way to melt chocolate without a double boiler?
Use a microwave! Heat dark or milk chocolate chips in 20-second intervals, stirring between each burst. Stop once it’s mostly melted—the residual heat will finish the job.
Can I make these dairy-free or vegan?
Absolutely! Swap sweetened condensed milk with coconut cream mixed with powdered sugar, and use dairy-free chocolate. Check labels to ensure all ingredients meet dietary preferences.
How long do these coconut treats stay fresh?
Store them in an airtight container in the fridge for up to 2 weeks. For longer storage, freeze them for up to 3 months—just thaw before serving.
Why does my coconut filling feel crumbly?
If the mixture isn’t sticking, add a teaspoon of coconut oil or extra condensed milk. Press the mixture firmly into the pan to help it hold its shape.
Can I add almonds to mimic another popular candy bar?
Of course! Press a whole almond into each piece before dipping in chocolate for a crunchy twist. It’s a simple way to customize your batch.
What’s the secret to a glossy chocolate finish?
Tempering your chocolate ensures shine and snap. For a shortcut, add a teaspoon of coconut oil to melted chocolate—it’ll stay smooth and set beautifully.