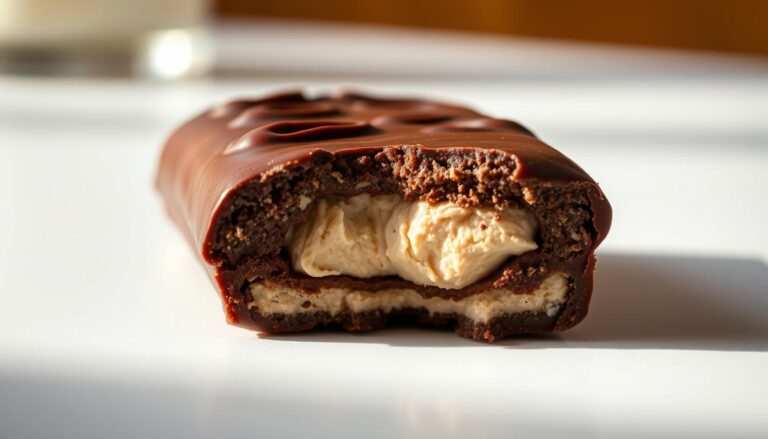
4-Ingredient Homemade Chocolate Bars (Dark, Milk, or White)
What’s the secret to creating rich, creamy, and indulgent chocolate bars without breaking the bank or relying on complicated ingredients?
In reality, you just need 4 ingredients to create deliciously smooth and indulgent chocolate bars in the comfort of your own home.
In this article, we’ll show you how to make these treats in dark, milk, and white chocolat.
They are perfect for snacking, gift-giving, or enjoying as a special treat.
Ready to unleash the master chocolatier in you?
Bring it on!
Key Takeaways
- Create premium-quality treats using four basic ingredients
- Learn professional techniques from top chocolate makers
- Customize sweetness, texture, and add-ins effortlessly
- Save money compared to luxury store-bought options
- Master three distinct varieties with simple adjustments
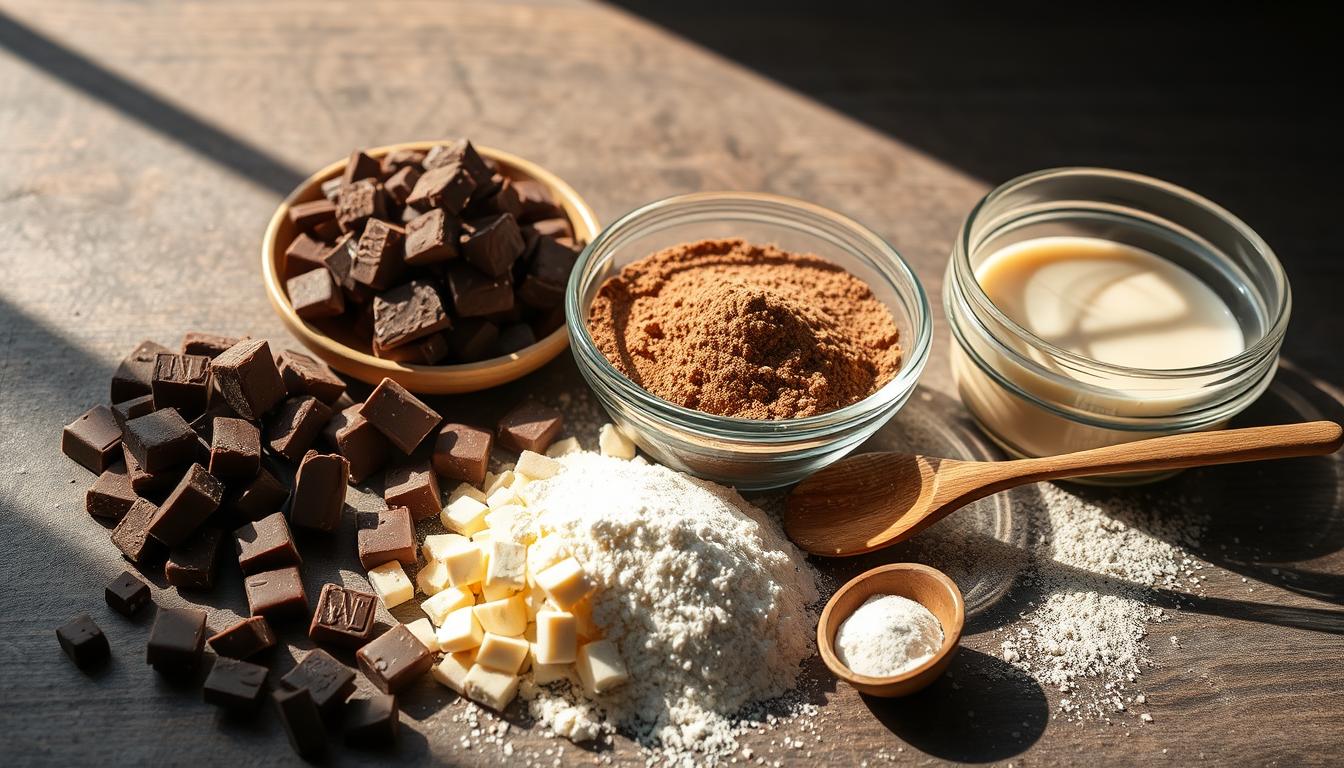
Balancing 4 ingredients to make white, milk and dark chocolate bars.
Here’s a simple and accurate recipe to make White, Milk, and Dark Chocolate Bars using only:
- cocoa butter,
- cocoa powder,
- sugar,
- milk powder.
Each version adjusts the proportions slightly for taste and texture.
🍫 Ingredients Overview (for approx. 100g bar each)
| Type of Chocolate | Cocoa Butter | Cocoa Powder | Sugar | Milk Powder |
|---|---|---|---|---|
| White Chocolate | 40g | 0g | 30g | 30g |
| Milk Chocolate | 30g | 20g | 25g | 25g |
| Dark Chocolate | 30g | 35g | 35g | 0g |
Step-by-Step Instructions (for each type)
🥥 Melt Cocoa Butter
- Chop finely the amount of cocoa butter required (see table above).
- Place in a double boiler or heatproof bowl over simmering water.
- Stir gently until fully melted. Keep heat low to avoid scorching.
🍫 Sift and Combine Dry Ingredients
In a separate bowl, sift together:
- Cocoa powder.
- Milk powder.
- Sugar (use powdered sugar for smoother texture)
This step removes lumps and makes the final chocolate smoother.
💫 Mix into Melted Cocoa Butter
- Remove the melted cocoa butter from heat.
- Gradually whisk in the sifted dry mixture using a balloon whisk or silicone spatula.
- Stir until completely smooth and glossy. Ensure no dry patches remain.
Pro Tip: For ultra-smooth texture, use an immersion blender for 1–2 minutes.
🧊 Pour and Set
- Pour chocolate into silicone chocolate molds or a parchment-lined loaf pan.
- Tap gently to release air bubbles.
- Let cool at room temperature for 15 minutes, then refrigerate for 1–2 hours until fully set.
Storage
- Store bars in an airtight container in a cool, dry place (not the fridge unless room temp is hot).
- Shelf life: up to 2 weeks.
Additional Tips
- For smoother melt, temper chocolate using the tabling or seeding method.
- You can add a pinch of salt or vanilla powder (optional) for enhanced flavor.
Shop this Recipe
|
Double Boiler | |
|
Heatproof Bowl | |
|
Mixing Bowl | |
|
Silicon Whisk Set | |
|
Chocolate Molds | |
|
Loaf Pan | |
|
Airtight Container |
Note: Chocolate Candy Kitchen (CCK) actively partners up with reputable brands to promote useful, quality products.
Some or all of the links above may be affiliate links that generate a small revenue for CCK when you buy through them. Thank you for supporting our blog.

Simple Guide to Craft Your Homemade Chocolate Bars
Transform your kitchen into a mini chocolate workshop with four core components.
Like Lindt’s Master Chocolatiers, you’ll combine precision and creativity to make bars that rival luxury brands. Let’s break down the essentials.
Essential Ingredients and Their Roles
Every great bar starts with quality elements.
Cocoa butter creates silkiness, while cocoa powder adds depth.
Sugar balances bitterness, and milk powder (for creamy varieties) delivers that velvety texture pros love.
| Ingredient | Purpose | Pro Tip |
|---|---|---|
| Cocoa Butter | Base for smooth melt | Use deodorized for neutral flavor |
| Cocoa Powder | Defines chocolate intensity | Choose 22-24% fat content |
| Sugar | Sweetness balance | Powdered blends best |
| Milk Powder | Creaminess boost | Full-fat for richness |
Flavor Pairings and Creative Ingredient Variations
Unlock endless possibilities by experimenting with flavors that elevate your homemade creations.
From balancing bold contrasts to meeting dietary needs, these techniques let you craft bars that delight every palate.
Balancing Sweetness with Sea Salt and Caramel
Sea salt transforms dark varieties by highlighting cocoa’s natural depth.
Try sprinkling flakes over melted chocolate before setting.
For caramel lovers, swirl homemade sauce into milk bases for Venchi-inspired layers.
Salted caramel works best when added in thin ribbons.
This creates pockets of gooey sweetness that contrast with rich cocoa.
Remember: a 1:4 salt-to-caramel ratio prevents overpowering flavors.
Accommodating Vegan, Gluten-Free, and Nutty Preferences
Plant-based milk powders create creamy vegan chocolate without dairy.
Use coconut or oat varieties for subtle flavor twists. Always check labels. Gluten-free certifications ensure safe options for sensitive friends.
- Swap dairy milk powder for almond flour (1:1 ratio)
- Use certified gluten-free vanilla extract
- Toast nuts separately to prevent cross-contamination
Incorporating Unique Flavors Like Hazelnut & Pistachio
Piedmont hazelnuts add crunch to milk bases, mirroring Venchi’s gianduja layers. Crush them coarsely for texture.
Bronte pistachios pair perfectly with white varieties. Their vibrant green hue makes bars visually stunning.
For pro-level results, try layering nut pastes between chocolate tiers. This technique creates the signature crunch of Cremino bars.
Store nut-enhanced creations in airtight containers to maintain freshness.
By the way, would you like to make a chocolate bar that is simply out of this world?
Then check out our recipe for the Ultimate Dubai chocolate Bar.

Your luxurious chocolate bars
Congratulations. You’re now equipped to craft chocolate that rivals luxury brands without the boutique price tag.
Whether making intense extra dark varieties or smooth white chocolate, each homemade bar becomes a canvas for creativity.
Package creations in elegant boxes for gifts that showcase personal care.
Build custom sets mixing flavors like sea salt dark and pistachio milk. Adjust sugar levels for dietary needs or experiment with cocoa percentages.
Friends will marvel at how your bars rival store-bought options.
Shopping for ingredients becomes an adventure—balance quality and cost to maximize flavor.
Consider gift boxes filled with handmade treats or personalized bars for coworkers. This isn’t just chocolate-making. It’s creating edible memories.
Your kitchen now holds the power to produce thoughtful presents and specialty items.
With each batch, you’ll refine techniques while saving money compared to shop prices. Start sharing your delicious artistry today.
Now that you know how to make your own chocolate bars, why not try making delicious peppermint bark for the holidays? Click the link to get our simple recipe.
FAQ
Can I substitute milk chocolate for dark chocolate in homemade recipes?
Absolutely! You can swap dark chocolate with milk or white varieties. Adjust sweetness levels based on your preference, as milk chocolate has more sugar, while dark options offer richer cocoa flavors.
How does sea salt enhance the taste of dark chocolate?
A pinch of sea salt balances bitterness and intensifies the cocoa’s depth. It creates a gourmet contrast, making sweet or caramel notes pop for a sophisticated flavor experience.
Are homemade chocolate bars gluten-free?
Yes! As long as you use gluten-free ingredients like pure cocoa, dairy alternatives, or nut mixes, your bars will stay safe for gluten-sensitive diets. Always check labels for hidden additives.
Can I make vegan-friendly chocolate without dairy?
Definitely! Use coconut oil or cocoa butter instead of milk, and opt for plant-based sweeteners. Add-ins like almond butter or vegan caramel keep the recipe dairy-free and indulgent.
What’s the best way to incorporate pistachios or hazelnuts?
Toast nuts lightly for extra crunch, then mix them into melted chocolate before setting. Layer them with vegan caramel or sprinkle on top for texture and nutty flavor.
How long do homemade chocolate bars stay fresh?
Store them in an airtight container at room temperature for up to 2 weeks. For longer freshness, refrigerate for 1–2 months—just let them warm slightly before eating to avoid texture changes.
Can I use honey or maple syrup instead of sugar?
Yes! Liquid sweeteners work but may alter texture. Reduce other liquids slightly and stir thoroughly to maintain smoothness. Taste-test to adjust sweetness levels as you go.
Why does white chocolate sometimes seize when melting?
White chocolate is sensitive to moisture. Melt it slowly using a double boiler, and avoid letting steam or water touch it. Stir gently for a creamy, lump-free finish.