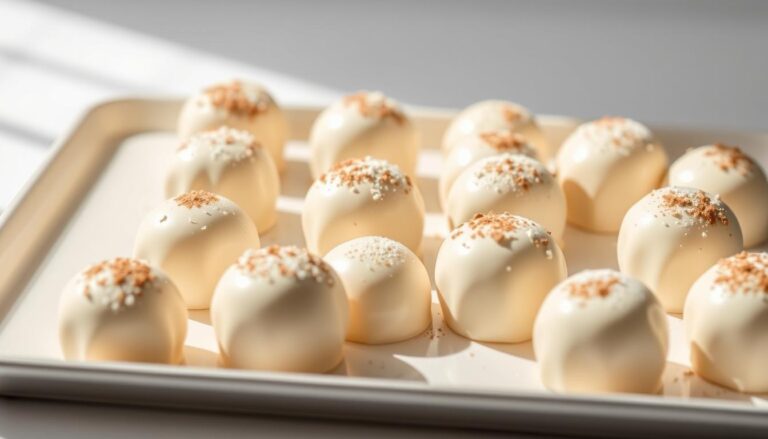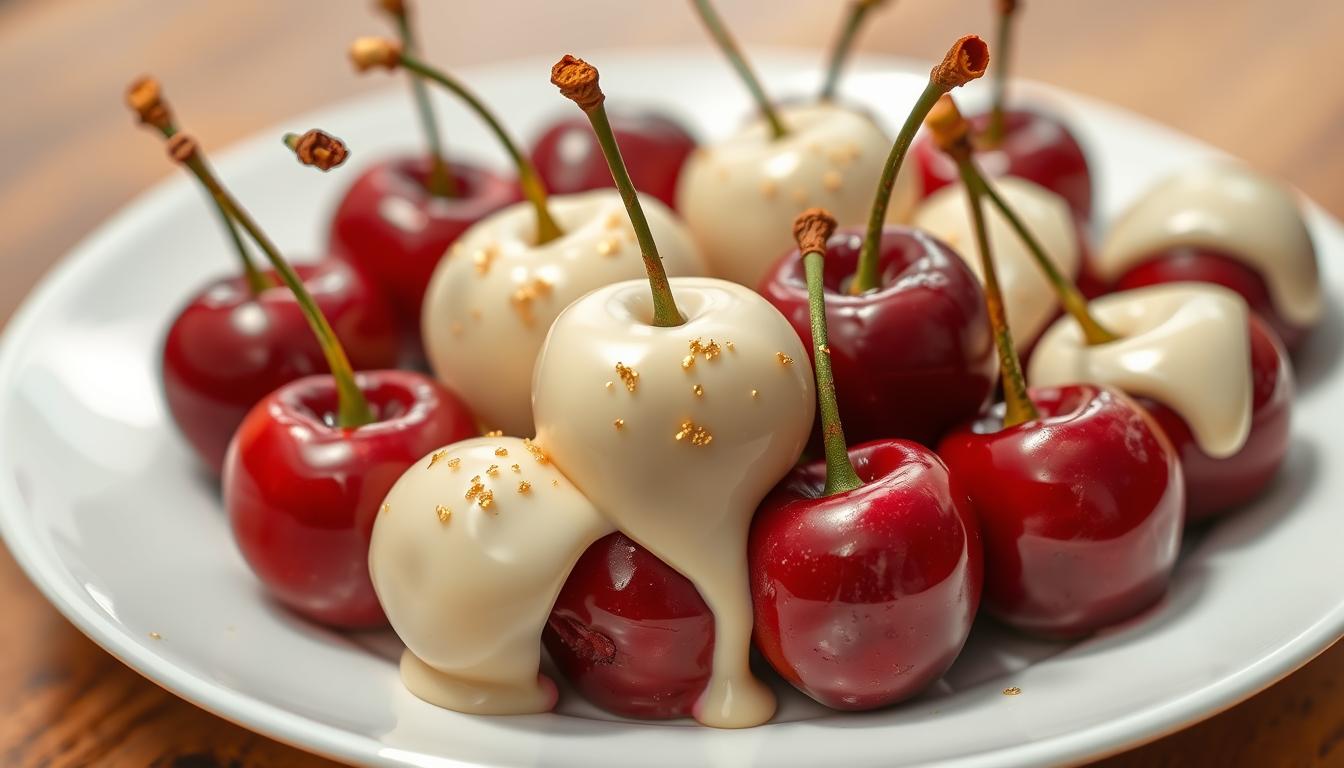
White Chocolate Dipped Cherries with Edible Gold Sparkle
Want transform a simple candy into a breathtaking gourmet gift? Then you need to learn to make these white chocolate dipped cherries with edible gold spark.
This elegant recipe offers a stunning upgrade to the classic treat.
We use a creamy white coating instead of the usual dark varieties. The result is a visually spectacular confection that tastes divine.
A sprinkle of edible gold sparkle elevates these sweets to pure luxury. They become perfect for holidays, parties, or a memorable Valentine’s surprise.
You can create these impressive treasures even with minimal baking experience.
Our guide breaks down the process into easy-to-follow steps. In the next minutes, you’ll learn the technique for creating beautiful, gift-worthy delights.
As you’ll see, this is the perfect solution for decorating desserts or crafting unique party favors.
Shall we?
Key Takeaways
- Learn to make a luxurious version of a classic candy.
- Using white coating creates a visually stunning treat.
- Edible gold sparkle adds a gourmet, gift-worthy touch.
- The method is simple and suitable for all skill levels.
- Perfect for special occasions and satisfying a sweet craving.
White Chocolate–Covered Cherries with Edible Gold Sparkle
Here is the recipe for White Chocolate–Covered Cherries with Edible Gold Sparkle.
These are a beautiful, elegant treat perfect for holiday gifting and New Year’s Eve celebrations.
Ingredients (Makes 24–30 cherries)
Cherries
- 24–30 long-stem maraschino cherries, well-drained and thoroughly dried
White Chocolate Coating
- 1 ½ cups (270 g) white chocolate chips
- 1 tablespoon (14 g) refined coconut oil
Finishing
- Edible gold luster dust OR edible gold glitter
(Use edible certified gold dust only)
Preparation Notes
- Moisture is the enemy of chocolate coating.
Pat cherries completely dry—including around the stem—before dipping. - Refined coconut oil helps the white chocolate melt smoothly and set with a glossy finish.
Instructions
Prepare the Cherries
- Remove cherries from the jar and place them on a paper towel–lined baking sheet.
- Gently pat each cherry dry, including the stem.
- Let cherries sit for 10–15 minutes to air-dry any residual moisture.
Melt the White Chocolate
- Add 1 ½ cups (270 g) white chocolate chips and 1 tablespoon (14 g) refined coconut oil to a microwave-safe bowl.
- Microwave on 50% power, stirring every 20–25 seconds, until smooth and fully melted.
- Do not overheat; white chocolate burns easily.
Dip the Cherries
- Line a baking sheet with parchment paper.
- Holding each cherry by the stem, dip it into the melted white chocolate, coating it almost to the top.
- Lift and let excess chocolate drip off.
- Set dipped cherries onto the prepared baking sheet.
- If the chocolate begins to thicken, briefly rewarm in the microwave (10 seconds at 50% power).
Add the Edible Gold Sparkle
You have two options:
A: Dust When Wet
- While the chocolate is still slightly tacky, lightly tap edible gold dust over the top using a small dry brush.
B: Brush After Setting (More Precise)
- Allow dipped cherries to set for 10–15 minutes.
- Dip a soft food-safe brush into edible gold dust.
- Gently brush gold over the surface or only at the top for a “dipped in gold” effect.
Chill and Serve
- Place the baking sheet of cherries in the refrigerator for 20 minutes or until fully set.
- Store cherries in an airtight container in the refrigerator up to 3 days.
Tips for Best Results
- Use refined coconut oil to avoid coconut flavor.
- For extra elegance, drizzle a thin line of gold over the stems.
- For gifting, place cherries in mini parchment candy cups inside a decorative tin.

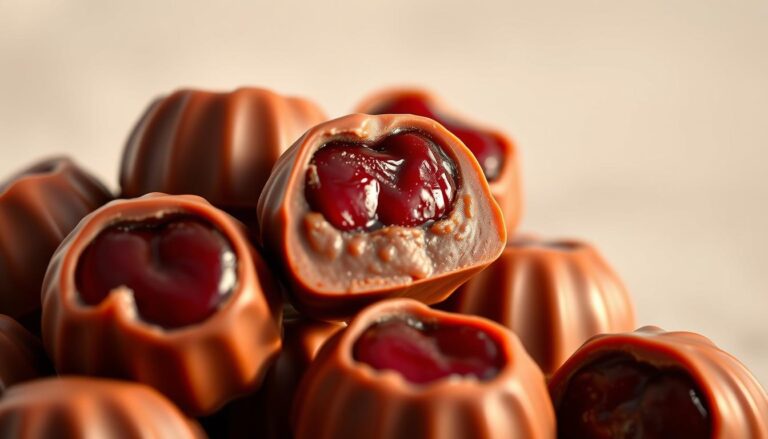
Introduction: A Decadent Twist on Chocolate Dipped Cherries
Many of us have fond memories of a special treat from our younger years.
If you love chocolate covered confections, you likely recall that perfect combination of sweet fruit and rich coating. It’s a favorite candy for a very good reason.
Store-bought cherry cordials often feature a liquid center made with corn syrup. Our homemade version offers a simpler, more natural approach.
You get to enjoy the pure, juicy flavor of the fruit without an overly sweet syrup.
This recipe puts a glamorous spin on the classic. We use a creamy white coating instead of dark varieties.
This creates a beautiful canvas for the edible gold sparkle that makes these treats truly stand out.
Making your own covered cherries gives you complete control. You can avoid artificial additives and create a fresher, more authentic candy.
The result tastes superior to anything from a box.
The beauty of this recipe is its incredible versatility. Enjoy these delights on their own as a sophisticated snack.
They also make stunning decorations for desserts or thoughtful handmade gifts for any occasion.
Essential Components for Your Decadent Recipe
Your journey to gourmet candy making begins with just three simple ingredients.
This minimalist approach makes the recipe accessible while delivering impressive results.
Overview
Long stem maraschino cherries are your foundation. The stems provide natural handles for dipping and create an elegant presentation.
Chocolate chips form the delicious coating. For the white version, choose white chocolate chips to create that beautiful pale canvas.
Refined coconut oil is your secret weapon. It thins the melted chips to perfect dipping consistency without adding coconut flavor.
Ingredient Substitutions and Tips
If you lack coconut oil, vegetable oil works equally well. Both help achieve that smooth, velvety texture for coating.
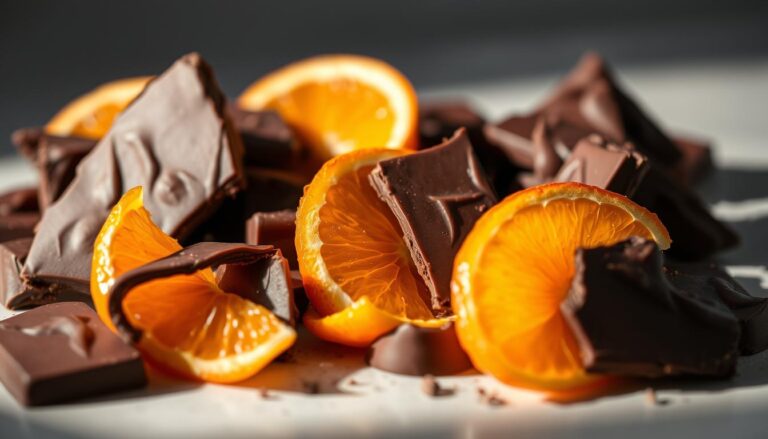
While this recipe focuses on white chocolate, feel free to experiment. Semi-sweet chocolate or dark chocolate chips create wonderful variations.
Related: Learn to make Milk Chocolate Cherry Cordials.
Consider making multiple batches with different chip types. This creates an impressive assortment perfect for gift-giving.
The simple ingredients list allows for easy customization. Choose allergy-friendly brands to accommodate dietary needs.
Prepping the Cherries and Creating the Perfect Workspace
A flawless final product starts with meticulous preparation of your ingredients and workspace.
Taking a few minutes to get organized will make the entire process smoother and more enjoyable.
Drying the Cherries Thoroughly
Begin by removing your maraschino cherries from their jar. Place them on a plate that is lined with two layers of paper towels. Let them drain for a full 15 minutes.
This waiting time is non-negotiable. Any leftover cherry juice will prevent the coating from sticking properly.
This can cause the mixture to become lumpy and unworkable.
After the initial drain, take a dry paper towel. Gently blot each piece of fruit to remove every last bit of surface moisture.
Your patience here guarantees a smooth, velvety finish later.
Setting Up with Parchment and Paper Towels
While your fruit is draining, prepare your finishing station.
Line a baking sheet or a large plate with parchment paper. This creates a non-stick surface for your treats to set.
Your workspace should have three clear areas. You need the drying station, the parchment-lined sheet for finished candies, and a clear spot for your melting bowl.
This organization prevents cross-contamination and mess. If you are making a large batch, consider using multiple sheets.
Having everything ready before you start is the key to success.

Mastering the Chocolate Melting Process
The secret to a flawless candy coating lies in mastering the art of melting.
This step is critical for achieving that glossy, professional finish you desire. Proper technique ensures your mixture is smooth and ready for dipping.
You have two excellent methods to melt your ingredients.
The microwave offers speed for smaller batches, while a double boiler provides gentle, controlled heat for larger quantities.
Melting Techniques: Microwave vs. Double Boiler
Choosing the right method depends on your batch size and comfort level.
Both approaches require patience to avoid overheating your mixture.
| Method | Best For | Key Steps | Pro Tip |
|---|---|---|---|
| Microwave | Small batches, quick results | Heat in 20-second intervals, stir well between each. | Start with less time to prevent scorching. |
| Double Boiler | Larger batches, more control | Place bowl over simmering water, stir until smooth. | Ensure no water gets into the bowl. |
Tips for Achieving a Smooth, Velvety Texture
Always combine your chips and oil in a microwave-safe bowl before applying heat. Toss them together so the oil coats the chips evenly.
Stirring is a must as it distributes heat and helps the mixture melt evenly. If it seems too thick, a tiny bit more oil can thin it to the perfect consistency.
The most important rule is to keep water away. Even a single drop can cause the mixture to seize, becoming grainy instead of smooth.
Perfecting the Dipping Technique
The moment of transformation is here, where simple fruit becomes an elegant confection.
This hands-on stage is both simple and deeply satisfying. You will see your beautiful treats take shape right before your eyes.
Working patiently is the key to a flawless, professional-looking finish. Rushing can lead to messy results. Taking your time ensures each piece is perfectly coated.
Detailed Dipping Process
Hold a drained cherry firmly by its stem. This natural handle keeps your fingers clean and gives you excellent control.
Gently lower the fruit into your bowl of melted chocolate.
Submerge it almost completely, but keep the stem above the surface. Slowly spin the cherry as you dip. This ensures the coating covers all sides and the top evenly.
Lift the cherry out and hold it over the bowl. Allow any excess coating to drip back down. A gentle tap on the bowl’s edge can help remove stubborn drips.
This step prevents a thick, clumsy coating and saves your mixture. Carefully place the finished piece onto your parchment-lined plate. Space them out so they don’t touch.
Continue this method, working on one piece at a time. After dipping all your cherries, move the plate to the refrigerator.
Let them set for at least one hour until firm.
Tips for Adding Edible Gold Sparkle and Finishing Touches
The final flourish is what turns your homemade candies into breathtaking works of art. This step adds a touch of luxury that makes your creations truly gift-worthy.
A simple sprinkle can elevate the entire presentation. It’s the detail that shows extra care and attention.
How to Apply Edible Gold Sparkle
Timing is everything when adding your decorative elements. You must work quickly after dipping each piece.
The coating needs to be wet and tacky for the sparkle to stick properly. Have your toppings ready before you begin the dipping process.
You have two main techniques for application. The method you choose depends on the look you want to achieve.
| Application Method | Best For | Instructions | Final Look |
|---|---|---|---|
| Sprinkling | Elegant, focused sparkle | Use a small spoon to sprinkle sparkle over the top of each piece. | Graduated effect, concentrated on the upper portion. |
| Rolling | Full, dramatic coverage | Gently roll the freshly coated fruit in a dish of sparkle. | Completely coated, very luxurious appearance. |
Creative Garnishing Ideas
Gold is stunning, but don’t be afraid to experiment. Consider your event’s color scheme for inspiration.
Rose gold sparkle is perfect for romantic occasions. Silver works beautifully for winter celebrations.
You can also use colorful edible sugar crystals for a fun look. A light drizzle of dark coating creates a lovely contrast.
After decorating, let your treats set completely in the fridge. This prevents smudging your beautiful finish.
Store your finished creations in an airtight container in the refrigerator. They will stay fresh for up to two weeks.
Using Chocolate Dipped Cherries in Desserts and Gifts
Your beautiful creations are more than just a delightful candy, they are the key to elevating everyday desserts into extraordinary experiences.
These elegant treats bring a touch of luxury to any occasion, whether served on a plate or presented as a heartfelt gift.
Their versatility makes them a favorite for creative bakers. You can use them to add a spectacular finish to many sweet dishes.
Decorative Dessert Ideas
Transform simple sweets into show-stopping finales. A single piece placed on whipped cream turns hot chocolate into a gourmet experience.
They are perfect for frozen treats. Add them to banana splits, sundaes, or an ice cream cake for a burst of flavor.
Consider these inspiring applications for your next baking project:
| Dessert | Placement Idea | Visual Impact |
|---|---|---|
| Chocolate Mousse | Garnish individual servings | Elegant and sophisticated |
| Cheesecake | Top each slice | Luxurious and festive |
| Dessert Board | Feature alongside other treats | Colorful and inviting centerpiece |
Gift Presentation and Party Favors
Homemade confections make thoughtful presents. For Valentine’s Day, arrange them in a decorative box lined with tissue paper.
Package them in clear cellophane bags tied with ribbon for charming party favors. This works wonderfully for weddings or showers.
Always store your gifts in the refrigerator until the last moment. Use parchment paper between layers in an airtight container to keep them perfect.

Troubleshooting and Common Pitfalls
When creating elegant confections, being prepared for common issues ensures consistent success.
Even with this simple covered cherries recipe, a few mistakes can derail your results. Knowing what to watch for helps you avoid frustration and wasted ingredients.
Avoiding Lumpy Chocolate Coatings
The number one culprit behind lumpy, separated chocolate is moisture.
If your cherries aren’t completely dry before dipping, even tiny amounts of cherry juice or water will cause the coating to seize.
Be extra diligent about drying time. Don’t hesitate to spend those extra few minutes thoroughly blotting each piece with paper towels.
This prevents moisture from contaminating your bowl.
Another common pitfall is overheating your mixture in the microwave. Always use short heating intervals and stir thoroughly between each one.
This prevents scorching and maintains a smooth texture.
Ensuring Proper Set Time and Storage
Allow adequate setting time in the refrigerator.
Rushing this step by trying to package or serve too soon will result in smudged presentation. Patience ensures a perfect finish.
For proper storage, place your finished treats in an airtight container in the refrigerator. They’ll keep fresh for up to two weeks, making this a fantastic make-ahead recipe.
When storing multiple layers, separate each with parchment paper. This prevents sticking and protects your beautiful gold sparkle finish.
Proper storage maintains both quality and appearance.
Stunning Chocolate Treats.
With this recipe now in your culinary toolkit, you can effortlessly produce stunning treats that impress every time.
You’ve mastered the art of creating elegant confections that transform simple ingredients into gourmet-quality candy.
This approach proves that beautiful results don’t require complex techniques. Quality ingredients and careful preparation yield professional-looking creations.
The perfect cherry and chocolate combination satisfies any sweet craving.
Feel free to customize your creations with different coatings and decorative toppings.
Keep this guide handy by printing it for future reference. Your covered cherries will stay fresh for weeks with proper storage.
Now you’re ready to create batches of these luxurious treats for any occasion and turn them into wonderful homemade gifts or special desserts that taste as amazing as they look.
Until next time.
FAQ
What’s the best way to melt candy melts for this recipe?
You can use a microwave or a double boiler. For the microwave, heat in short 30-second bursts, stirring each time. For a double boiler, place a heatproof bowl over a pot of simmering water, ensuring the bowl doesn’t touch the water. Both methods help you achieve that smooth, velvety texture.
Can I use maraschino cherries instead of fresh ones?
Absolutely! Maraschino cherries work wonderfully. Just be sure to pat them completely dry with paper towels after draining the cherry juice. Any extra moisture can cause the coating to seize up or not stick properly.
How do I get the edible gold sparkle to stick?
Apply the sparkle right after you’ve finished dipping, while the coating is still wet. You can gently sprinkle it on or use a small, clean brush to dust it over the top for a more controlled, elegant look.
My coating is lumpy. What went wrong?
Lumps usually mean the candy got too hot or a bit of water got into the bowl. To fix it, try adding a tiny amount of coconut oil or vegetable shortening to the melted mixture and stir gently. This often helps smooth everything out.
How long do these treats need to set, and how should I store them?
Let them set on a parchment-lined baking sheet at room temperature for about an hour. For storage, keep them in a single layer in an airtight container in a cool, dry place. They are best enjoyed within a week.
Can I use semi-sweet or dark chocolate chips instead of white candy melts?
Yes, you can! Semi-sweet or dark chocolate chips make a delicious combination. Just remember that they may have a different melting point, so melt them slowly and stir frequently for the best results.
Are these a good option for party favors or gifts?
They make fantastic, elegant gifts! Place them in small decorative boxes or clear cellophane bags tied with a ribbon. They add a special, homemade touch to any celebration or holiday gift box.