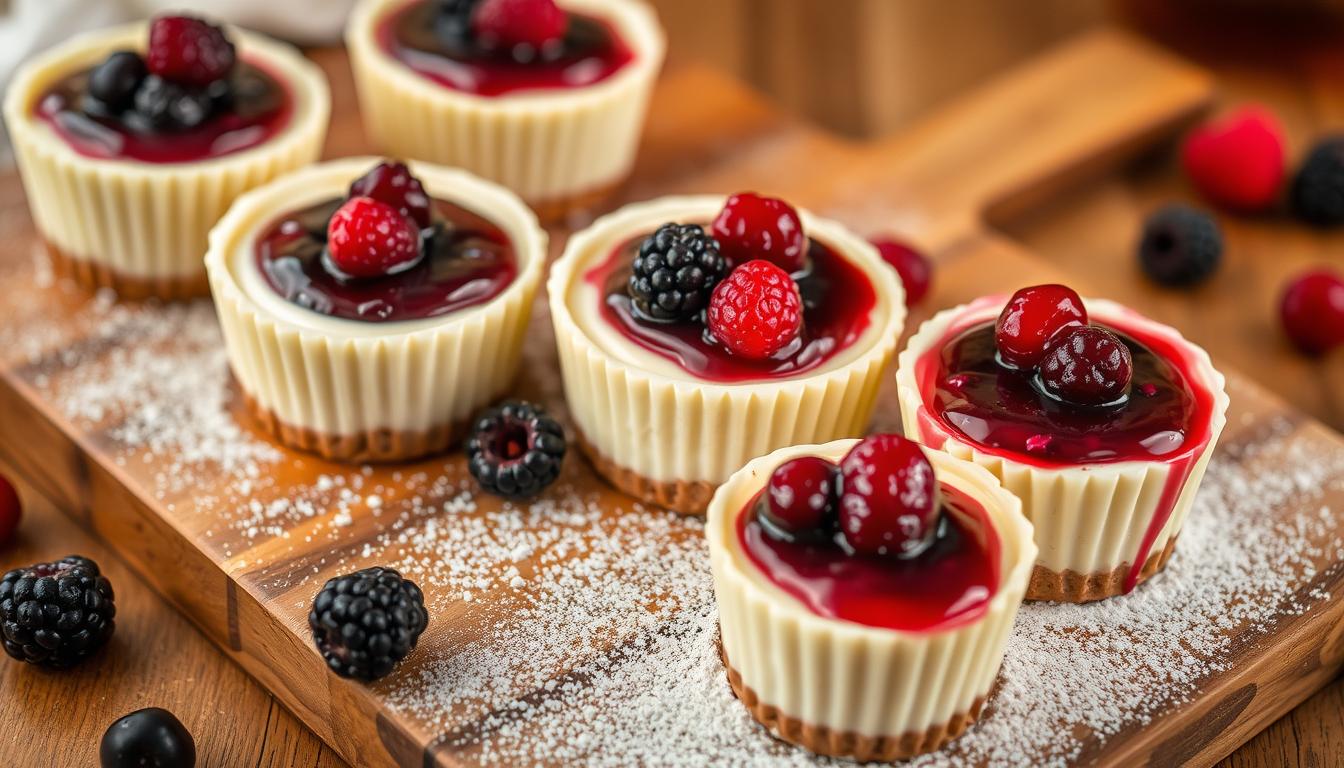
White Chocolate Cheesecake Cups with a Boozy Berry Topping
Want to craft a dessert that looks like it came from a high-end patisserie but is actually quite simple to make? Say hello to these white chocolate cheesecake cups.
These elegant individual treats transform the classic cheesecake experience into something truly special for your next gathering.
Imagine a creamy, rich filling paired with a vibrant, tangy topping. The combination is both sophisticated and incredibly satisfying.
Each component complements the other beautifully.
Best of all, serving is a breeze. There is no messy slicing involved. Your guests get their own perfectly portioned delight.
This makes them ideal for parties and special occasions.
You do not need to be a professional baker to achieve stunning results. This guide will walk you through every step.
So, are you ready to impress everyone with your culinary skills?
Let’s do it!
Key Takeaways
- This dessert offers an elegant, individual alternative to a traditional large cake.
- The combination of a creamy base and a tangy topping creates a complex flavor profile.
- These cups are incredibly easy to serve, with built-in portion control.
- The final product has a professional appearance but is achievable for home bakers.
- This recipe is perfect for entertaining and impressing guests at parties.
- The guide provides clear, step-by-step instructions for success.
Recipe for White Chocolate Cheesecake Cups with a Boozy Berry Topping
Here is the recipe to make delightful White Chocolate Cheesecake Cups with a Boozy Berry Topping.
These are perfect for New Year’s Eve celebrations: Elegant, creamy, festive, and individually portioned.
Yields: 12 Cups
Prep: 25 minutes (+ chill time) • Bake: ~16–19 minutes • Chill: ≥2 hours (overnight best)
Ingredients
Crust (for 12 cups)
- 1 1/4 cups (150 g) graham cracker crumbs
- 5 tablespoons (70 g) unsalted butter, melted
- 2 tablespoons (25 g) granulated sugar
Cheesecake Filling
- 8 oz (226 g) full-fat cream cheese, softened
- 1/4 cup (50 g) granulated sugar
- 1/4 cup (60 g) sour cream, room temperature
- 1 teaspoon pure vanilla extract
- 6 oz (170 g) white chocolate, finely chopped and melted, cooled slightly
- 1 large egg, room temperature
- 1/2 cup (120 ml) heavy whipping cream, cold (to be whipped and folded in)
Boozy Berry Topping
- 1 1/4 cups (180–200 g) mixed berries (fresh or thawed frozen; e.g., raspberries, blueberries, blackberries)
- 3 tablespoons (36 g) granulated sugar
- 2 tablespoons (30 ml) water
- 2 tablespoons (30 ml) berry liqueur (e.g., Chambord) or dark rum — optional, adjust to taste
- 1 teaspoon cornstarch + 2 teaspoons cold water (slurry)
Sweetened Whipped Cream (for garnish)
- 1 cup (240 ml) heavy whipping cream, cold
- 1/4 cup (30 g) confectioners’ (powdered) sugar, sifted
- 1/2 teaspoon vanilla extract
Equipment
- 12-cup mini muffin tin + 12 foil or paper liners (foil gives sturdier base)
- Mixing bowls, hand mixer or stand mixer, small saucepan
Directions
Make & press the crust
- Preheat oven to 325°F (163°C). Line the mini muffin tin with liners.
- In a bowl combine graham crumbs, melted butter, and granulated sugar. Stir until evenly moistened.
- Divide the crumb mixture among the 12 liners (about 1 heaping tablespoon each). Press firmly into the bottom (use a small flat-bottomed measuring spoon or the end of a small glass).
- Bake crusts 5 minutes to set. Remove and let cool while preparing filling.
Prepare the white-chocolate cheesecake filling
- Melt the white chocolate gently (double boiler or microwave in 20-sec bursts) until smooth. Let cool to just warm (not hot).
- In a mixing bowl, beat the softened cream cheese and 1/4 cup granulated sugar on medium speed until smooth and lump-free (~1–2 minutes). Scrape sides as needed.
- Add sour cream and vanilla; beat to combine.
- With mixer on low, add the egg and mix until just blended (avoid overbeating).
- Stir in the melted white chocolate until uniform.
- In a separate bowl whip the 1/2 cup cold heavy cream to soft peaks. Fold the whipped cream gently into the cheesecake mixture until homogenous.
Fill & bake the mini cups
- Spoon the filling into each prepared crust, filling nearly to the top (leave ~1–2 mm for whipped cream/top).
- Bake at 300°F (150°C) for 16–19 minutes, or until centers are set but still slightly jiggly (they will firm as they chill).
- Remove from oven and let cool to room temperature on a wire rack, then refrigerate at least 2 hours, preferably overnight.
Making the Boozy berry topping
- In a small saucepan combine berries, 3 Tbsp sugar, and 2 Tbsp water. Cook over medium heat until berries release juices and begin to soften (3–5 minutes).
- Stir the cornstarch slurry (1 tsp cornstarch + 2 tsp cold water) into the hot berries and cook 1–2 minutes until slightly thickened. Remove from heat.
- Stir in liqueur or rum (2 Tbsp) if using. Taste and adjust sweetness. Let cool completely (refrigerate to speed this if desired).
Make sweetened whipped cream
- Whip 1 cup cold heavy cream with 1/4 cup confectioners’ sugar and 1/2 tsp vanilla to medium-stiff peaks. Keep chilled.
Assemble and finish
- Remove chilled cheesecake cups from the fridge. Top each with 1 teaspoon (or more if desired) of the cooled boozy berry compote.
- Pipe or dollop a small swirl of the sweetened whipped cream beside or on top of the berries. For extra polish, shave a little white chocolate over each cup or add a single fresh berry.
- Keep stored refrigerated until service.
Make-ahead & storage
- Cheesecake cups (un-topped) keep well in an airtight container up to 48 hours refrigerated.
- Berry topping can be made 2–3 days ahead and refrigerated.
- Assemble within a few hours of serving for best texture; assembled cups keep 24–48 hours chilled.
Notes & tips
- Use full-fat cream cheese for the creamiest texture; let fully soften for a lump-free filling.
- Don’t over-whip the filling after adding egg to avoid cracks/air pockets — gentle folding is best.
- If you prefer no-alcohol, just omit the liqueur and add a teaspoon extra lemon juice or a splash of berry juice for brightness.
- For sturdier presentation at parties, use foil liners; they hold shape and look elegant.

Introduction: A Festive Dessert Adventure
Discover how simple kitchen tools can create stunning results that rival professional bakery offerings.
These individual treats transform the dessert experience into something truly memorable.
What Makes This Recipe Special
The individual serving format sets these creations apart. Using a standard muffin tin eliminates complex equipment like springform pans.
This approach makes the process much more accessible. No water baths are required for baking.
The smaller size ensures even cooking throughout. Your guests receive perfectly portioned delights.
The boozy berry topping adds an adult-friendly twist. It elevates these treats from simple to sophisticated. This makes them perfect for celebrations.
Why You’ll Love This Unique Twist
The flavor balance is exceptional. The sweet base provides a perfect canvas for tangy fruit. Each component complements the other beautifully.
This recipe offers excellent make-ahead convenience. You can prepare everything in advance. Simply store them until serving time.
The versatility makes this dessert ideal for various occasions. It works for both casual gatherings and elegant events. Everyone enjoys their own personal treat.
| Feature | Mini Cheesecakes | Traditional Cheesecake |
|---|---|---|
| Serving Style | Individual portions | Requires slicing |
| Preparation Time | Shorter baking time | Longer baking process |
| Equipment Needed | Standard muffin tin | Springform pan required |
| Serving Convenience | No cutting needed | Messy slicing involved |
| Portion Control | Built-in individual servings | Variable slice sizes |
The comparison shows why this approach saves time. It’s a fantastic way to serve dessert without stress. Your guests will appreciate the thoughtful presentation.
Core Components for a Creamy Cheesecake
The secret to a truly exceptional dessert lies in the quality and preparation of its core components.
Choosing the right elements makes all the difference between a good treat and a great one.
Your shopping list for this recipe is simple but specific. Each item plays a vital role in creating the final texture and flavor.
Dairy, White Chocolate, and Cream Cheese
Your foundation starts with high-quality dairy. Always use brick-style cream cheese, not the spreadable kind found in tubs.
This type has less moisture, which helps your filling set properly without becoming lumpy.
For the best results, ensure your cream cheese, egg, and any sour cream are at room temperature. This simple step is crucial for achieving a perfectly smooth mixture.
- Room temperature ingredients blend seamlessly.
- They prevent overmixing, which can incorporate too much air.
- This results in a denser, creamier texture.
When it comes to the star flavor, invest in a premium bar of white chocolate from brands like Ghirardelli or Lindt.
Chopped bars melt more evenly into the filling than chips, which are better saved for decoration.
Heavy whipping cream contributes to a silky filling. A splash of vanilla extract enhances the other flavors without overpowering them.
Fruity Elements and Sweet Accents
The berry topping offers a vibrant contrast. You can use either fresh or frozen fruit with great success.
Frozen berries often break down more easily when cooked into a sauce.
For the crust, you will need graham cracker crumbs, melted butter, and a bit of granulated sugar.
Confectioners’ sugar is ideal for sweetening the whipped cream topping, as it dissolves instantly.
Each of these ingredients works together to create a balanced and impressive final product.
Must-Have Equipment and Kitchen Tools
Your kitchen arsenal plays a crucial role in achieving professional-looking results with minimal effort. The right tools make each step smoother and more efficient.
Muffin Tin and Cupcake Liners
A standard 12-count muffin tin creates perfectly portioned desserts. This tin ensures consistent sizing for a uniform presentation.
Cupcake liners make removal effortless. They help maintain the delicate shape of each treat. If you lack liners, generously grease each cup with non-stick spray.
Mixing Bowls, Microwaves, and More
You’ll need various mixing bowl sizes throughout the process. A small bowl works for melting ingredients. A large bowl handles the main filling preparation.
Either a hand mixer or stand mixer achieves the perfect consistency. It blends the filling smoothly and whips cream to ideal peaks.
A medium saucepan prepares the berry syrup with even heat. A fine-mesh sieve strains out seeds for a smooth topping.
| Tool | Primary Use | Alternative Options |
|---|---|---|
| Muffin Tin | Creating individual portions | Well-greased ramekins |
| Mixing Bowls | Preparing various components | Various-sized containers |
| Hand Mixer | Blending filling smoothly | Stand mixer or whisk |
| Fine-Mesh Sieve | Straining berry seeds | Cheesecloth or fine strainer |
Piping bags with decorative tips elevate your presentation.
A simple spoon works for more casual serving. Additional tools like spatulas and measuring cups ensure accuracy.

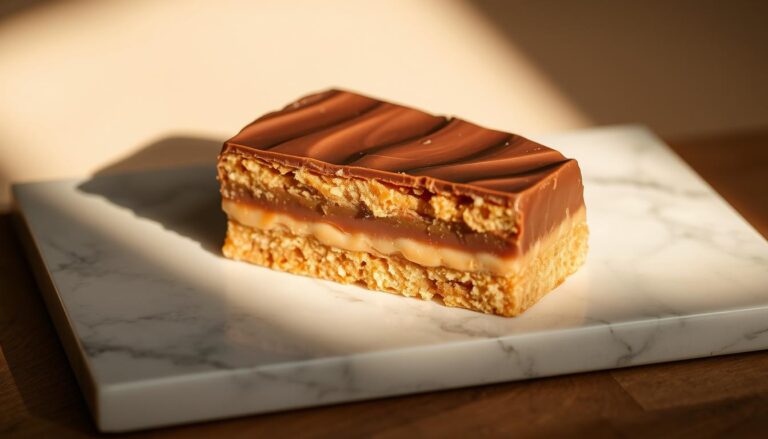
Perfecting the Graham Cracker Crust
Creating a stable base for your individual desserts requires attention to texture and proper preparation techniques.
The foundation sets the stage for everything that follows.
Getting this step right ensures your final product holds together beautifully.
It’s the first layer of flavor and structure.
Combining Crumbs, Butter, and Sugar
Start by making your graham cracker crumbs. You can use a food processor for quick pulses.
Alternatively, place whole crackers in a sealed bag and crush them with a rolling pin.
Measure about 1 to 1½ cups of these fine crumbs. The quantity depends on how many portions you’re making.
Combine the crumbs with 3-4 tablespoons of melted butter. Add 1-3 tablespoons of granulated sugar for subtle sweetness. Mix until the texture resembles wet sand.
Test the mixture by pressing it between your fingers. It should hold its shape without crumbling apart. This indicates the perfect butter-to-crumb ratio.
| Crumb Method | Preparation Time | Result Texture | Best For |
|---|---|---|---|
| Food Processor | 2-3 minutes | Very fine and even | Quick, consistent results |
| Rolling Pin | 5-7 minutes | Slightly varied texture | Hands-on approach |
| Pre-made Crumbs | Instant | Consistently fine | Maximum convenience |
Divide the crumb mixture evenly among your liners. Use about two tablespoons per cup. Press firmly with the back of a spoon to create an even layer.
Pre-bake the crust at 325-350°F for about 5 minutes. This short bake time sets the butter. It creates a firm foundation that won’t become soggy.
Allow the baked crust to cool completely before adding the filling. This cooling period prevents the creamy mixture from melting upon contact.
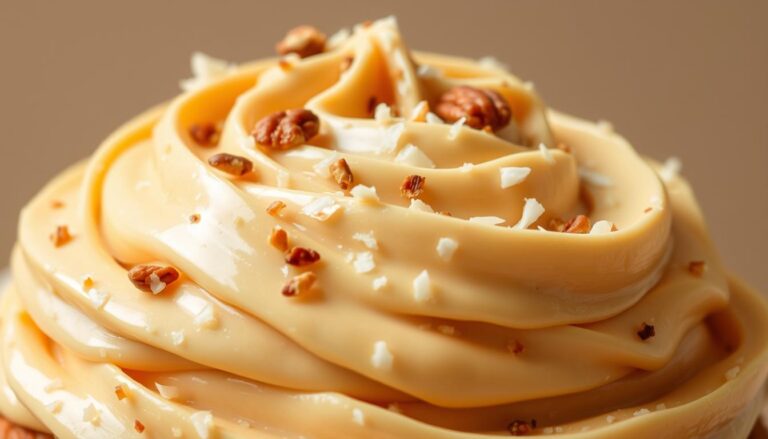
Crafting the White Chocolate Cheesecake Filling
The heart of this elegant dessert is its rich and velvety filling, which comes together with a few simple techniques.
Paying close attention to each step ensures a perfectly smooth and decadent result every time.
Techniques for Melting White Chocolate
Begin by properly melting your high-quality bar. Chopped bars melt more smoothly than chips for a superior cheesecake filling.
Use a microwave, heating in short 15-30 second bursts. Stir thoroughly between each interval to prevent scorching.
The melted white chocolate must be completely smooth and cooled slightly before adding it to your other ingredients.
This prevents the cream cheese from seizing and becoming grainy.
For more controlled heat, a double boiler is an excellent alternative. Gently melt the chocolate over simmering water, stirring constantly.
Tips for a Smooth Cream Cheese Mixture
Ensure your brick-style cream cheese is at room temperature.
Beat it with granulated sugar until the cream cheese sugar mixture is completely lump-free. Scrape the bowl’s sides and bottom frequently for an even blend.
Next, incorporate sour cream (or Greek yogurt) and a teaspoon of vanilla extract.
This adds creaminess and a subtle tang that balances the sweetness. Gently fold in the cooled, melted white mixture.
Finally, add the egg. Mix on low speed just until it is incorporated. Overmixing can incorporate too much air and lead to cracks during baking.
Your final filling should be thick, creamy, and perfectly pourable.
Creating a Boozy Berry Topping
The crowning glory of these elegant desserts is a vibrant berry topping that adds both visual appeal and sophisticated flavor.
This final layer brings everything together with its beautiful color and balanced taste.
Berry Syrup Preparation Methods
Begin by placing your berries in a medium saucepan over medium heat. Combine them with sugar and let the natural juices release.
The gentle heat helps concentrate the flavors beautifully.
Cook the mixture for about five minutes, stirring occasionally. This allows the berries to break down into a rich syrup.
For a thicker consistency, add a tablespoon of cornstarch to the mixture.
After cooking, strain the syrup through a fine-mesh sieve. This removes seeds for a smooth, professional-looking chocolate raspberry topping.
The white chocolate raspberry combination creates a classic pairing that’s both elegant and satisfying.
| Berry Type | Cooking Time | Best For |
|---|---|---|
| Fresh Raspberries | 4-5 minutes | Bright, fresh flavor |
| Frozen Berries | 5-6 minutes | Year-round availability |
| Mixed Berries | 6-7 minutes | Complex flavor profile |
Infusing a Boozy Twist
For an adult-friendly version, add your chosen liqueur after removing the saucepan from the heat.
Use about 2-3 tablespoons of Chambord, Grand Marnier, or dark rum. This amount adds complexity without making the topping too liquid.
The alcohol can be omitted for family gatherings. You can substitute with extracts for subtle flavor hints.
Always allow the syrup to cool completely before adding it to the top of your desserts.
This cooling time is crucial. Adding warm mixture can affect the texture of your filling.
The final chocolate raspberry topping should be chilled and ready to complement your creation perfectly.
Assembling Your Mini Cheesecakes
The final assembly is where your individual desserts transform from separate components into a stunning, cohesive treat.
This step combines flavor and visual appeal.
Start by spooning or piping your creamy filling into the cupcake liners over the cooled crust.
For a marbled effect, alternate spoonfuls of the chilled berry syrup with the filling as you go.
Creating beautiful swirls is simple. Use a toothpick or thin knife. Gently make figure-eight or circular motions through the layers.
Be careful not to overmix. Aggressive mixing will muddy the colors instead of creating distinct, elegant patterns. The goal is a gentle blend.
- Fill each cup about three-quarters full. This allows room for slight expansion during baking and prevents overflow in the tin.
- For a layered look, add half the filling, a layer of berry syrup, then top with the remaining filling.
- Any leftover filling can be set aside in a small ramekin and baked separately for a quick tester treat.
Remember, working with chilled syrup is essential. Warm syrup would blend too readily into the base, losing the beautiful marbled effect you want to achieve.
Baking and Chilling to Perfection
The final phase of creating your elegant desserts involves precise baking and patient chilling. This step ensures a smooth texture and prevents cracks.
Optimal Baking Times and Temperatures
Preheat your oven between 325°F and 350°F. Both temperatures work well. Your choice depends on your desired outcome.
A lower temperature of 325°F offers gentler, more even heat. This reduces the risk of over-browning. A 350°F setting provides slightly faster cooking.
The baking time for these individual treats ranges from 15 to 25 minutes. Thinner fillings will need less time. Watch for visual cues to know when they are done.
The centers should have a slight jiggle when you gently shake the pan. The edges will appear set. The top should not have any cracks.
| Baking Temperature | Baking Style | Ideal For |
|---|---|---|
| 325°F | Gentler, slower bake | Ultra-creamy texture, minimizing cracks |
| 350°F | Faster, efficient bake | When you need to save a few minutes |
Once baked, the cooling process is critical. Let the pan cool on a rack for about 45 minutes. This gradual cooldown at room temperature prevents thermal shock.
After this, transfer the desserts to the refrigerator. They need at least 2-3 hours to set fully. For the best texture, chilling overnight is ideal.
You will know they are ready when the top feels firm to the touch. This patience allows the flavors to meld beautifully. The result is a perfectly set, sliceable delight.
Plating and Decoration Ideas
Elevating your desserts from delicious to dazzling requires simple techniques that make a dramatic visual impact.
The final presentation transforms your individual treats into elegant masterpieces.
Whipped Cream and Drizzle Finishing Touches
Create light, stabilized whipped cream by beating heavy cream with confectioners’ sugar until stiff peaks form.
This airy topping provides a beautiful contrast to the rich base.
Transfer your cream to a piping bag fitted with a star tip. Pipe decorative rosettes or swirls that add height and professional appeal.
For an extra touch of elegance, melt additional white chocolate chips and drizzle artistic patterns across the top.
Garnishing with Fresh Berries
Fresh berries add vibrant color and complementary tartness to your sweet creation. Whole raspberries or sliced strawberries create visual interest while enhancing flavor.
Add delicate garnishes just before serving to maintain their fresh appearance. Consider chocolate shavings or mint leaves for special occasions.
For parties, create a dessert board where guests can customize their own treats.

Variations and Expert Tips
Expert insights help elevate your baking skills while offering flexible customization options. Once you master the basic formula, endless creative possibilities await.
These personal touches make each batch uniquely yours. They also allow you to adapt to different occasions and preferences.
Flavor Substitutions and Customizations
Swap raspberries for strawberries or blueberries in your berry topping. Each fruit brings its own character to the final creation.
For the base, consider using dark or milk varieties instead of white. This changes the flavor profile dramatically.
Alternative crust options include Oreo or vanilla wafer crumbs. Even pretzel crumbs create an interesting sweet-salty contrast.
| Variation Type | Ingredient Swap | Flavor Result | Best Occasion |
|---|---|---|---|
| Berry Alternative | Strawberries | Sweet, bright profile | Summer gatherings |
| Chocolate Change | Dark variety | Rich, sophisticated | Formal events |
| Crust Innovation | Oreo crumbs | Cookies-and-cream vibe | Kids’ parties |
| No-Bake Version | Whipped cream | Light, mousse-like | Hot summer days |
Creative Presentation Ideas
Serve your creations in small glass jars for a rustic look. Decorative liners add color coordination with party themes.
A tiered stand creates elegant display options. These presentation notes transform simple serving into something special.
Proper storage ensures your mini delights stay fresh. They keep well refrigerated for several days.
Elegant, Personal Desserts.
With the right approach, these elegant desserts become achievable for any home baker.
This recipe delivers impressive results while simplifying the traditional process. You eliminate complex equipment and water baths.
Feel free to experiment with different flavors and crust variations. Quality ingredients and proper technique ensure success every time.
Patience during chilling creates the perfect texture.
The make-ahead convenience makes these treats ideal for entertaining. You can prepare everything in advance for stress-free serving.
Share your creative combinations and enjoy your delicious creations!
FAQ
Can I make these mini desserts ahead of time?
Absolutely! These treats are perfect for prepping in advance. You can bake them up to two days before serving. Just store them in an airtight container in the refrigerator. Add the boozy berry topping and any final garnishes right before you’re ready to serve for the freshest taste and presentation.
What’s the best way to melt the white chocolate chips?
The gentlest method is using a double boiler. Simply place a heatproof bowl over a saucepan with a small amount of simmering water, ensuring the bowl doesn’t touch the water. Stir the chips until they are smooth. You can also use a microwave, heating in 20-second bursts and stirring well between each interval to prevent scorching.
My cream cheese mixture is lumpy. How can I fix it?
The key is to have your cream cheese at room temperature before you start. If you find lumps in your mixture, try beating it a bit longer with an electric mixer. For a super-smooth texture, you can press the finished filling through a fine-mesh sieve to remove any stubborn bits before adding it to your crusts.
Can I use a different type of berry for the topping?
Of course! Feel free to get creative. Raspberries, blackberries, or a mix of your favorite berries would work wonderfully. Just keep in mind that different fruits may have varying levels of natural sweetness and pectin, which can slightly alter the cooking time and thickness of your syrup.
Do I need to use a muffin tin for this recipe?
Yes, a standard muffin tin is essential for creating the perfect individual cup shape. Lining the cups with paper or foil liners makes removing the finished desserts incredibly easy and keeps your pan clean. This setup helps the crust hold its form and ensures even baking.