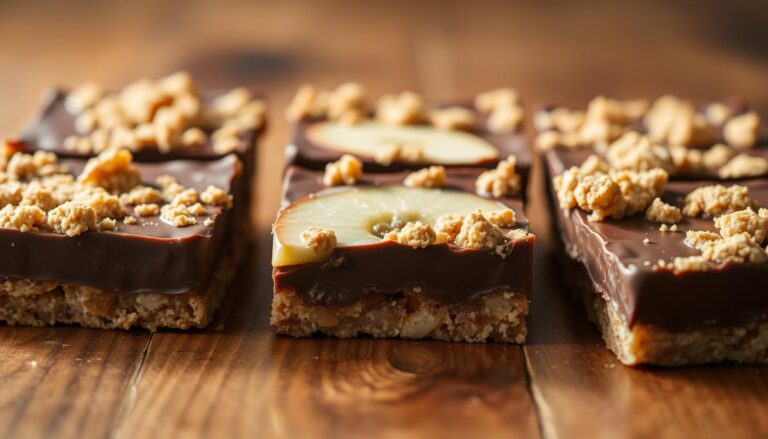
No-Bake Peppermint Bark Cheesecake Cups
Want to create a stunning holiday dessert that impresses everyone and requires little effort? Then you need to learn to make these peppermint bark cheesecake cups.
These individual treats bring the magic of the season right to your table while keeping you away from the oven.
They combine a rich, chocolatey crust with a cool, creamy filling. The classic pairing of chocolate and mint makes every bite festive.
Perfect for parties, these mini delights mean no slicing or messy plates. In fact, this recipe is designed for bakers of all skill levels.
Your guests simply grab their own personal serving using a muffin tin that makes the process straightforward and foolproof.
You get all the richness of a classic dessert without any stress.
Ready to get started?
Let’s roll.
Key Takeaways
- Create an impressive holiday dessert with minimal effort and no baking required.
- Enjoy the convenience of individual servings, perfect for parties and gatherings.
- Simplify the process by using a standard muffin tin instead of specialty pans.
- Achieve a rich, creamy texture without the need for a complicated water bath.
- Combine classic festive flavors for a treat that everyone will love.
- This approachable recipe is great for both beginner and experienced bakers.
Peppermint Bark Cheesecake Cups (No-Bake)
Here is the recipe for 12 No-Bake Peppermint Bark Cheesecake Cups, which are creamy, festive, mint-kissed with crunchy peppermint bark pieces.
All in individual cups to avoid any kind of mess.
These treats are also perfect for New Year’s Eve!
Ingredients
Crust
- 24 Oreo cookies (about 250 g), finely crushed
- 4 tbsp (56 g) unsalted butter, melted
- 1 tbsp (12 g) granulated sugar
Cheesecake Filling
- 16 oz (454 g) full-fat cream cheese, softened
- ½ cup (100 g) granulated sugar
- ¼ cup (60 g) plain yogurt (Greek or regular)
- 1 tsp pure vanilla extract
- ½–¾ tsp peppermint extract (½ tsp for subtle mint, ¾ tsp for stronger flavor)
- 2 large eggs, room temperature
- 1 cup (150 g) peppermint bark, finely chopped (plus extra for topping)
Equipment
- 12-cup muffin pan
- Paper or foil cupcake liners
- Electric mixer
- Mixing bowls
Instructions
Prepare the Crust
- Line a muffin pan with 12 cupcake liners.
- In a bowl, combine crushed Oreos, melted butter, and granulated sugar.
- Mix until the crumbs are evenly moistened.
- Scoop 1½–2 tbsp of the mixture into each cup.
- Press firmly using the bottom of a small glass or spoon.
- Refrigerate 10–15 minutes to set while preparing the filling.
Make the Peppermint Cheesecake Filling
- In a large bowl, beat the softened cream cheese for 1–2 minutes until smooth.
- Add granulated sugar and mix until fully incorporated.
- Add yogurt, vanilla extract, and peppermint extract; mix until creamy.
- Add the eggs, mixing on low speed until just combined (do not overmix).
- Fold in the peppermint bark pieces gently with a spatula.
Fill the Cups
- Spoon the cheesecake filling evenly into the prepared crusts (about 3 tbsp per cup).
- Tap the pan lightly to remove air bubbles.
Chill to Set
- Cover the pan with plastic wrap.
- Refrigerate for at least 4 hours, preferably overnight for best texture.
Garnish & Serve
- Sprinkle each cheesecake cup with additional chopped peppermint bark before serving.
- Optional: add a dollop of whipped cream.
Storage
- Refrigerate covered for up to 3 days.
- Freeze without toppings for up to 2 months; thaw overnight in the refrigerator.

Introduction to a Festive No-Bake Dessert
Imagine serving an elegant holiday dessert that will wow your guests while keeping your kitchen cool and stress-free.
These individual creations bring seasonal magic to your table with minimal effort.
About This Holiday Recipe
The combination of rich chocolate and refreshing mint has become a Christmas tradition for good reason.
This recipe transforms those classic candy flavors into something truly special.
You get all the indulgence of traditional sweets in a creamy, elegant form. The process is designed to be straightforward and forgiving for any skill level.
Why You’ll Love This Treat
Individual portions make holiday entertaining so much easier. There’s no slicing or messy plates, just grab-and-go perfection for your gatherings.
These little delights work for any festive occasion throughout the season. From office parties to family dinners, they bring joy wherever they go.
The no-bake approach means you can focus on celebrating rather than cooking. Even beginners achieve impressive results with this simple method.
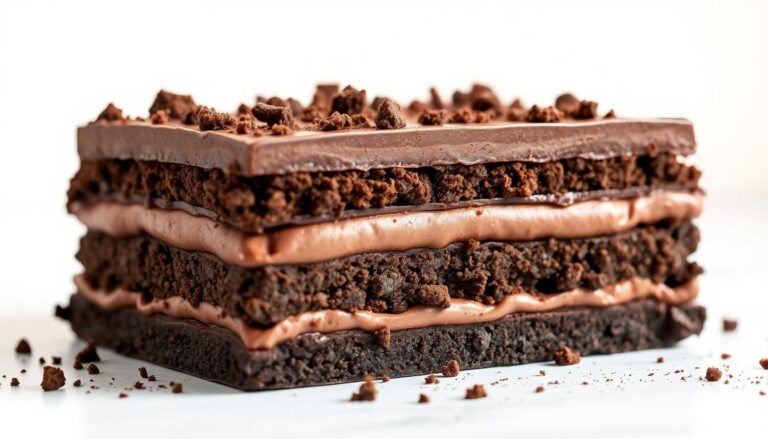
Related: Learn to make our no-bake Chocolate Lasagna.
Essential Components and Tools
Before you begin assembling your festive desserts, let’s review what you’ll need from your pantry and kitchen.
Most items are staples you likely have on hand during the holiday season.
Required Ingredients Overview
You’ll find the ingredient list straightforward and accessible. The right components ensure your treats turn out perfectly every time.
| Ingredient | Purpose | Important Notes |
|---|---|---|
| Block-style cream cheese | Creates smooth, creamy filling | Room temperature, not spreadable kind |
| Regular Oreo cookies | Forms the chocolate crust base | Not double-stuffed for proper balance |
| Pure peppermint extract | Provides authentic mint flavor | Avoid imitation varieties |
| Peppermint bark pieces | Adds texture and festive crunch | Ghirardelli dark chocolate recommended |
| Sugar and dairy | Sweetens and enriches the mixture | Yogurt or sour cream both work well |
Must-Have Kitchen Tools
A standard 12-count muffin pan and cupcake liners make preparation incredibly easy. These tools ensure neat individual servings.
Your food processor quickly crushes cookies for the crust. If you don’t have one, use a sealed bag and rolling pin instead.
An electric mixer creates the smooth filling. Both stand and hand versions work perfectly for this recipe.
Gather your mixing bowl and rubber spatula for easy blending.

Decorating and Serving Your Mini Cheesecakes
The final flourish transforms your creations from simple treats to holiday masterpieces.
This stage lets your creativity shine while adding beautiful finishing touches.
Your presentation choices will make these desserts unforgettable. Consider your party theme and guest preferences when selecting decorations.
Topping Ideas: Whipped Cream & Extra Peppermint Bark
Homemade whipped cream adds a light, airy contrast to the rich filling. Beat heavy cream with sugar and vanilla until soft peaks form.
For chocolate lovers, a simple ganache creates decadent elegance. Melt chocolate chips with cream for a smooth, glossy finish.
Crushed candy pieces provide festive color and crunch. Place candies in a sealed bag and gently tap with a rolling pin.
| Topping Option | Preparation Time | Best For | Special Tip |
|---|---|---|---|
| Whipped Cream | 3 minutes | Light, airy texture | Chill bowl first for better peaks |
| Chocolate Ganache | 5 minutes | Rich, decadent look | Add instant coffee to enhance flavor |
| Crushed Candy | 2 minutes | Festive color and crunch | Use various sizes for visual interest |
Presentation and Serving Suggestions
Remove your desserts from liners carefully or leave them on for easy handling. Arrange them on a tiered stand or holiday platter.
Pipe whipped cream in decorative swirls or simply dollop for a rustic look. Drizzle chocolate in artistic patterns for visual appeal.
These treats pair beautifully with hot coffee or cocoa. They make perfect additions to holiday dessert spreads and cookie exchanges.
Your personal touches will make each serving uniquely yours. Enjoy watching your guests delight in these festive creations.

Tips and Tricks for a Flawless Dessert
With these insider tips, you’ll achieve bakery-quality results in your own kitchen. Small adjustments to your technique can transform your final product.
Using Room Temperature Ingredients Effectively
The single most important tip for success involves temperature control. Always bring your dairy products to room temperature before mixing.
This ensures your filling blends smoothly without lumps. Cold cream cheese creates an uneven texture that affects the entire dessert.
Plan ahead by removing ingredients from refrigeration about one hour before you begin. Room temperature components incorporate much more easily.
Ingredient Substitutions and Customizations
This recipe offers wonderful flexibility for different tastes and dietary needs. You can easily adapt it to suit your preferences.
For a stronger mint flavor, try using mint-flavored cookies instead of regular ones. If you don’t have peppermint bark, crushed candy canes work beautifully.
Those needing gluten-free options can use gluten-free cookies for the crust. Dairy-free alternatives also work well for vegan versions.
Experiment with different chocolate types to customize the flavor profile. The basic recipe serves as an excellent foundation for creativity.
Troubleshooting and Storage Advice
Even the most carefully prepared desserts can sometimes face challenges. Knowing how to troubleshoot common issues ensures perfect results every time.
Common Pitfalls and How to Fix Them
A lumpy filling often means your cream cheese was too cold. Always let ingredients reach room temperature before mixing.
Cracks usually appear from overbaking or rapid cooling. Let your desserts cool gradually at room temperature first.
If your crust crumbles, you may not have pressed it firmly enough. Use enough butter to bind the mixture properly.
Best Practices for Storage and Leftovers
Store your treats in an airtight container in the refrigerator. They’ll stay fresh for 5-7 days when covered properly.
For longer storage, wrap each dessert individually before freezing. This prevents freezer burn and maintains quality.
Thaw frozen desserts slowly in the refrigerator overnight. The flavors actually improve after a day or two of storage.
Your mini desserts continue to set during cooling time. Slightly underbaking is better than overbaking for perfect texture.
Amazing desserts don’t need complex Skills
This recipe proves that creating a delightful holiday dessert doesn’t require complex skills or hours in the kitchen.
These individual treats perfectly capture the festive spirit with their classic combination of peppermint and chocolate.
They offer a convenient, elegant solution for your celebrations.
The approachable method makes this recipe ideal for bakers of any experience level.
You can prepare these mini cheesecakes ahead of time, reducing stress during busy holiday gatherings.
Standard kitchen tools are all you need for professional-looking results.
Feel free to make these delightful cups your own by experimenting with different toppings.
We’re confident they’ll become a cherished part of your holiday traditions.
Finally, share your creations and let us know what kind of comments you got!
By the way, if you are a fan of Peppermint Bark, check out this recipe.
FAQ
Can I make these cheesecake cups ahead of time?
Absolutely! These treats are perfect for preparing in advance. You can assemble them and store them in your refrigerator for up to three days. Add the final toppings just before you serve them to keep everything looking fresh.
What can I use if I don’t have a food processor for the crust?
No problem! You can place the cookies in a sturdy zip-top bag and crush them with a rolling pin. Just make sure you get fine, even crumbs so your dessert base holds together nicely.
My cream cheese mixture is lumpy. How can I fix it?
Lumps usually happen if your dairy products are too cold. Ensure your cream cheese and other ingredients are at room temperature before you start mixing. If you still have a few lumps, a quick pulse with an electric mixer can often smooth everything out.
Are there any good substitutes for peppermint extract?
Yes, you can explore other flavors! Vanilla extract is a classic choice. For a different holiday twist, you could try a tiny bit of almond extract. Remember to start with a small amount and adjust to your taste.
How do I prevent the dessert from sticking to the cupcake liners?
Using quality non-stick liners is a great first step. For extra insurance, you can give the liners a very light coating with a non-stick cooking spray before adding the crust mixture.
Can I freeze these mini cheesecakes?
You can! Freeze them in a single layer on a pan until solid, then transfer to a freezer-safe container. They’ll keep for about a month. Thaw them in the refrigerator for several hours before serving for the best texture.