The Ultimate NYE Chocolate Bark (with Pretzels and Caramel)
Pressed for time in New Year’s Eve? Then check out this chocolate bark with pretzels and caramel recipe. It’s a real lifesaver.
This simple recipe is designed for maximum impact with minimal effort, making it the perfect last-minute treat for your New Year’s Eve celebration.
The combination of premium ingredients creates an unforgettable flavor experience. You can whip up a big batch without dealing with individual servings.
This guide will walk you through every step.
You’ll learn how to select the best components and create a dessert that is both beautiful and delicious.
It’s incredibly versatile and can be customized for any occasion throughout the year.
So, let’s get going as your guests will be arriving soon.
Key Takeaways
- This dessert is incredibly easy to make, requiring no advanced baking skills.
- It’s perfect for a last-minute holiday treat or a thoughtful homemade gift.
- Using high-quality ingredients is key to achieving the best flavor and texture.
- The recipe is highly versatile and can be adapted for different celebrations.
- It’s designed as an occasional indulgence to enjoy during special times.
- You can create a large batch quickly, saving valuable time during busy periods.
Recipe to the ultimate New Year’s Eve Chocolate Bark (with Pretzels & Caramel)
Here is the recipe to make The Ultimate New Year’s Eve Chocolate Bark.
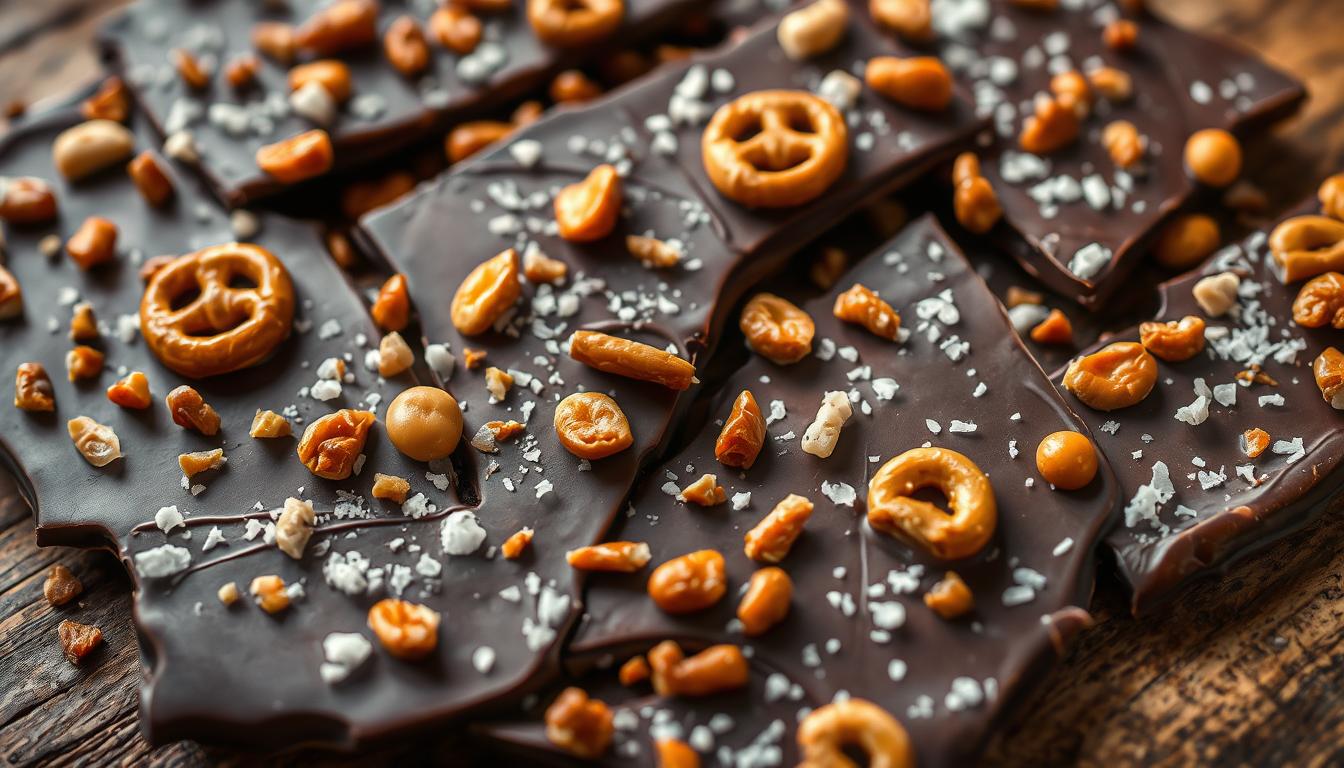
This is a luxurious, dramatic, premium-looking treat that appears like it took hours to make, but in reality it comes together rather quickly.
This version uses high-quality white, milk, and dark chocolate bars, plus pretzels and caramel for crunch, shine, and flavor contrast.
Yield: One 10×14 inch slab of bark (20–24 pieces)
Total Time: 25 minutes active + 30 minutes chilling
Ingredients
Premium Chocolate Layers
- 6 oz (170 g) high-quality dark chocolate (70–72%), chopped
- 6 oz (170 g) high-quality milk chocolate, chopped
- 6 oz (170 g) high-quality white chocolate, chopped
(Use brands like Lindt, Ghirardelli, Valrhona, Godiva, or similar. Avoid baking chocolate.)
Caramel + Crunch
- ½ cup (120 ml) thick caramel sauce
(store-bought or homemade, NOT thin ice-cream topping) - 1 cup (50 g) mini pretzel twists, lightly crushed
- ¼ teaspoon flaky sea salt, plus extra for garnish
Optional Festive Add-Ins
Use 1–3 of the following for high-end presentation:
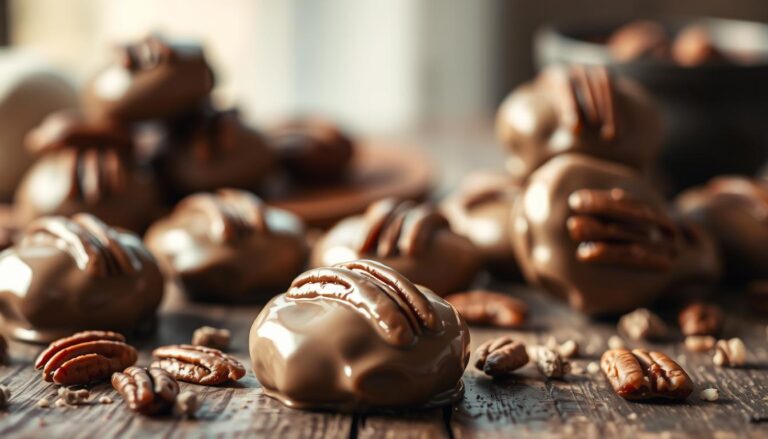
- ¼ cup (40 g) chopped toasted pecans
- 2 tablespoons mini chocolate chips
- 2 tablespoons gold or silver sugar pearls
- Gold leaf flakes (small amount)
- White sprinkles or stars
- Extra melted chocolate for drizzling
Instructions
Prepare the pan
- Line a 10×14-inch baking sheet with parchment paper.
- Lightly crinkle the parchment for texture, then flatten—this gives the bark a rustic artisan finish.
Melt the chocolates separately
High-quality bars scorch easily, so use gentle heat.
Dark chocolate:
- Place in a heatproof bowl. Melt in 20–30 second intervals, stirring between each.
- Stop when most pieces are melted; residual heat will finish the job.
Milk chocolate:
- Melt the same way, but reduce each microwave burst to 15–20 seconds.
White chocolate:
- White chocolate burns FAST, so do 10–15 second bursts only.
- Stir constantly; stop when 80% is melted.
Create the marbled chocolate base
- Pour the dark chocolate onto the prepared parchment.
- Drizzle the milk chocolate over it in thick ribbons.
- Drizzle the white chocolate last, in sweeping streaks.
Use an offset spatula or knife to gently swirl the chocolates together, creating a marbled pattern.
Do not overmix as the goal is to have defined streaks, not blending.
Add caramel
- Warm the caramel sauce slightly (5–10 seconds) so it’s pourable but thick.
- Using a spoon, drop ½–1 teaspoon puddles all across the chocolate.
- Swirl gently with the tip of a knife for elegant golden ribbons.
Add the pretzels + toppings
While chocolate is still wet:
- Sprinkle 1 cup lightly crushed pretzels evenly.
- Add flaky sea salt—it sharpens the caramel and chocolate flavors.
- Add optional toppings for glamour:
- pecans
- mini chocolate chips
- sugar pearls
- gold leaf (tear tiny flecks)
- extra chocolate drizzles
Press toppings lightly to ensure adhesion.
Chill & set
- Refrigerate for 25–30 minutes, or until firm.
Do not freeze (it can cause sugar bloom).
Break into pieces
Once fully set:
- Lift bark using parchment.
- Break into 20–24 irregular artisanal chunks.
The marbling and caramel ribbons will look like high-end chocolatier work.
Storage
- Store in an airtight container at cool room temperature for 5–7 days.
- Or refrigerate up to 2 weeks (wrap well to prevent humidity damage).
- Do not expose to heat or direct sunlight—premium chocolate softens quickly.

Introduction to This Festive Recipe
Creating an elegant party dessert doesn’t have to be complicated or time-consuming with this simple approach.
This festive treat combines impressive presentation with straightforward preparation that anyone can master.
Setting the Scene for Your NYE Celebration
Picture your New Year’s Eve gathering with a beautiful platter of homemade confections.
This dessert eliminates last-minute stress since you can prepare a large batch in under an hour.
The sweet and salty combination has become a crowd favorite for midnight celebrations.
It offers the perfect balance that keeps guests coming back for more throughout your party.
Why You’ll Love This Sweet and Salty Treat
This recipe is incredibly forgiving and encourages creativity. There’s really no wrong way to make delicious bark that suits your personal taste preferences.
The versatility makes it ideal for gift-giving during the holiday season.
You can customize the toppings to create party favors or hostess gifts that look professionally made.
Best of all, this candy-like creation requires no special skills or fancy equipment. It’s one of those wonderful things that delivers maximum impact with minimal effort.
The Perfect Components and Equipment
Let’s dive into the fun part: choosing the flavors and getting your workspace ready. Having the right components makes the entire process smooth and enjoyable.
Quality is the secret to an exceptional final product. Using ingredients you love to eat on their own guarantees a tasty result.
High-Quality Chocolate and Toppings
Start with a mix of dark, milk, and white chocolate bars. This combination creates beautiful swirls and a complex flavor profile.
Avoid compound or cooking varieties. They can taste gritty. Instead, pick a premium brand you’d enjoy as a treat.
Melting wafers can also be a great choice. They melt evenly and require no chopping.
For toppings, think about texture and taste. Pretzels add a salty crunch. Caramel pieces bring sweetness.
You can also add nuts, candy bits, or a hint of peppermint. Use about one cup of each topping you select.
| Type | Best For | Melting Ease | Flavor Profile |
|---|---|---|---|
| Dark Chocolate | Rich, deep flavor | Good | Bold, slightly bitter |
| Milk Chocolate | Creamy, classic taste | Very Good | Sweet, smooth |
| White Chocolate | Sweet, colorful contrast | Excellent | Very sweet, buttery |
| Melting Wafers | Easiest melting | Best | Consistently sweet |
Essential Tools for a Seamless Process
You don’t need fancy gadgets. A large rimmed baking sheet is your main piece of equipment. An 10×14 or even an 11×15 inch pan works perfectly.
Line it with parchment paper. This prevents sticking and allows for easy removal.
A rubber spatula is ideal for spreading the melted mixture smoothly. An offset spatula can give you even more control.
Have your bowls ready for melting and pre-measured toppings. This prep work makes assembly quick and simple.

Techniques for a Smooth and Stunning Finish
You can elevate your dessert from good to spectacular by focusing on timing and temperature control.
These two elements work together to create professional-looking results.
Mastering these techniques ensures your creation has beautiful layers and perfect texture.
Managing Temperature and Timing
Temperature control is crucial for layered desserts. Your first layer needs just a few minutes in the fridge to firm up properly.
This quick chill creates a stable base for additional layers. White varieties spread beautifully over a cooled foundation.
| Method | Time Required | Best For | Results |
|---|---|---|---|
| Refrigerator | 5-10 minutes | Quick setting | Firm base layer |
| Room Temperature | 15-20 minutes | Gentle setting | Smooth texture |
| Freezer | 2-3 minutes | Emergency speed | Very firm result |
Timing becomes critical when working with melted ingredients. You have a brief window to add toppings before the surface sets.
Prepare all your additions before spreading the top layer. This ensures you can work quickly and efficiently.
The contrast between room temperature and fridge conditions affects your final product. Leaving your creation out too long may cause softening.
Work efficiently during each step to maintain ideal consistency. Your attention to these details creates a stunning finish.
Mastering the NYE Chocolate Bark Technique
The real magic of this dessert comes from its incredible versatility.
Once you master the basic method, you can create endless variations to suit any taste or occasion. Your imagination is the only limit when designing your perfect bark recipe.
This flexibility makes it ideal for matching party themes or catering to different dietary needs.
Customizing Flavors with Substitutions
Feel free to swap the types of chocolate based on your preferences. You can use all dark chocolate for a richer, less sweet base.
Milk chocolate creates a classic, creamy foundation. White chocolate offers a sweet, neutral canvas that lets your toppings shine.
For a festive peppermint version, add a few drops of peppermint extract to white chocolate before spreading.
This creates a delightful holiday flavor that pairs perfectly with crushed candy.
Related: Learn to make Peppermint Bark at Home.
Consider creating a healthier almond bark using dark chocolate with roasted nuts. A sprinkle of sea salt enhances the sophisticated flavor profile.
Seasonal Toppings and Presentation Tips
Choose toppings that complement your celebration’s color scheme or theme. You can create a stunning visual impact with thoughtful ingredient selection.
For a nutrient-dense option, try pumpkin seeds, goji berries, or coconut flakes. These additions make your creation both delicious and nourishing.
Don’t be afraid to experiment with unexpected combinations. A salty-sweet mix using about one cup of pretzels and potato chips creates an addictive flavor contrast.
Things like freeze-dried strawberries, mini marshmallows, or even crushed cookies all work beautifully. The melted base will hold virtually any topping you choose.

Serving, Storage, and Gifting Your Creation
Your beautiful creation deserves proper handling to maintain its freshness and presentation.
Understanding storage needs and gifting options ensures your dessert stays perfect from kitchen to celebration.
Since this recipe uses untempered chocolate, refrigeration is essential. The treat cannot sit at room temperature for extended periods without softening.
Packaging Ideas for Gifting
Creative presentation makes your homemade gift extra special. Cellophane bags, kraft boxes, or pastry containers work beautifully for individual portions.
For a unique approach, keep the entire sheet intact in the original pan.
Tie a decorative ribbon around a breaking tool for recipients to enjoy the experience of breaking their own pieces.
You can also arrange pieces on a decorative tray that becomes part of the gift. This creates a lasting present that remains useful after the dessert is enjoyed.
Best Practices for Storage and Freshness
An airtight container is your best friend for preserving quality. Store your creation in the refrigerator where it will stay fresh for 2-3 weeks.
While the base can last months, toppings like candy pieces may lose flavor over time. For optimal taste, enjoy your dessert within the first few weeks.
| Location | Duration | Best Use | Considerations |
|---|---|---|---|
| Refrigerator | 2-3 weeks | Daily enjoyment | Maintains texture |
| Freezer | 1 month | Long-term storage | Thaw before serving |
| Room Temperature | Brief periods only | Serving time | Monitor carefully |
Plan ahead by making your dessert several days before needed.
Store it safely in the fridge until ready to package. Remember to inform recipients about refrigeration needs.
This recipe yields about six gift bags when using 2-3 pieces per portion.
You can adapt this treat for any season throughout the year by changing toppings.
Abundant Treats under Pressure
The beauty of this approach lies in its ability to transform basic ingredients into something extraordinary.
This recipe delivers abundant treats with minimal time investment, making it perfect for busy celebrations.
You’ll love how this dessert requires no special skills or equipment.
The creative freedom lets you experiment with different toppings and combinations to make it uniquely yours.
This bark makes a wonderful gift for party guests or hosts. It shows thoughtfulness while being incredibly simple to prepare.
I am sure this treat will quickly become a favorite tradition for years to come.
Want another quick and delicious dessert ideal for NYE celebration?
Then take a look at our Chocolate Cake Ball Drops. They’re fun and delightful.
FAQ
Can I use milk chocolate instead of white chocolate for this dessert?
Absolutely! You can use dark, milk, or even almond bark. The key is to pick a high-quality brand for the best flavor and smooth melt. Feel free to mix different types for a beautiful swirl effect.
How long does it take for the candy to set completely?
It typically takes about 1 to 2 hours in the fridge. For faster results, you can pop the pan in the freezer for 20-30 minutes. Just make sure it’s firm before you break it into pieces.
What are some other topping ideas besides pretzels and caramel?
Get creative! Crushed candy canes add a festive peppermint flavor. You can also use nuts, dried fruit, mini marshmallows, or a sprinkle of sea salt. It’s your chance to make it unique for your holiday celebration.
What’s the best way to store this treat, and how long will it last?
Keep your creation fresh by storing it in an airtight container at room temperature. It will stay delicious for up to two weeks. Avoid the refrigerator for long-term storage, as condensation can affect the texture.
Can I make this ahead of time for a party or as a gift?
Yes, it’s a fantastic make-ahead dessert! It’s perfect for preparing a day or two before your event. For gifting, layer the pieces in a decorative box or tin with parchment paper between layers for a beautiful and thoughtful present.
My chocolate sometimes seizes up when I melt it. How can I prevent that?
The secret is gentle heat and keeping things dry. Use a double boiler or microwave in short bursts, stirring frequently. Ensure all your equipment is completely dry, as even a tiny drop of water can cause the chips to seize and become grainy.